
Setup a campaign
Steps to set up each campaign type
Manual
Step 1: Admin selects menu Settings => Campaign Management => Outbound campaign
Step 2: In the Outbound campaign management interface, the admin selects Create campaign
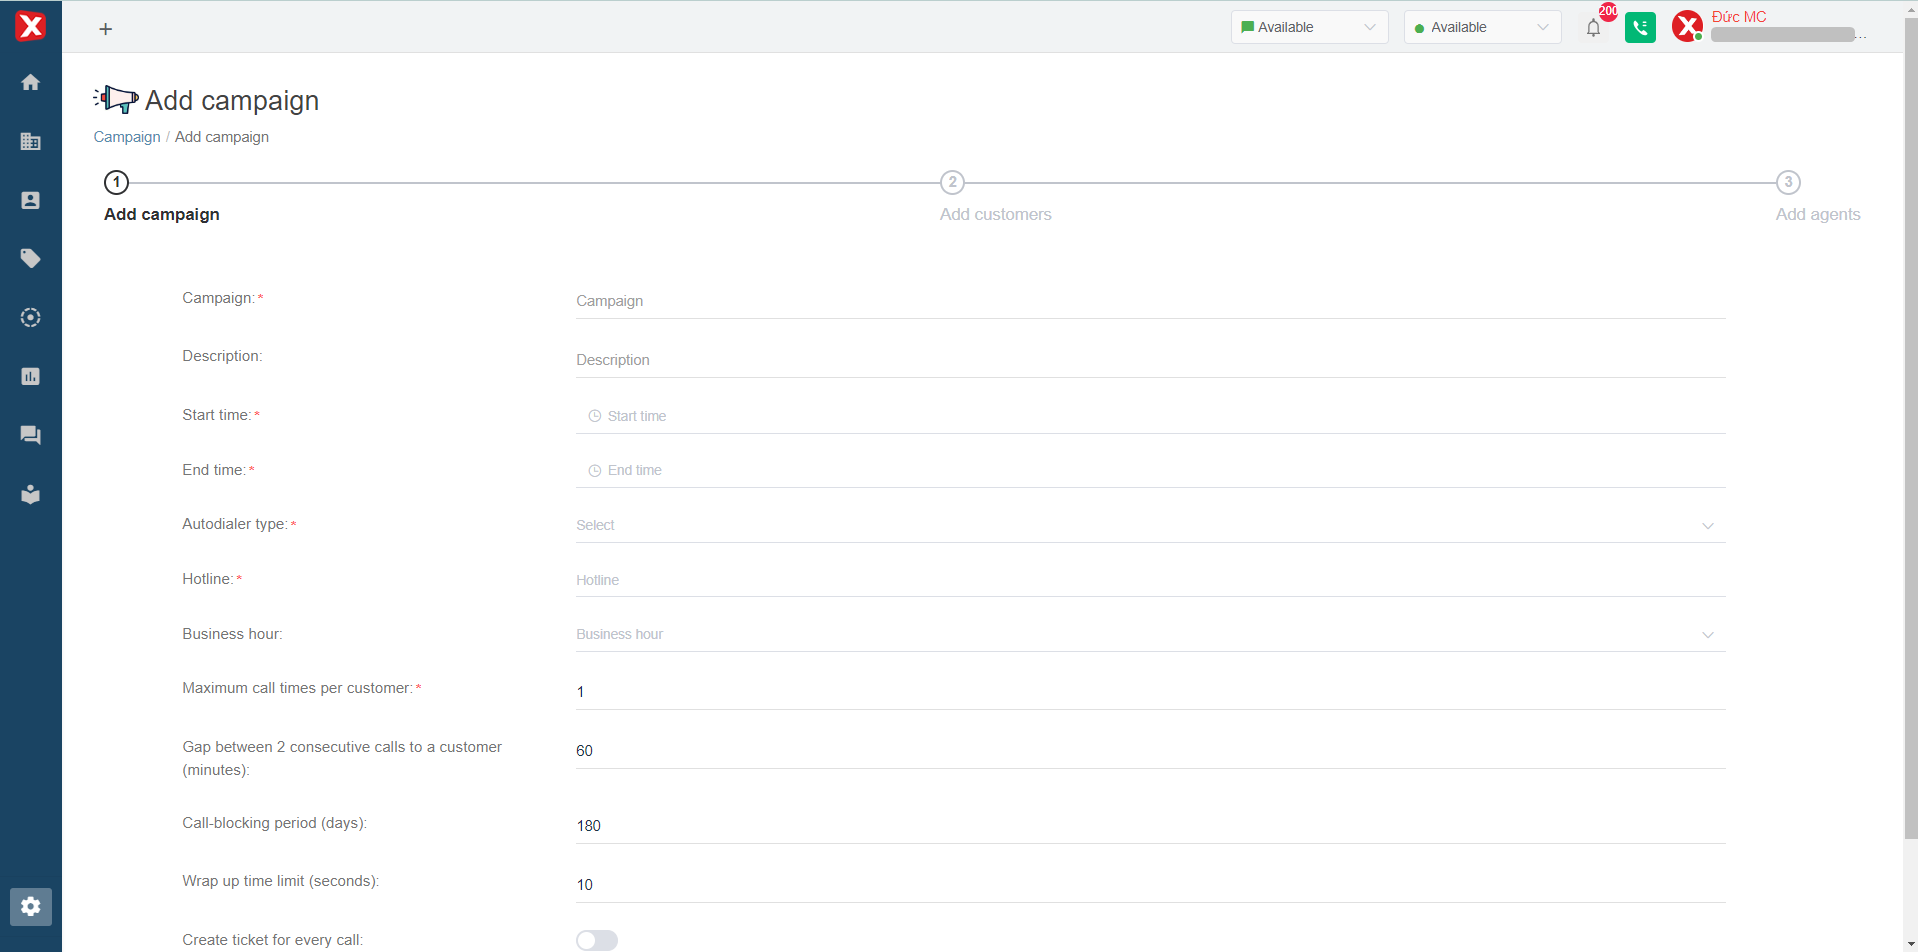
Step 3: In the Create campaign interface (see picture), the admin performs the campaign settings, in which:
Campaign name: the campaign name set by admin
Description: the specific description of the campaign
Start time: the campaign start time. The necessary condition for the agent to execute the campaign is that the admin has clicked Start the campaign and this start time has been reached.
End time: the campaign end time. The campaign will stop running when it reaches this time, even if the campaign's customer list is not called.
Call type: Manual
Hotline number: the hotline number used to call out during the campaign
Working hours: select the working hours that apply to the campaign, the campaign will not automatically run outside this time frame
Maximum number of calls: the maximum number of calls for 1 customer in the campaign. For example, the maximum number of calls is 3, the system can call the customer 3 times. If the previous 2 times the agent and the customer have not met each other.
Break time between two calls to the same customer (minutes): will be the time between two calls for the same customer if the maximum number of calls is greater than 1. Manual dialing type is not affected by this metric because the agent can proactively call back the customer, if the previous calls have not been met and the maximum number of calls has not been reached.
No-callback period (days): number of days without calling customers marked as no callback
Break time between calls (seconds): the amount of time for the agent to rest and enter information between two calls distributed by the system. With Manual dialing, the agent can proactively receive customers and not be affected by this metric.
Campaign script: choose a script for the campaign. The script includes one or more questions for the agent to enter information during the conversation with the customer. Admin can add new and manage the scripts (If it is blank, the campaign uses the default script).
Calling quota: is the maximum number of customers each agent is allowed to call out in a day. When the agent received the maximum number of customers, the system will not allow to receive more customers than the quota:
Admin can set this callout quota: The quota for each agent is the same. For example, you need to set a limit of 50 customers/day, admin enter the number of customers with a quota of 50.
The quota for each agent: The admin can set the quota for each agent separately. For example, agent A is 50 customers, agent B is 80 customers.
Automatically assign a management account when receiving a customer: In the enabled mode, the corresponding customer will be assigned a management account on the system (in the contact section) which is the agent on that call.
Create a ticket for each call: In the enabled mode, calls from the campaign are recorded as regular outgoing calls. In off mode, calls from campaigns are not generated tickets.
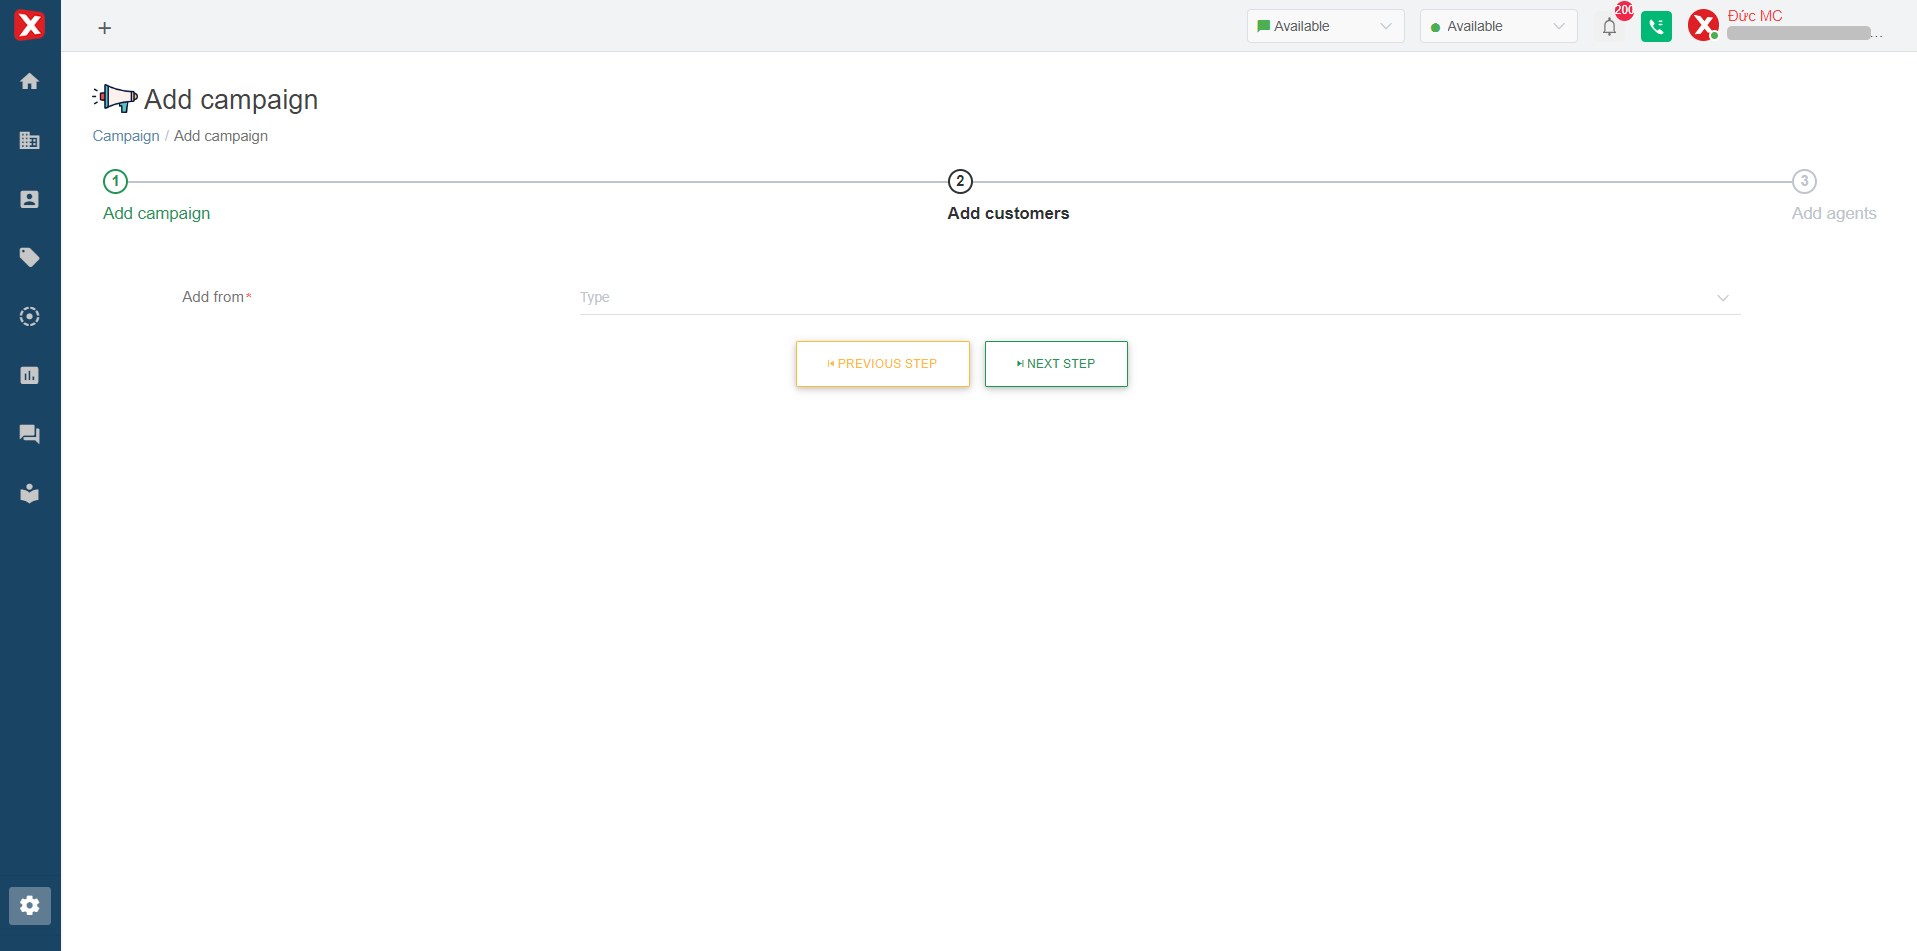
Step 4: Add customers to the campaign. After completing step 3, Admin chooses to continue to switch to the interface of adding customers. In this interface, the admin can optionally add contacts from 1 of 4 options as shown, select "Next" after completion. Here are the contact upload options:
Contact: Select contacts already on Portal. With this option, admin search and click to select contact on search bar
Filter: Select a filter from the list of contact filters created in Advanced Filters.
Import data from excel: Upload an excel file containing contacts according to the template file into the campaign
Step 1: Download the sample file for uploading the contact list to your computer and edit it. Note: the information is needed to be in "text" format and the phone number field (Phone) needs to have a country code. For example 84xxxxxxxxx (the Vietnamese code is +84). The phone number field is required in the Auto Dialer campaign.
Step 2: Upload the file in the “Select file” section and select “Next”
Customer group: add from the previously created customer group in the "Customer warehouse" section at the campaign management interface

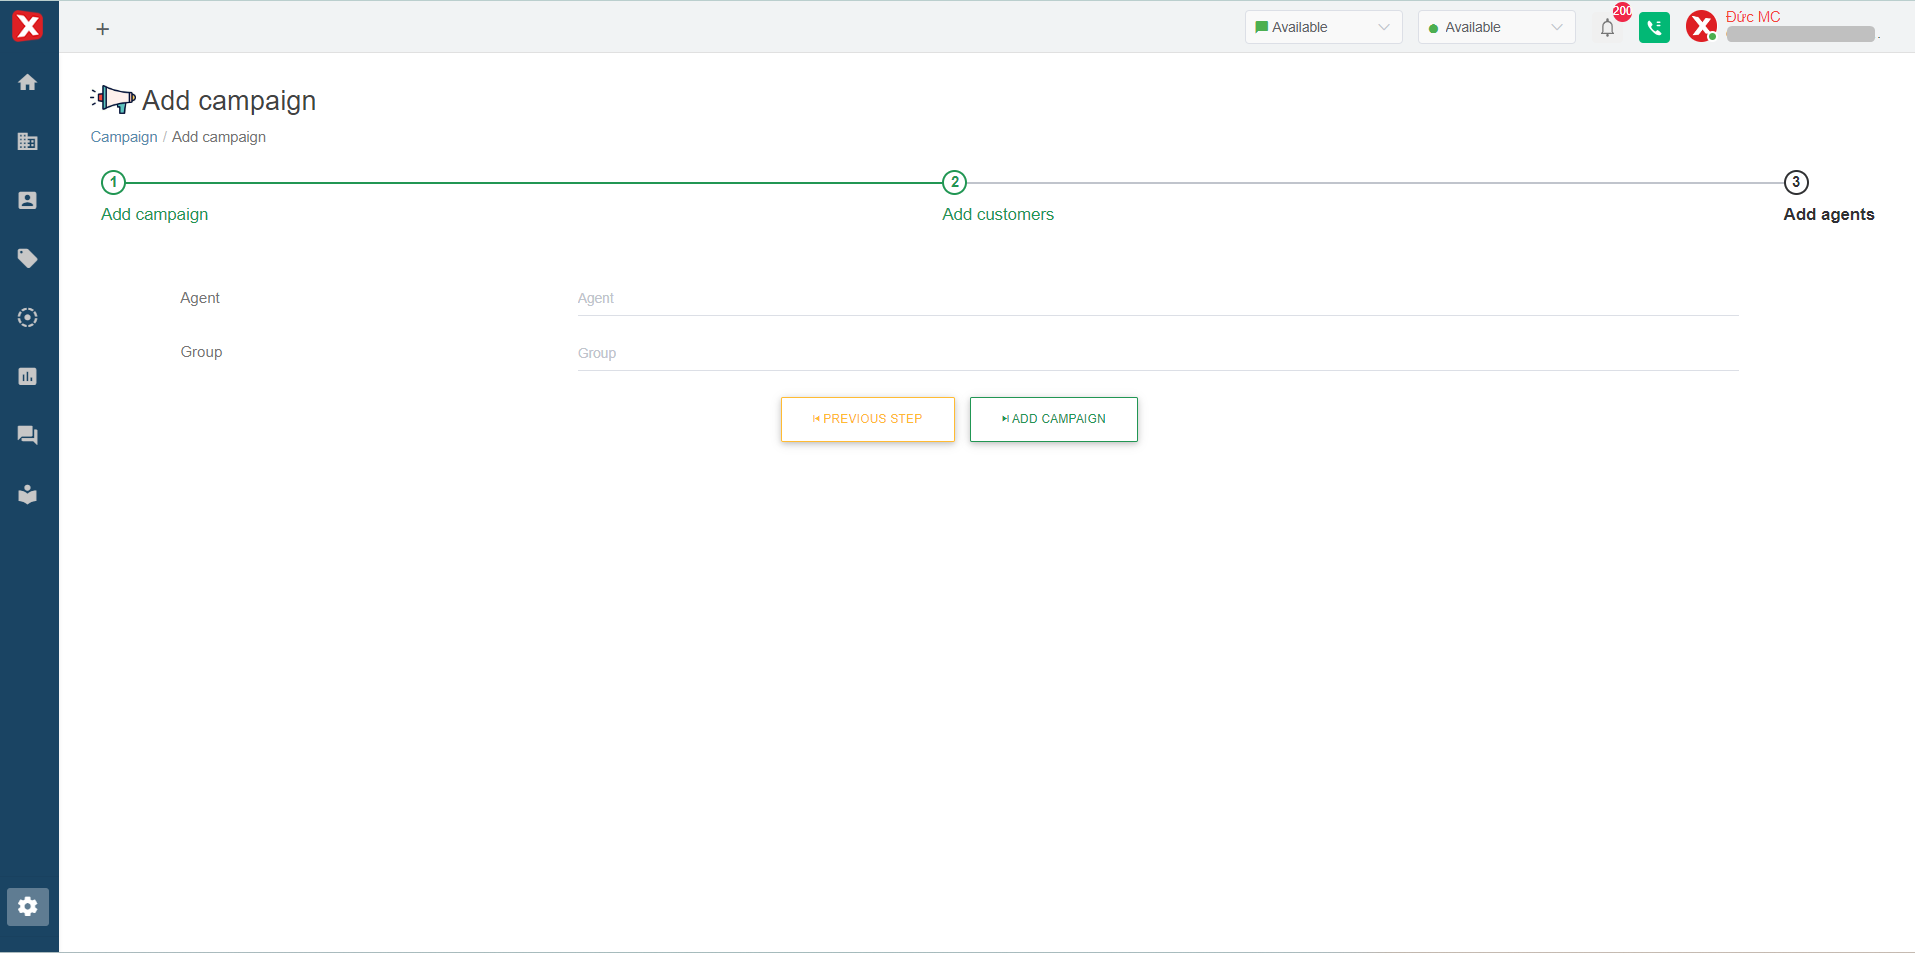
Step 5: Admin adds agents through two options: Agent (manually add each agent, can select multiple agents) or Group (add agent group, this group needs to be created and added agent to the previous group)
Step 6: Creation. After checking that the information is correct, the admin selects "Add campaign" to complete the installation and initialize the campaign. If the information needs to be changed, the admin can choose to return to the corresponding interface to edit the information. Once initialized, the campaign defaults to Unapproved status
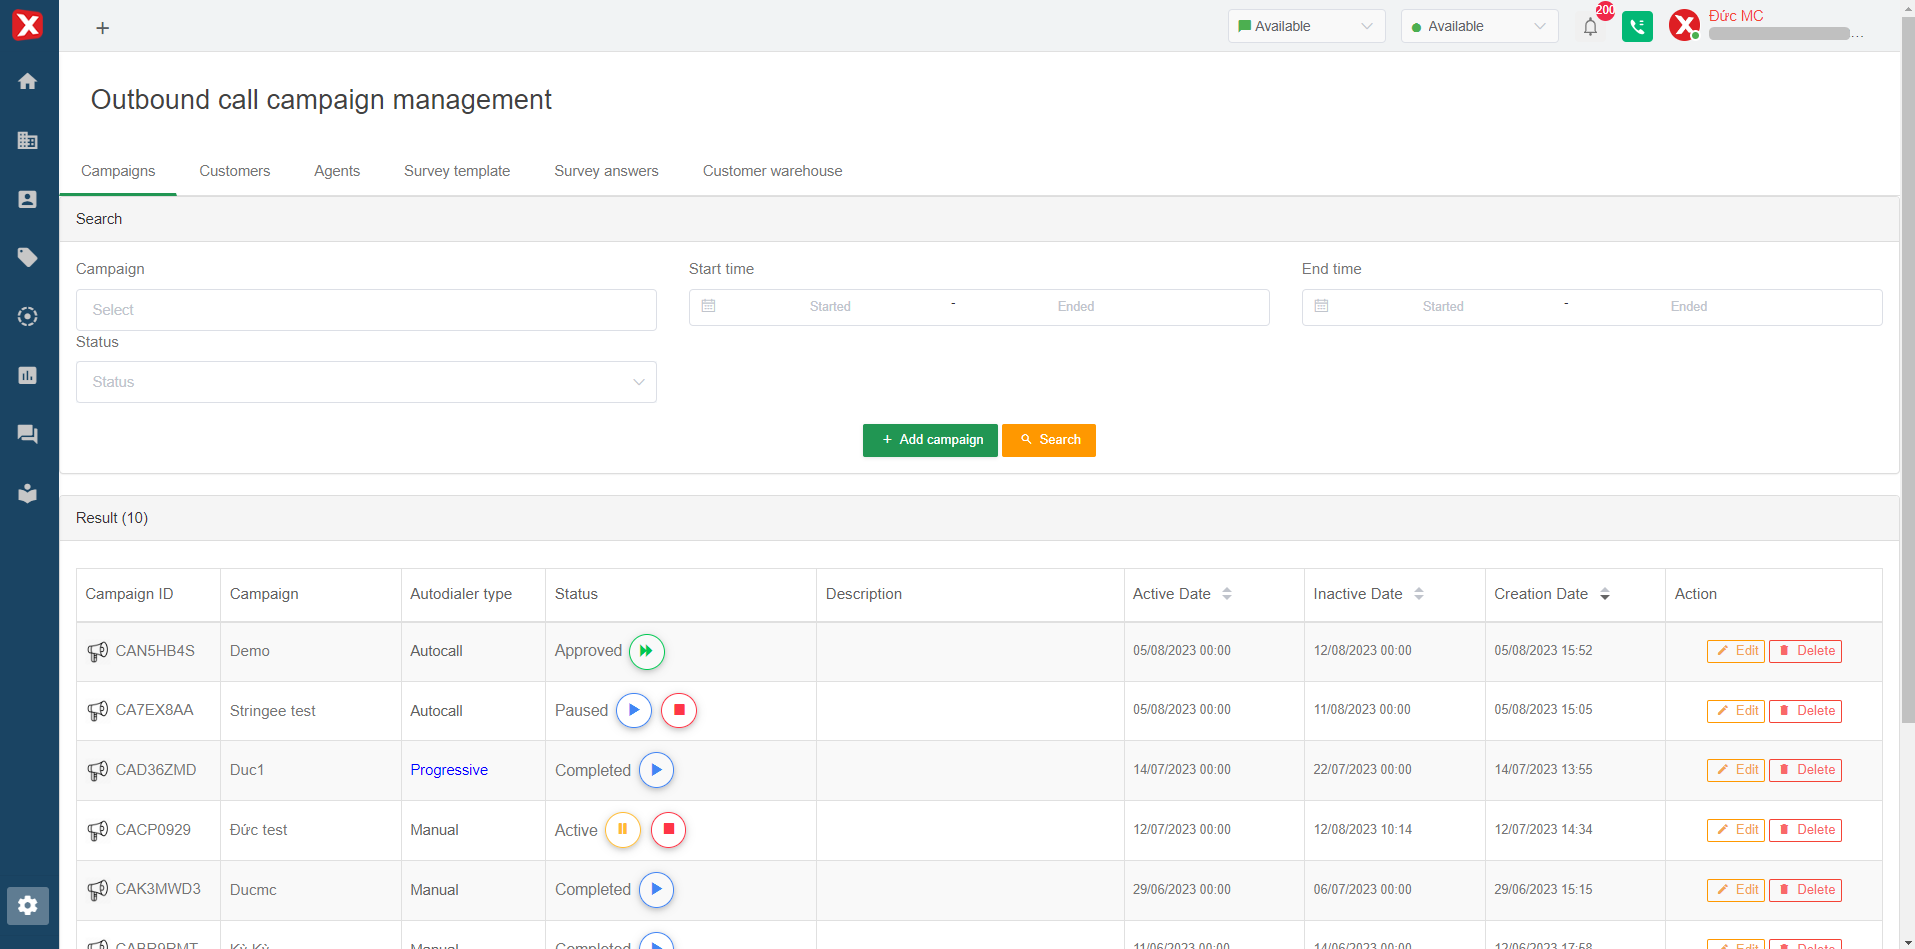
A successfully-created campaign will have a successful creation message. In the campaign management interface, there will be new campaign information similar to the illustration. To launch the campaign, the admin needs to Approve the campaign. After approval, if the campaign is in the set time to run, admin can select Start to run the campaign immediately. Otherwise during this set time, the campaign will start running when it reaches the set time(regardless of which admin clicked start)
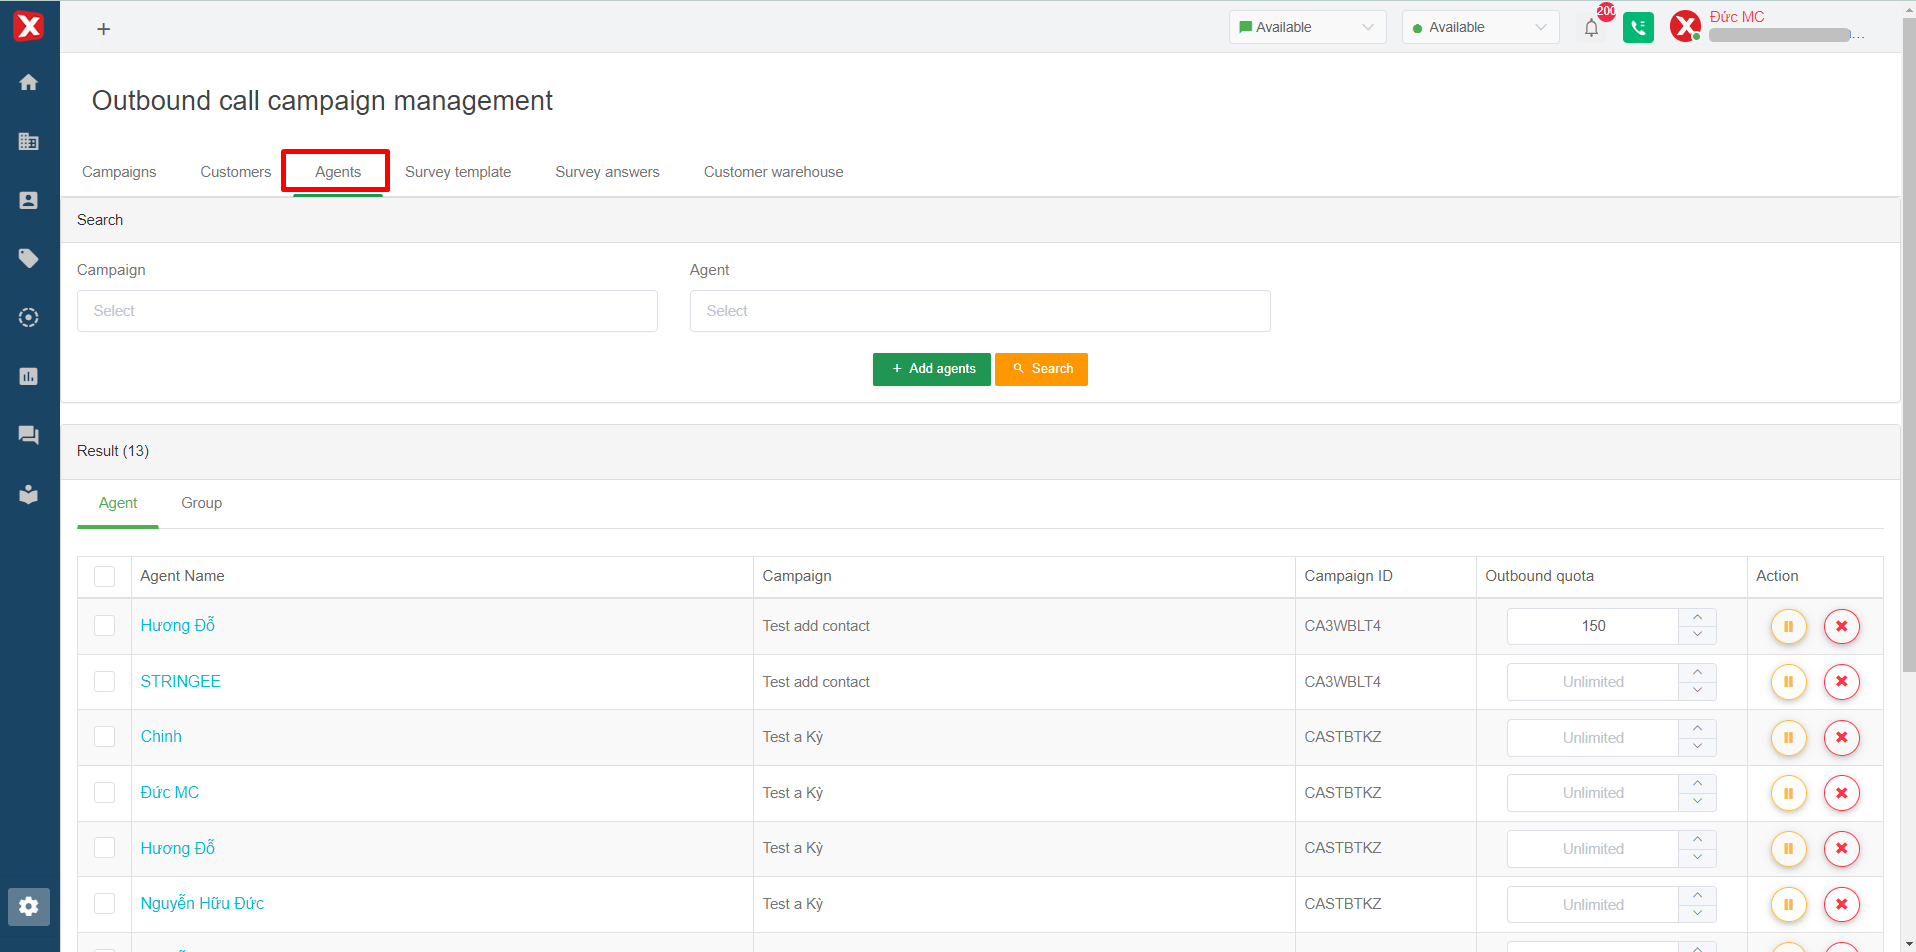
Note: To set the quota for each agent, after creating a campaign, businesses access the menu Settings => Campaign Management => Agent list. In this interface, businesses enter the number of calls per day for each agent in the column "Call-out quota" (unlimited by default if not entered)
Preview
Step 1: Admin selects menu Settings => Campaign Management => Outbound call campaign
Step 2: In the Call out campaign management interface, the admin selects "Add campaign"
Step 3: In the Add campaign interface (see picture), the admin set up a campaign, in which:
Campaign name: campaign name set by admin
Description: specific description of the campaign
Start time: campaign start time. The necessary condition for the agent to execute the campaign is that the admin has clicked Start the campaign and this start time has been reached
End time: campaign end time. The campaign will stop running when it reaches this time, even if the campaign's customer list has not been called yet
Autodialer type: Preview
Hotline number: the hotline number used to call out during the campaign
Working hours: select the working hours that apply to the campaign. The campaign will not automatically run out of this time frame
Maximum number of calls: the maximum number of calls for 1 customer in the campaign. For example, the maximum number of calls is 3. So the system can call the customer 3 times, if the previous 2 times the agent and the customer have not met each other.
Break time between two calls to the same customer (minutes): will be the time between two calls for the same customer if the maximum number of calls is greater than 1. Manual dialing type is not affected by this metric because the agent can proactively call back the customer, if the previous calls have not been met and the maximum number of calls has not been reached.
No-callback period (days): number of days without calling customers marked as no callback
Break time between calls (seconds): the amount of time for the agent to rest and enter information between two calls distributed by the system. With Manual dialing, the agent can proactively receive customers and not be affected by this metric.
Campaign script: choose a script for the campaign. The script includes one or more questions for the agent to enter information during the conversation with the customer. Admin can add new and manage the scripts (If it is blank, the campaign uses the default script).
Waiting time for agent previewing customer information (s): the time to display customer information to help the agent preview and grasp the necessary information. The system will automatically dial after this time expires.
Create a ticket for each call: in the enabled mode, calls from the campaign are recorded as regular outgoing calls. In off mode, calls from campaigns will not generate tickets.

Step 4: Add customers to the campaign. After completing step 3, Admin chooses to continue to switch to the interface of adding customers. In this interface, the admin can optionally add contacts from 1 of 4 options as shown, select "Next" after completion. Here are the contact upload options:
Contacts: Select contacts already on the Portal. With this option, admin search and click to select contact on search bar
Filter: Select a filter from the list of contact filters created in the Advanced Filter.
Import data from excel: Upload an excel file containing contacts according to the template file into the campaign
Step 1: Download the sample file for uploading the contact list to your computer and edit it. Note: the information is needed to be in "text" format and the phone number field (Phone) needs to have a country code. For example 84xxxxxxxxx (the Vietnamese code is +84). The phone number field is required in the Auto Dialer campaign.
Step 2: Upload the file in the “Select file” section and select “Next”
Customer group: add from the previously created customer group in the "Customer warehouse" section at the campaign management interface

Step 5: Admin adds agents through two options: Agent (manually add each agent, can select multiple agents) or Group (add agent group, this group needs to be created and added agent to the previous group)
Step 6: Creation. After checking that the information is correct, the admin selects "Add campaign" to complete the installation and initialize the campaign. If the information needs to be changed, the admin can choose to return to the corresponding interface to edit the information. Once initialized, the campaign defaults to Unapproved status

A successfully-created campaign will have a successful creation message. In the campaign management interface, there will be new campaign information similar to the illustration. To launch the campaign, the admin needs to Approve the campaign. After approval, if the campaign is in the set time to run, admin can select Start to run the campaign immediately. Otherwise during this set time, the campaign will start running when it reaches the set time(regardless of which admin clicked start)

Progressive
Step 1: Admin selects menu Settings => Campaign Management => Outbound call campaign
Step 2: In the Call out campaign management interface, the admin selects "Add campaign"
Step 3: In the Add campaign interface (see picture), the admin set up a campaign, in which:
Campaign name: campaign name set by admin
Description: specific description of the campaign
Start time: campaign start time. The necessary condition for the agent to execute the campaign is that the admin has clicked Start the campaign and this start time has been reached
End time: campaign end time. The campaign will stop running when it reaches this time, even if the campaign's customer list has not been called yet
Autodialer type: Progressive
Hotline number: the hotline number used to call out during the campaign
Working hours: select the working hours that apply to the campaign. The campaign will not automatically run out of this time frame
Maximum number of calls: the maximum number of calls for 1 customer in the campaign. For example, the maximum number of calls is 3. So the system can call the customer 3 times, if the previous 2 times the agent and the customer have not met each other.
Break time between two calls to the same customer (minutes): will be the time between two calls for the same customer if the maximum number of calls is greater than 1. Manual dialing type is not affected by this metric because the agent can proactively call back the customer, if the previous calls have not been met and the maximum number of calls has not been reached.
No-callback period (days): number of days without calling customers marked as no callback
Break time between calls (seconds): the amount of time for the agent to rest and enter information between two calls distributed by the system. With Manual dialing, the agent can proactively receive customers and not be affected by this metric.
Campaign script: choose a script for the campaign. The script includes one or more questions for the agent to enter information during the conversation with the customer. Admin can add new and manage the scripts (If it is blank, the campaign uses the default script).
Create a ticket for each call: in the enabled mode, calls from the campaign are recorded as regular outgoing calls. In off mode, calls from campaigns will not generate tickets.

Step 4: Add customers to the campaign. After completing step 3, Admin chooses to continue to switch to the interface of adding customers. In this interface, the admin can optionally add contacts from 1 of 4 options as shown, select "Next" after completion. Here are the contact upload options:
Contacts: Select contacts already on the Portal. With this option, admin search and click to select contact on search bar
Filter: Select a filter from the list of contact filters created in the Advanced Filter.
Import data from excel: Upload an excel file containing contacts according to the template file into the campaign
Step 1: Download the sample file for uploading the contact list to your computer and edit it. Note: the information is needed to be in "text" format and the phone number field (Phone) needs to have a country code. For example 84xxxxxxxxx (the Vietnamese code is +84). The phone number field is required in the Auto Dialer campaign.
Step 2: Upload the file in the “Select file” section and select “Next”
Customer group: add from the previously created customer group in the "Customer warehouse" section at the campaign management interface

Step 5: Admin adds agents through two options: Agent (manually add each agent, can select multiple agents) or Group (add agent group, this group needs to be created and added agent to the previous group)
Step 6: Creation. After checking that the information is correct, the admin selects "Add campaign" to complete the installation and initialize the campaign. If the information needs to be changed, the admin can choose to return to the corresponding interface to edit the information. Once initialized, the campaign defaults to Unapproved status
A successfully-created campaign will have a successful creation message. In the campaign management interface, there will be new campaign information similar to the illustration. To launch the campaign, the admin needs to Approve the campaign. After approval, if the campaign is in the set time to run, admin can select Start to run the campaign immediately. Otherwise during this set time, the campaign will start running when it reaches the set time(regardless of which admin clicked start)

Predictive
Step 1: Admin selects menu Settings => Campaign Management => Outbound call campaign
Step 2: In the Call out campaign management interface, the admin selects "Add campaign"
Step 3: In the Add campaign interface (see picture), the admin set up a campaign, in which:
Campaign name: campaign name set by admin
Description: specific description of the campaign
Start time: campaign start time. The necessary condition for the agent to execute the campaign is that the admin has clicked Start the campaign and this start time has been reached
End time: campaign end time. The campaign will stop running when it reaches this time, even if the campaign's customer list has not been called yet
Autodialer type: Progressive
Hotline number: the hotline number used to call out during the campaign
Working hours: select the working hours that apply to the campaign. The campaign will not automatically run out of this time frame
Maximum number of calls: the maximum number of calls for 1 customer in the campaign. For example, the maximum number of calls is 3. So the system can call the customer 3 times, if the previous 2 times the agent and the customer have not met each other.
Break time between two calls to the same customer (minutes): will be the time between two calls for the same customer if the maximum number of calls is greater than 1. Manual dialing type is not affected by this metric because the agent can proactively call back the customer, if the previous calls have not been met and the maximum number of calls has not been reached.
No-callback period (days): number of days without calling customers marked as no callback
Break time between calls (seconds): the amount of time for the agent to rest and enter information between two calls distributed by the system. With Manual dialing, the agent can proactively receive customers and not be affected by this metric.
Campaign script: choose a script for the campaign. The script includes one or more questions for the agent to enter information during the conversation with the customer. Admin can add new and manage the scripts (If it is blank, the campaign uses the default script).
Maximum allowable missed rate: The system will adjust the number of simultaneous calls using an algorithm to bring the missed call rate below the maximum allowable missed call rate. For example, the registration portal runs a maximum of 20 simultaneous calls, with 5 agents participating in the campaign. The campaign will run (at most) 20 simultaneous calls, but there will be times when 4 or all 5 agents are on calls. The system will automatically reduce the number of calls from 20 to a smaller number (based on the analysis of the average response time of agents with customers who have answered the call) to ensure the missed call rate stays within the allowable threshold. The smaller the missed call rate, the faster the reduction (to ensure the rate). The maximum allowable missed call rate can be set to 0.1 (10%).
Waiting music file when the customer listens to the phone: music waiting for the customer to listen when it is not connected to the agent. The files in the selection list are business greeting files uploaded to StringeeX. When the customer has answered the phone, the system will distribute the call to an agent A. If the agent does not answer the phone within 30 seconds, the system will distribute the call to another agent (agent B).
Maximum waiting time (If there is no agent ready to answer the phone) (s): is the maximum time the customer waits. The system will disconnect the call if after this time no agent accepts the call.
Create a ticket for each call: in the enabled mode, calls from the campaign are recorded as regular outgoing calls. In off mode, calls from campaigns will not generate tickets.

Step 4: Add customers to the campaign. After completing step 3, Admin chooses to continue to switch to the interface of adding customers. In this interface, the admin can optionally add contacts from 1 of 4 options as shown, select "Next" after completion. Here are the contact upload options:
Contacts: Select contacts already on the Portal. With this option, admin search and click to select contact on search bar
Filter: Select a filter from the list of contact filters created in the Advanced Filter.
Import data from excel: Upload an excel file containing contacts according to the template file into the campaign
Step 1: Download the sample file for uploading the contact list to your computer and edit it. Note: the information is needed to be in "text" format and the phone number field (Phone) needs to have a country code. For example 84xxxxxxxxx (the Vietnamese code is +84). The phone number field is required in the Auto Dialer campaign.
Step 2: Upload the file in the “Select file” section and select “Next”
Customer group: add from the previously created customer group in the "Customer warehouse" section at the campaign management interface

Step 5: Admin adds agents through two options: Agent (manually add each agent, can select multiple agents) or Group (add agent group, this group needs to be created and added agent to the previous group)
Step 6: Creation. After checking that the information is correct, the admin selects "Add campaign" to complete the installation and initialize the campaign. If the information needs to be changed, the admin can choose to return to the corresponding interface to edit the information. Once initialized, the campaign defaults to Unapproved status

A successfully-created campaign will have a successful creation message. In the campaign management interface, there will be new campaign information similar to the illustration. To launch the campaign, the admin needs to Approve the campaign. After approval, if the campaign is in the set time to run, admin can select Start to run the campaign immediately. Otherwise during this set time, the campaign will start running when it reaches the set time(regardless of which admin clicked start)
Auto Call
Autocall feature is a feature that allows businesses to pre-set a call script for the target customer list. Then, the system will automatically make calls to customers according to the business's settings without any agent's involvement. Autocall feature helps businesses save costs, improve work efficiency and create new experiences for customers.
Businesses can apply Autocall campaign in many different operations such as:
Notify customers automatically (for example: account balance, payment schedule, medical examination/treatment schedule, charge notification, etc.)
Automatically introduce products to customers (can be set up to connect customers directly with consultants by selecting a key if customers are interested)
Automatically survey customer service satisfaction, collect customer opinions, survey the market about products
To create an Autocall outbound campaign, the admin needs to create an IVR first (refer to IVR settings), then the steps to install Autocall. Here are the steps to install Autocall campaign”
Step 1: Admin selects menu Settings => Campaign Management => Outbound call campaign
Step 2: In the Call out campaign management interface, the admin selects "Add campaign"
Step 3: In the Add campaign interface (see picture), the admin set up a campaign, in which:
Campaign name: campaign name set by admin
Description: specific description of the campaign
Start time: campaign start time. The necessary condition for the agent to execute the campaign is that the admin has clicked Start the campaign and this start time has been reached
End time: campaign end time. The campaign will stop running when it reaches this time, even if the campaign's customer list has not been called yet
Autodialer type: Autocall
Reverse hotline number: there are 3 types of number reversal. Note: In case some hotlines cannot be called. The campaign will automatically ignore calls from the wrong hotline number. Ignored customers will be called after the customer data is exhausted. Here are 3 types of reverse number system StringeeX supports installation:
Do not reverse numbers: use a single hotline number in the entire campaign, businesses install this hotline at the hotline number field below
Randomly reverse number: use a group of hotline numbers to call out during the campaign. Hotline numbers will change randomly. Businesses install this hotline at the hotline number field.
Reverse all numbers: use all hotline numbers in the portal. Hotline numbers will change randomly.
Maximum number of calls at a time: the maximum number of calls automatically called by the system at a time, ranges from 1 to 100. Note, the exact number will be according to the contract, the total number of calls concurrently equals the total number of concurrent calls at the same time of all active campaigns. In case a customer uses both Autocall service and regular call on the system, the total number of calls is calculated by the total number of calls at a time on the system, including manual calls (agent calling out to normal customers). normal) and Autocall
Hotline number: hotline number to make calls during the campaign. Admin can choose one or more hotlines to use for the campaign here
IVR button: IVR button which companies installed for callout script
Working hours: select the working hours that apply to the campaign. The campaign will not automatically run out of this time frame.
Maximum number of calls: the maximum number of calls for 1 customer in the campaign. For example, the maximum number of calls is 3. So the system can call the customer 3 times, if the previous 2 times the agent and the customer have not met each other.
Break time between two calls to the same customer (minutes): will be the time between two calls for the same customer if the maximum number of calls is greater than 1. Manual dialing type is not affected by this metric because the agent can proactively call back the customer, if the previous calls have not been met and the maximum number of calls has not been reached.
No-callback period (days): number of days without calling customers marked as no callback
Create a ticket for a call to an agent or to voicemail: in the on mode, the system will create a ticket if the call meets the agent or goes to the customer's voicemail

Step 4: Add customers to the campaign. After completing step 3, Admin chooses to continue to switch to the interface of adding customers. In this interface, the admin can optionally add contacts from 1 of 4 options as shown, select "Next" after completion. Here are the contact upload options:
Contacts: Select contacts already on the Portal. With this option, admin search and click to select contact on search bar
Filter: Select a filter from the list of contact filters created in the Advanced Filter.
Import data from excel: Upload an excel file containing contacts according to the template file into the campaign
Step 1: Download the sample file for uploading the contact list to your computer and edit it. Note: the information is needed to be in "text" format and the phone number field (Phone) needs to have a country code. For example 84xxxxxxxxx (the Vietnamese code is +84). The phone number field is required in the Auto Dialer campaign.
Step 2: Upload the file in the “Select file” section and select “Next”
Customer group: add from the previously created customer group in the "Customer warehouse" section at the campaign management interface

Step 5: Admin adds agents through two options: Agent (manually add each agent, can select multiple agents) or Group (add agent group, this group needs to be created and added agent to the previous group)
Step 6: Creation. After checking that the information is correct, the admin selects "Add campaign" to complete the installation and initialize the campaign. If the information needs to be changed, the admin can choose to return to the corresponding interface to edit the information. Once initialized, the campaign defaults to Unapproved status

A successfully-created campaign will have a successful creation message. In the campaign management interface, there will be new campaign information similar to the illustration. To launch the campaign, the admin needs to Approve the campaign. After approval, if the campaign is in the set time to run, admin can select Start to run the campaign immediately. Otherwise during this set time, the campaign will start running when it reaches the set time(regardless of which admin clicked start)

Auto Call Back
The Auto Callback campaign helps users save time by automatically scheduling callbacks to customers who called into the queue but were not answered, and who pressed the key to request a callback.
For Auto Callback calls, the system will automatically call the agent first. Once the agent answers, the system will then dial the customer's number.
Mandatory conditions for the Auto Callback campaign to function:
The campaign must be of the Auto Callback type
A trigger is required to add missed customers to the callback campaign
Customers need to press a key while in the queue if they want to be called back for the trigger to activate
Set up the Auto Callback campaign
Step 1: The admin navigates to the Settings menu => Campaign Management => Outbound Campaigns
Step 2: In the Outbound Campaign Management interface, the admin selects Create Campaign
Step 3: In the Create Campaign interface (see image), the admin configures the campaign settings, including:
Campaign: The name of the campaign, set by the admin
Description: A detailed description of the campaign
Start Time: The time when the campaign begins. For the agent to be able to execute the campaign, the admin must click "Start Campaign," and this start time must be reached
End Time: The time when the campaign ends. The campaign will stop running at this time, even if the customer list hasn't been fully called
Autodialer type: Auto Callback
Hotline: The hotline number used by the call center to make outbound calls for the campaign
Business hour: The hours during which the Auto Callback campaign will run. If calls fall outside these hours, the campaign will not execute. If no working hours are selected, the campaign will run whenever there is a missed call
Maximum call times per customer: The maximum number of call attempts for a single customer in the campaign. For example, if the maximum is set to 3, the system may call the customer up to 3 times if the agent and customer do not connect during the first 2 attempts
Gap between 2 consecutive calls to a customer (minutes): The time interval between two call attempts to the same customer if the maximum call attempts are greater than 1. The Manual Dialing mode is not affected by this setting, as the agent can choose to call the customer back immediately if previous attempts were unsuccessful and the maximum call attempts haven't been reached
Call-blocking period (days): The number of days during which customers marked as "Do Not Call Back" will not be contacted again
Call-blocking period (days): The time for the agent to rest and enter information between two calls made by the system. For Manual Dialing mode, the agent can manage customer calls independently and is not affected by this setting

Step 4: Next, the admin adds agents (call center agents). The admin can add agents using two options: Agent (manually adding individual agents, with the option to select multiple agents) or Group (adding a group of agents, where the group must be created and agents added to the group beforehand). After completing the addition of agents and groups, the admin selects "Initialize Campaign":

Once the campaign is successfully created, a success notification will be displayed, and the new campaign information will appear in the campaign management interface, similar to the illustration. To launch the campaign, the admin needs to Approve the Campaign. After approval, the campaign will start (if the start time has been reached) or will automatically begin when the scheduled start time arrives.

Create a rule to add missed customers to the callback campaign
At this step, the admin needs to:
Configure the Queue to capture the key press by customers requesting a callback
Set up the Trigger to automatically add missed customers (those who pressed the key) to the campaign
Configure the Queue
Step 1: Access the admin account => Settings => Service Management => Customer Service => Queues, and click to edit the queue
Step 2: Configure the Auto Callback settings:
Key press leaves callback: Enter the key that customers should press to request a callback when they call in. Valid characters are any single digit from 1 to 9, or the keys * and #. If the customer presses an invalid key, the call will remain in the queue
Minimum time required to leave a callback: Enter the minimum number of seconds required for a callback request (counted from when the call enters the queue). Admin needs to inform customers about this key press option in the queue's hold music file. For example, if the setting is 20 seconds and the maximum queue wait time is 60 seconds, then from the 20th second to the 60th second, if a customer presses the key, the system will record the request, play the "callback request notification" to the customer, and then end the call
Notification when leaving callback: The notification file that plays after the customer presses the key to request a callback
Note: Ensure that the feature for generating tickets for missed calls is enabled in the queue settings to support triggers and popup tickets for missed customers in the Auto Callback campaign.

Set up the Trigger
Step 1: Access the admin account => Settings => Configure Trigger.
Step 2: Create a new trigger to automatically add missed customers who pressed the key to the campaign with the following required Conditions and Actions:
Conditions (condition type is "Meet ALL of the following conditions"):
Condition: Ticket, expression: Is, value: Created
Condition: Channel, expression: Is, value: Callback
Action: Select Add Customer to Campaign, and choose the Auto Callback Campaign (campaign name).

Auto Callback Campaign Notes
If the agent's call reception status is "Available":
When the campaign execution screen is open: receive both Auto Callback calls and queued calls
When the campaign execution screen is closed: do not receive Auto Callback calls, still receive queued calls
If the agent's call reception status is "Not Available": they will not receive both Auto Callback calls and queued calls
The Auto Callback campaign will not automatically switch to "Paused" status like other campaign types
Auto Callback calls have a higher priority than queued calls
As long as there are customers in the campaign and an agent is available, the campaign will be executed. Customers added to the campaign first will be called back first. For the case where the same customer generates multiple callback tickets, the system will check for duplicates and only add that customer to the campaign once
Last updated