12. Configure IP Phone connection with Stringee contact center
Create a SIP PHONE account on Stringee
StringeeX
Step 1: Access the User list

Step 2: Create a SIP account for the user
Select “Update” => “Call center settings” => “Create a SIP Phone account”.

Username: the system will create it automatically, the user cannot change it.
Password: set by user.
Domain: Server and Port of Stringee.
PCC
Step 1: Access the User list
Select “Edit User” as shown in Image 3.

Step 2: Create SIP account for the User
Select “Create a SIP Phone account”.
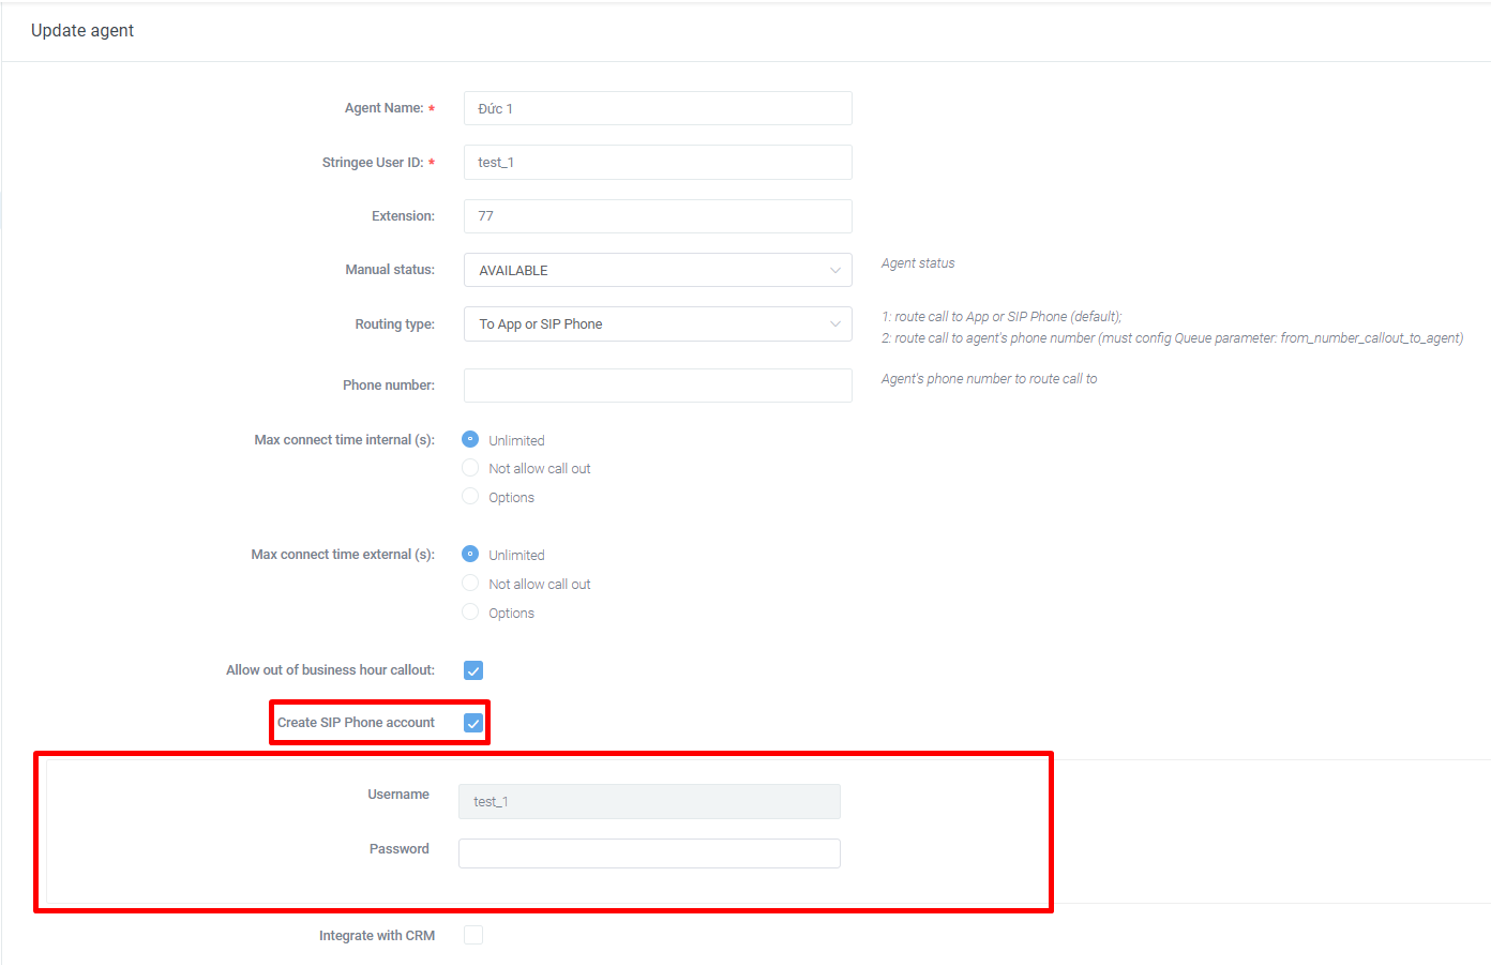
Username: the system will create it automatically, the user cannot change it.
Password: set by the user.
Note: After creating a SIP account and updating the User, the user needs to repeat step 1 to get the User's Username. At this time, the Username will be changed to the format (ProjectID_UserID) as shown in Image 5.
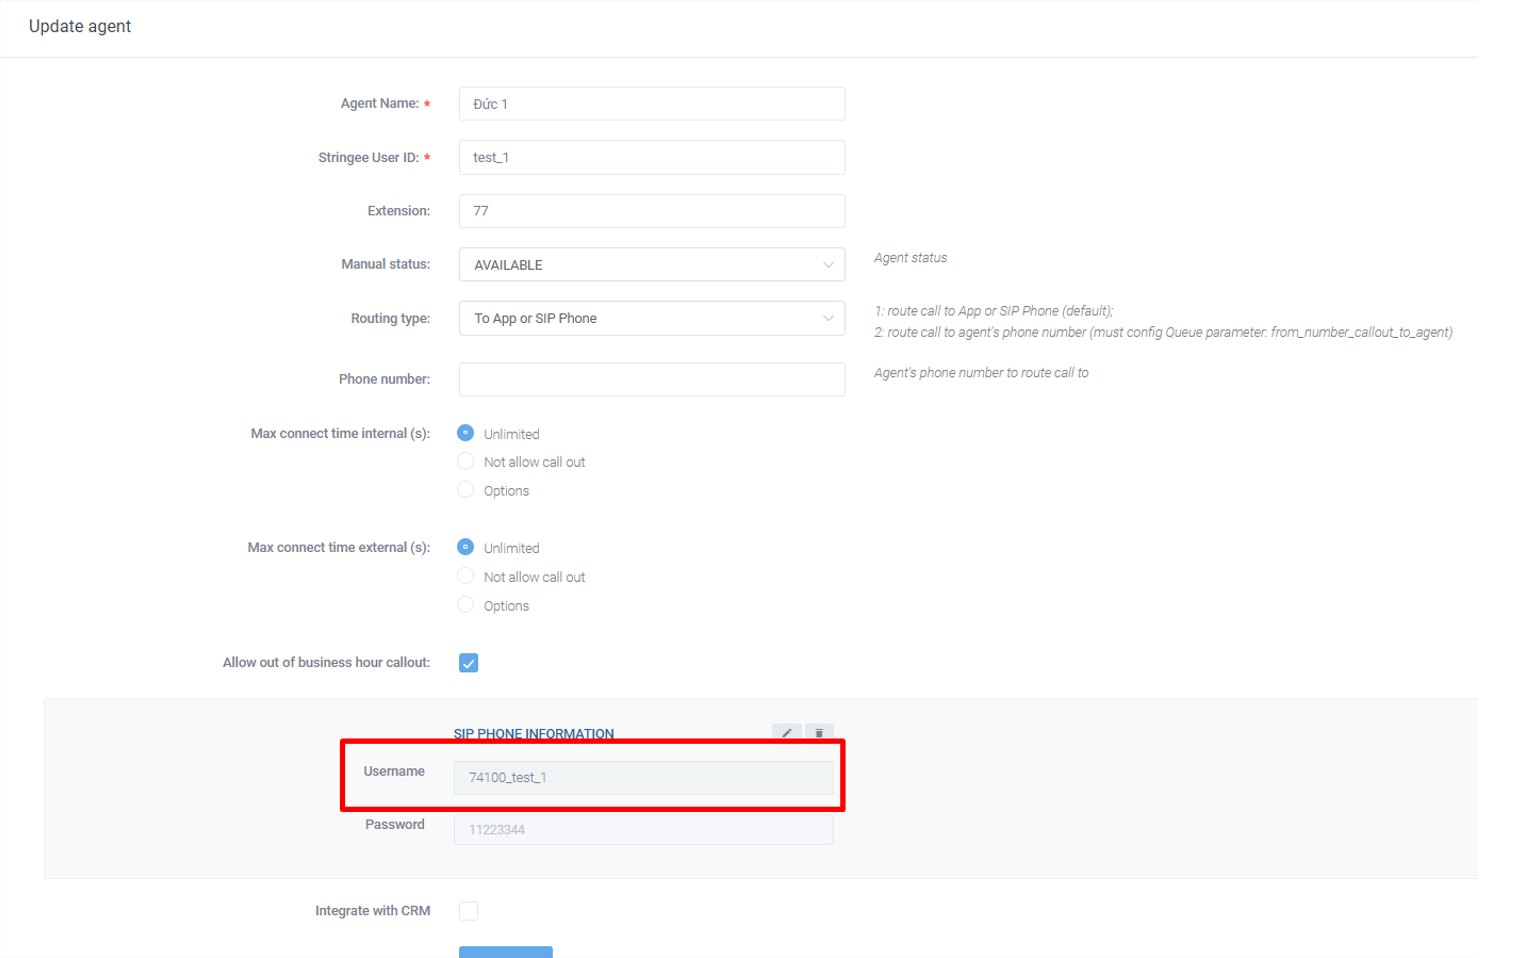
Connect the User's SIP Phone account to an IP Phone (Landline: Fanvil, Yealink,...) or SIP Phone (Zoiper,...)
To install and connect to a SIP Phone account, users need to prepare the following devices:
For IP Phone:
IP Phone device.
Computer, phone,... (computer is preferred) connected to the same internet connection as the IP Phone device.
Internet cable to connect IP Phone to the internet. One end of the cable must be plugged into the IP Phone device port with the symbol as shown in Image 6.
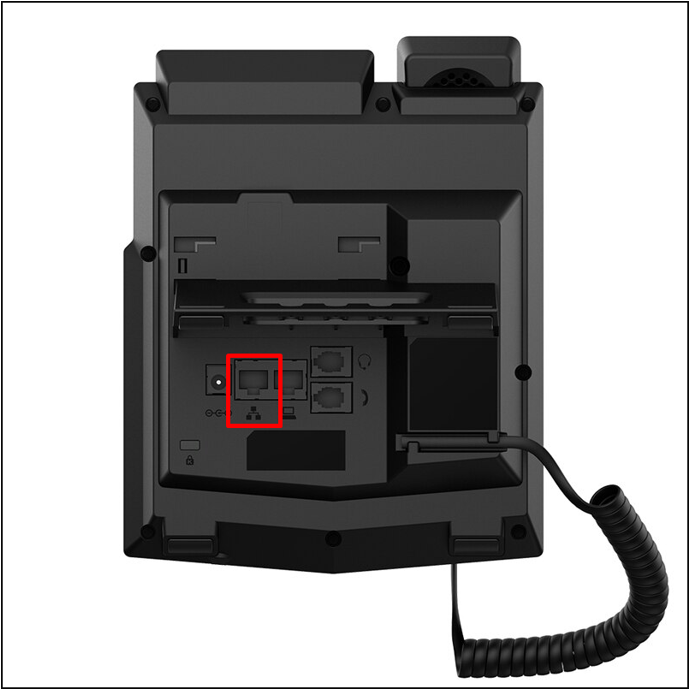
Note: for some IP Phone types, this icon will be replaced with the words "LAN" or "Internet".
For SIP Phone:
Successfully download and install the SIP Phone application on computer devices, phones,...
IP Phone - Favil
Step 1: Get the IP address of the IP Phone
Access “Menu” depending on the key on the IP Phone device => “Status” => “IP”.
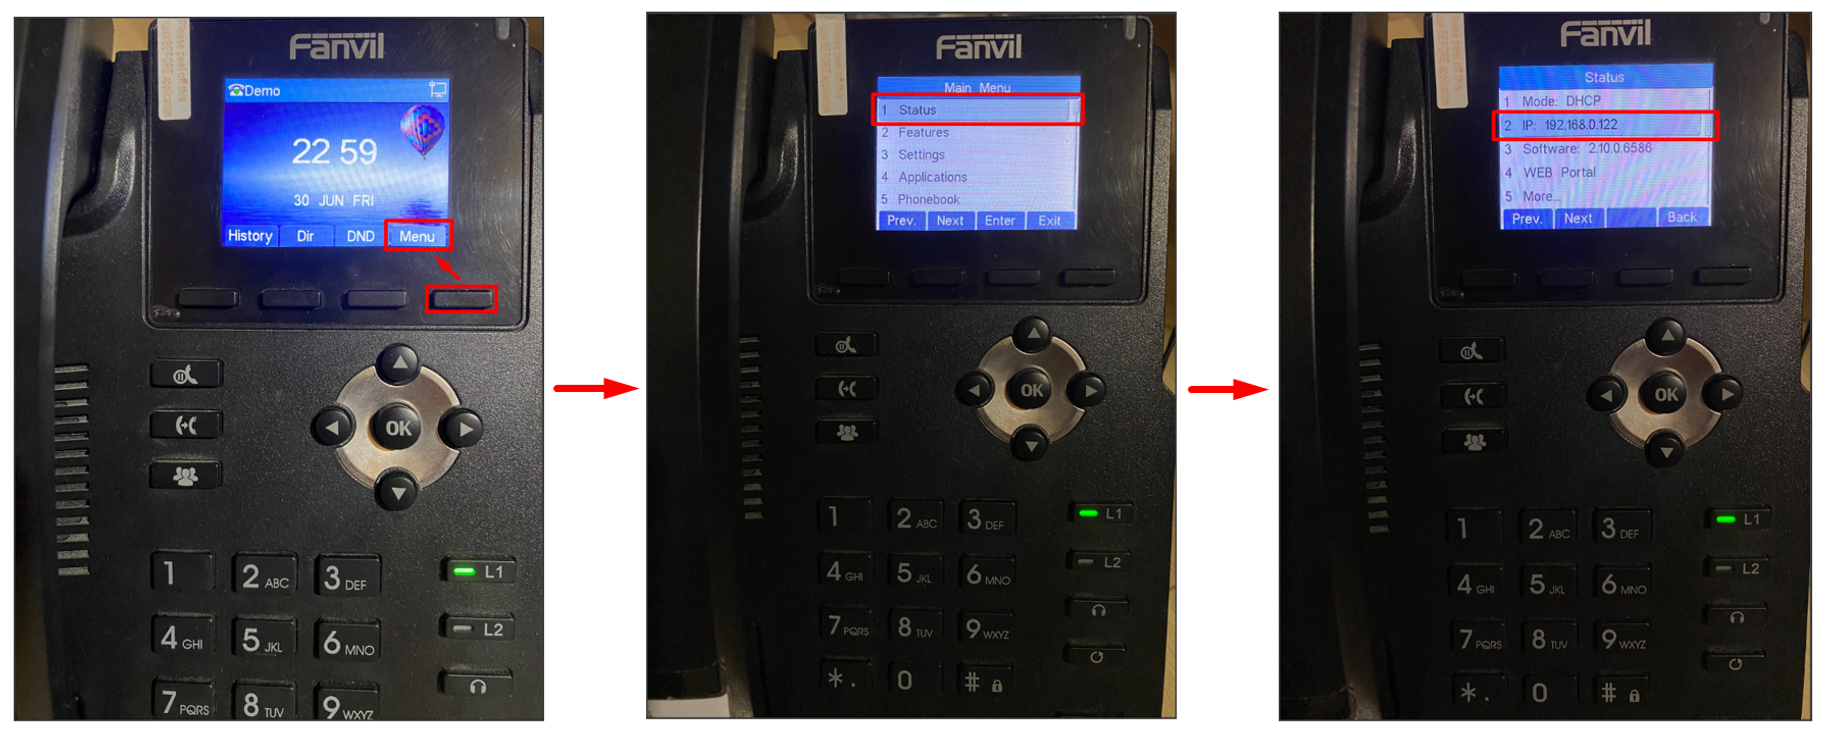
Note: In case the "IP" section displays "Negotiating..." or has no information, it means the IP Phone is not connected to the network.
Step 2: Access the IP address of the IP Phone
Users access the IP address of the IP Phone on the web browser of a computer (or other device) that has the same internet connection as the IP Phone.
After accessing the IP address, the user needs to enter the login information of the IP Phone device (Image 8).
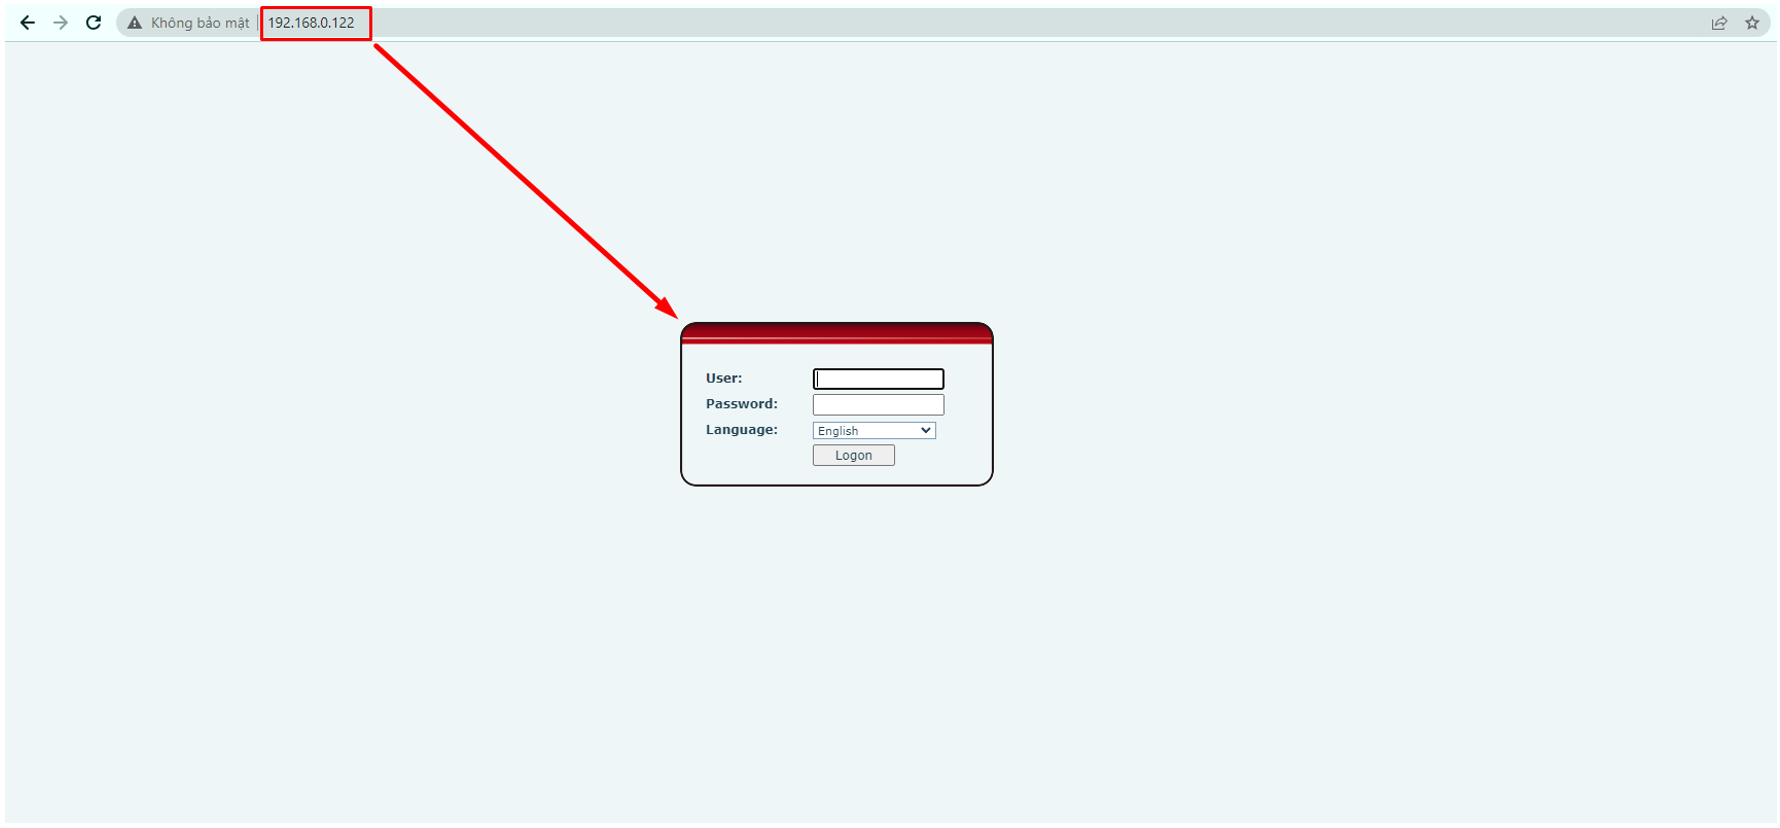
Normally, the login information of the IP Phone provider (IP Phone brand) will default to:
User: admin
Password: admin
If you forget or do not have login information, users need to contact the provider of the IP Phone device for support.
Note: Stringee has absolutely no information about the IP Phone login account because the login account is held, edited, and changed by the user.
Step 3: Configure IP Phone account
Step 3.1: Configure SIP account information
Users access the path: "SIP" => "Line" and complete the information items circled in Image 9. The remaining items can be kept as they are without changing the information.
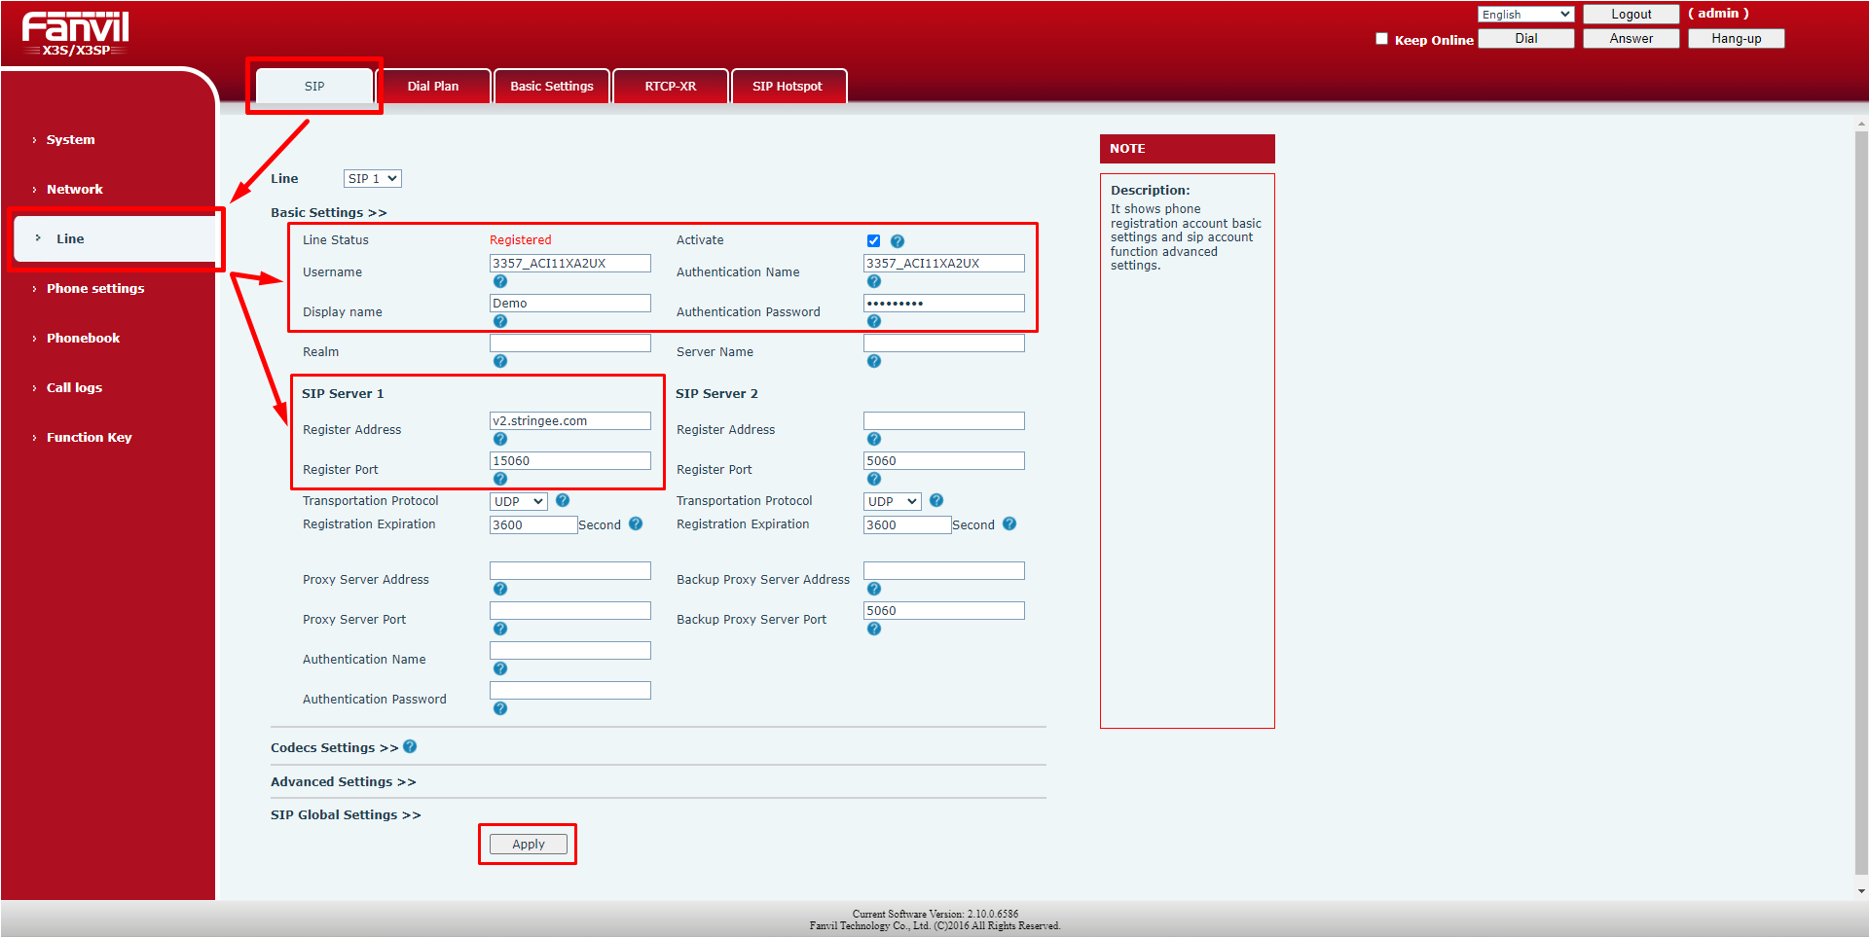
Line status: IP Phone configuration status results. This result will be returned after updating (applying) the account. If the result is “Registered” => the configuration is successful.
Username: enter the SIP account username.
Display name: name displayed on the IP Phone device screen.
Active: This item must be checked.
Authentication Name: enter the SIP account username.
Authentication Password: enter the SIP account password.
Register Address: enter domain server Stringee (sip-register-india.stringee.com).
Register Port: enter domain server port Stringee (5262).
Step 3.2: Configure Keep Alive for IP Phone
Still at the path "SIP" => "Line", users access "Advanced Setting".
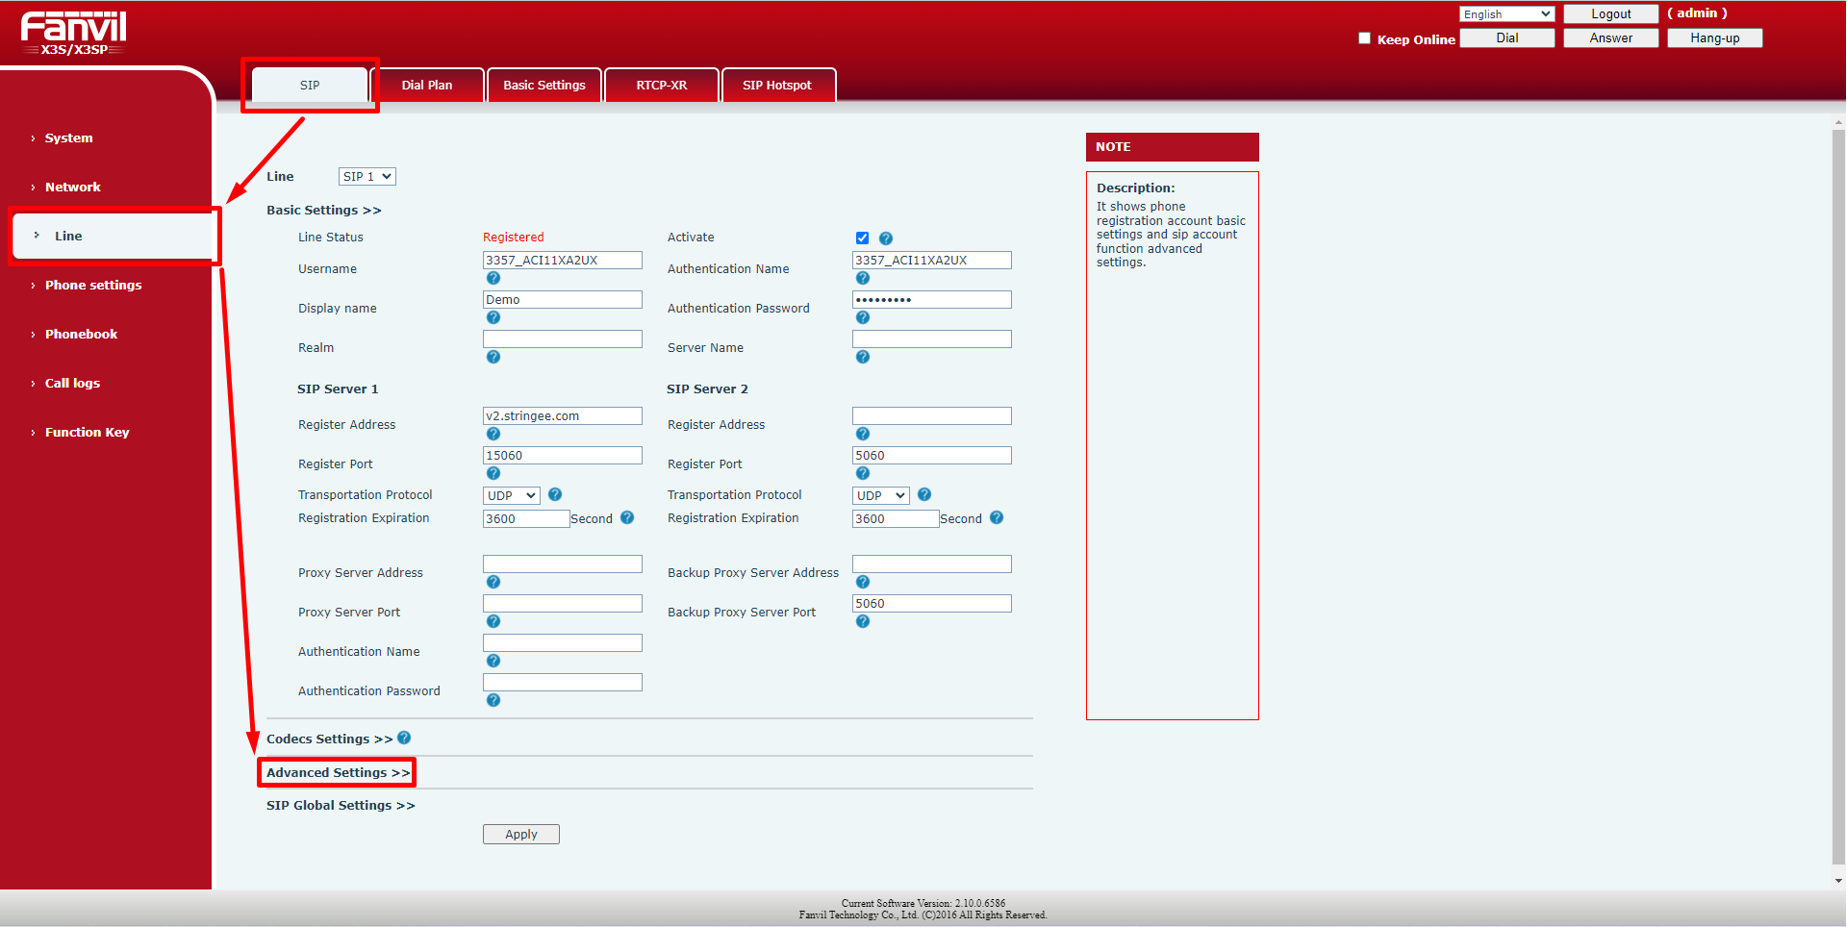
Next, scroll down to the Keep Alive section (Image 11) and complete the information as follows:
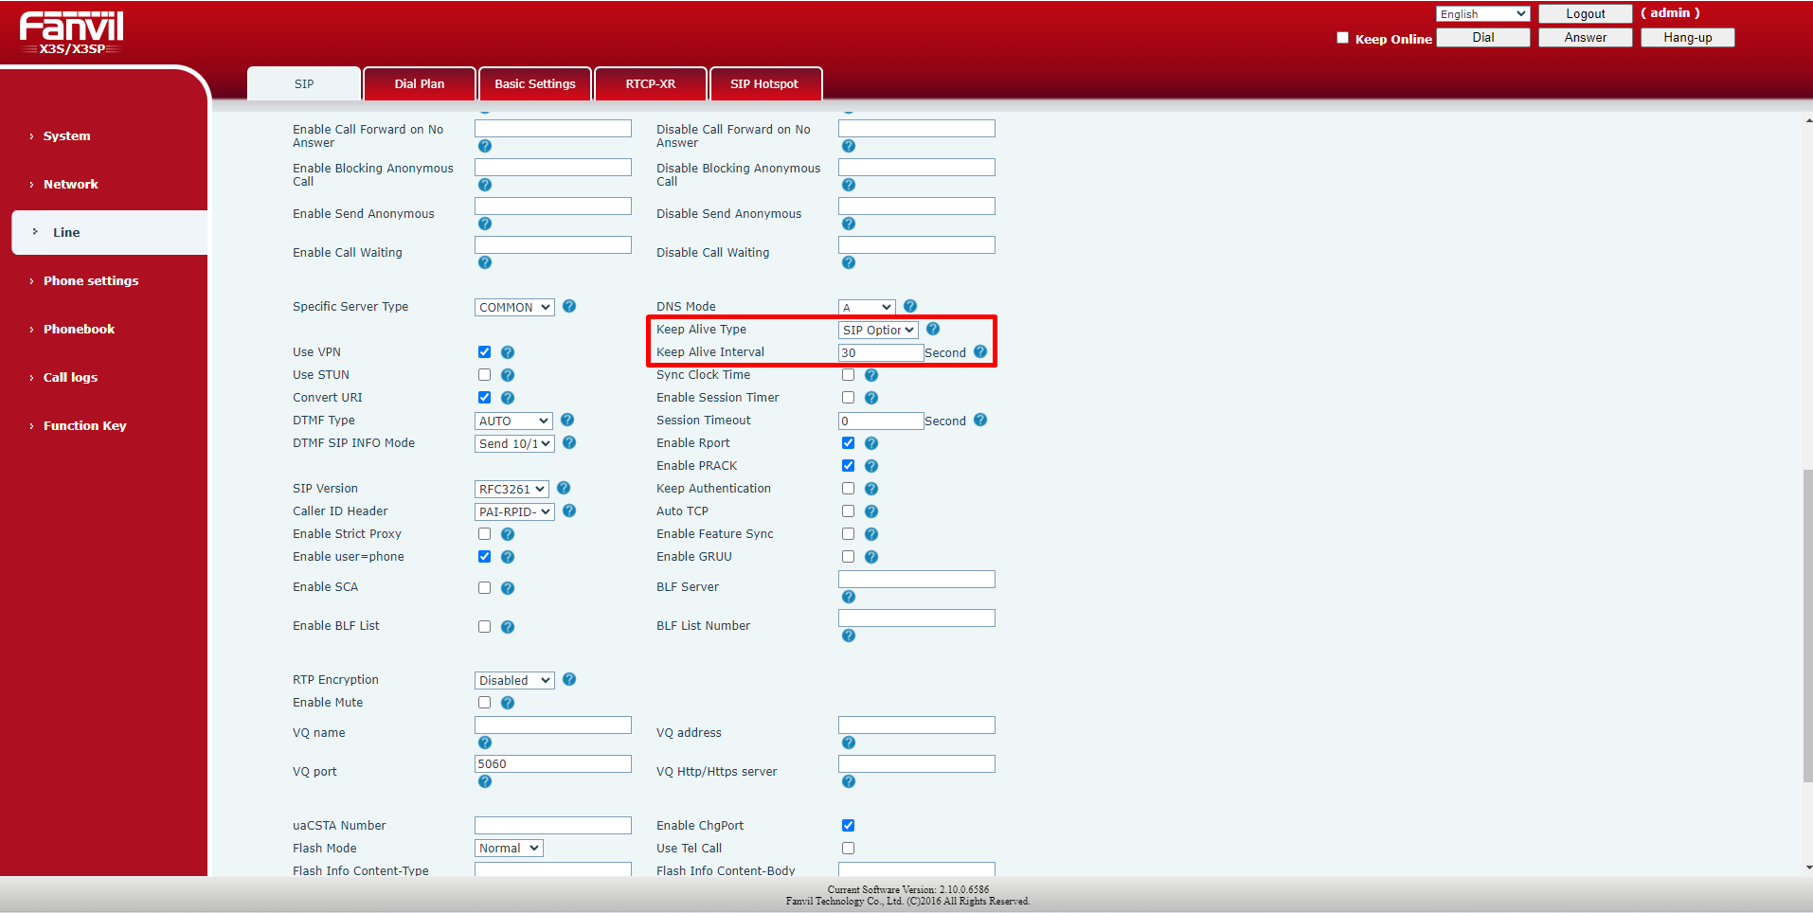
Keep Alive Type: SIP Option.
Keep Alive Interval: 30.
Step 3.3: STUN configuration
Users access the path: "SIP" => "Line" and complete the information items circled in Image 12. The remaining items can be kept as they are without changing the information.
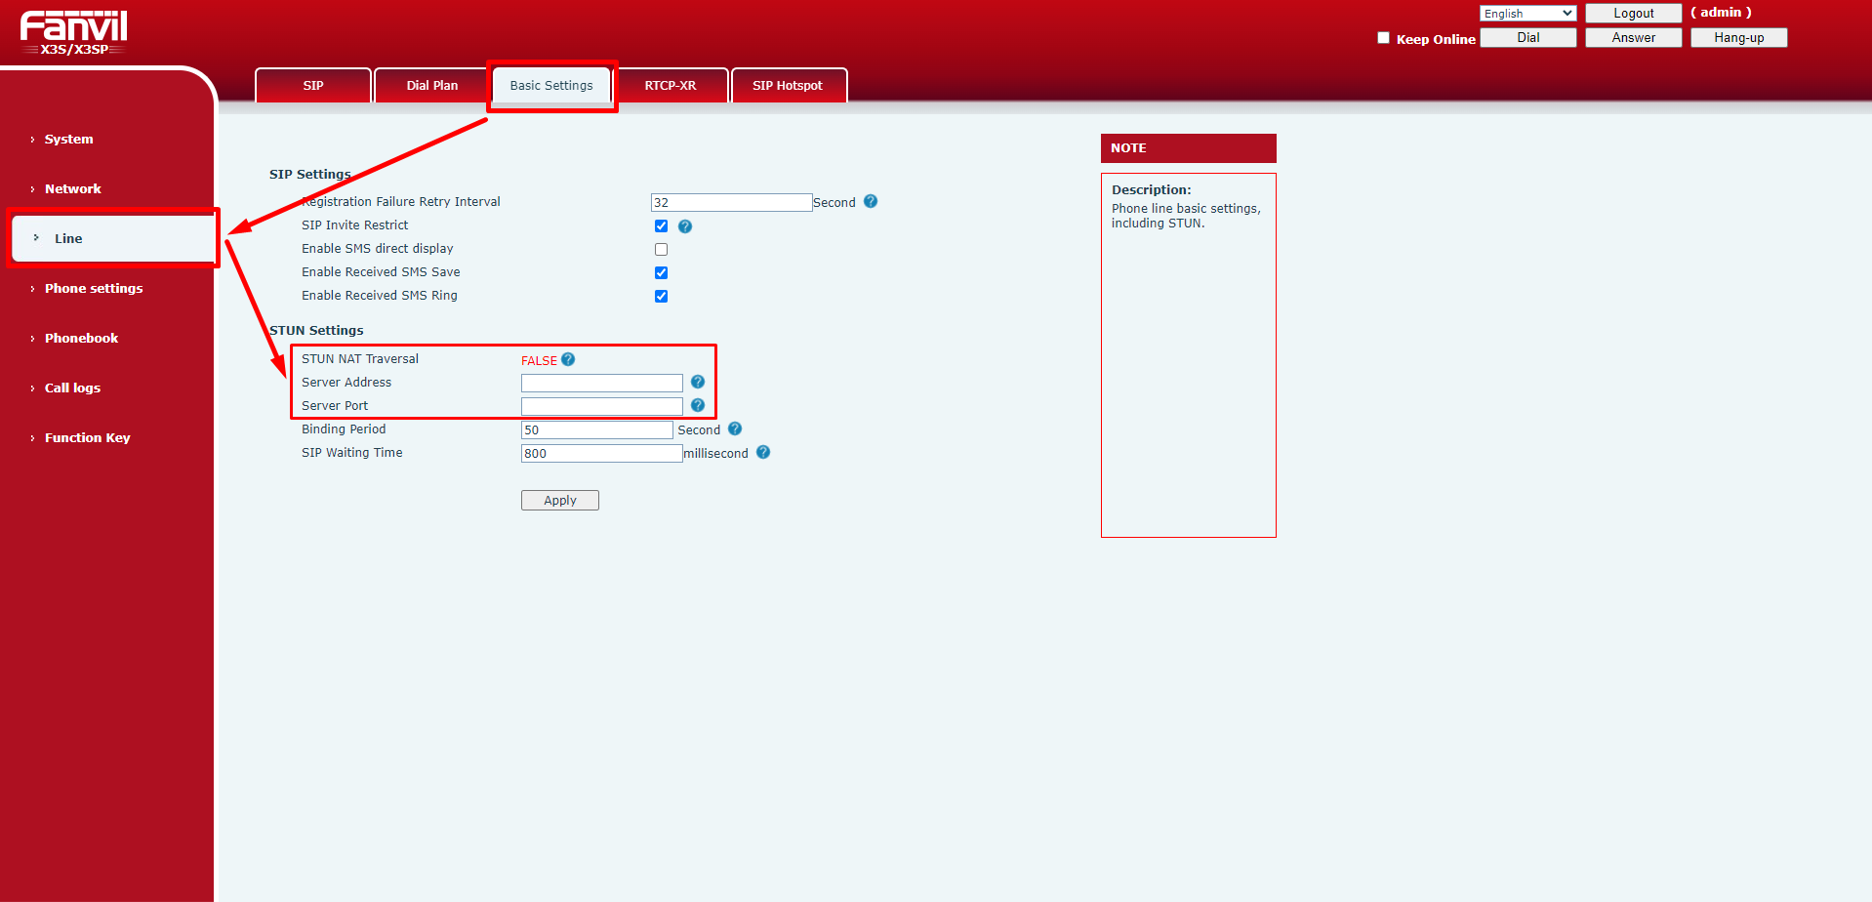
STUN NAT Traversal: STUN configuration status results. This result will be returned after updating (apply). If the returned result is “TRUE” => the configuration is successful.
Server Address: enter domain server Stringee (v1.stringee.com).
Server Port: enter port server Stringee (3478).
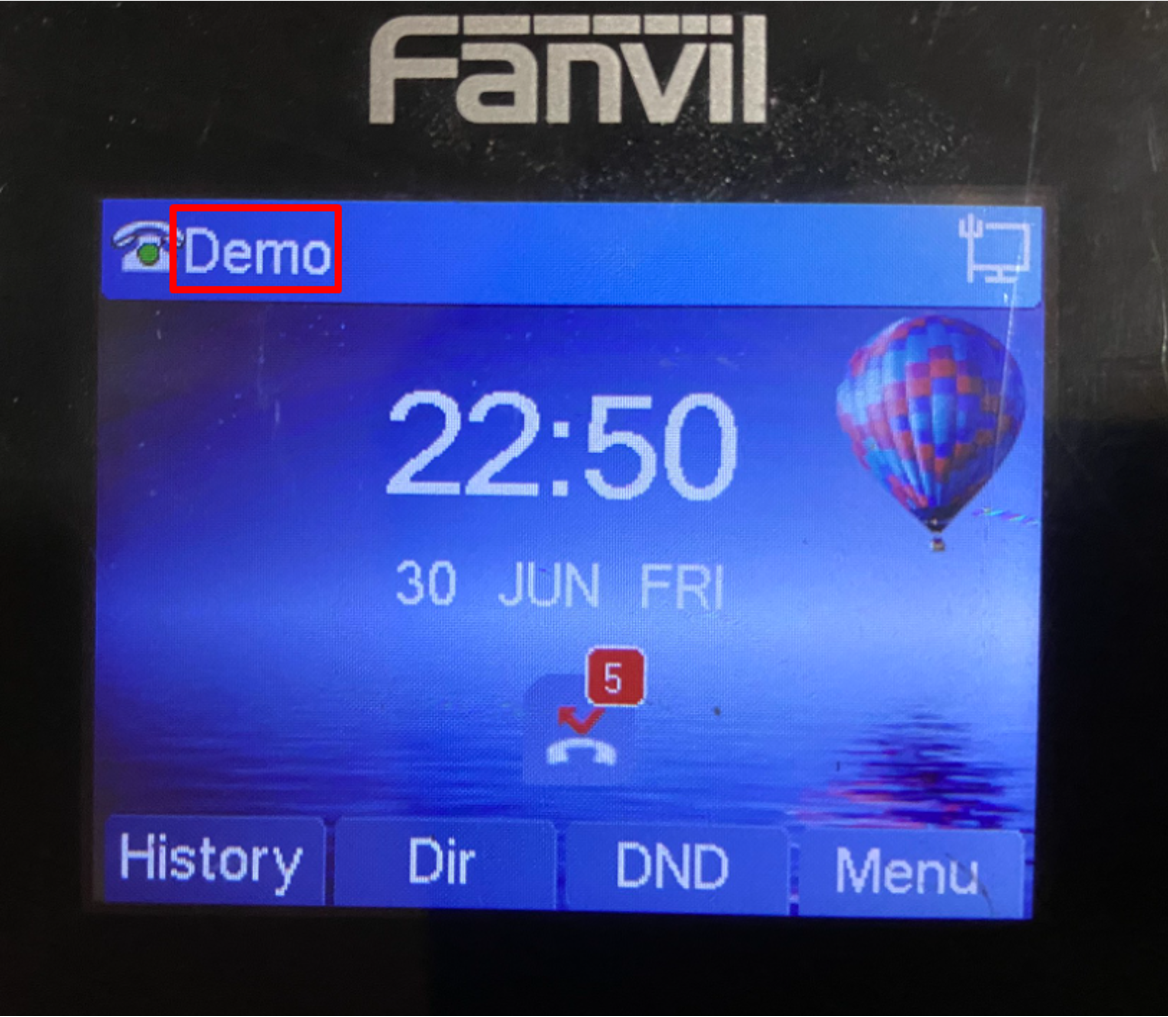
After completing all the above steps, if the IP Phone device screen displays the "Display name" configured in Step 3.1 => Connect the SIP account to the IP Phone device successfully.
IP Phone - Yealink
Step 1: Get the IP address of the IP Phone
Access “Menu” depending on the key on the IP Phone device => “Status” => “IP”.
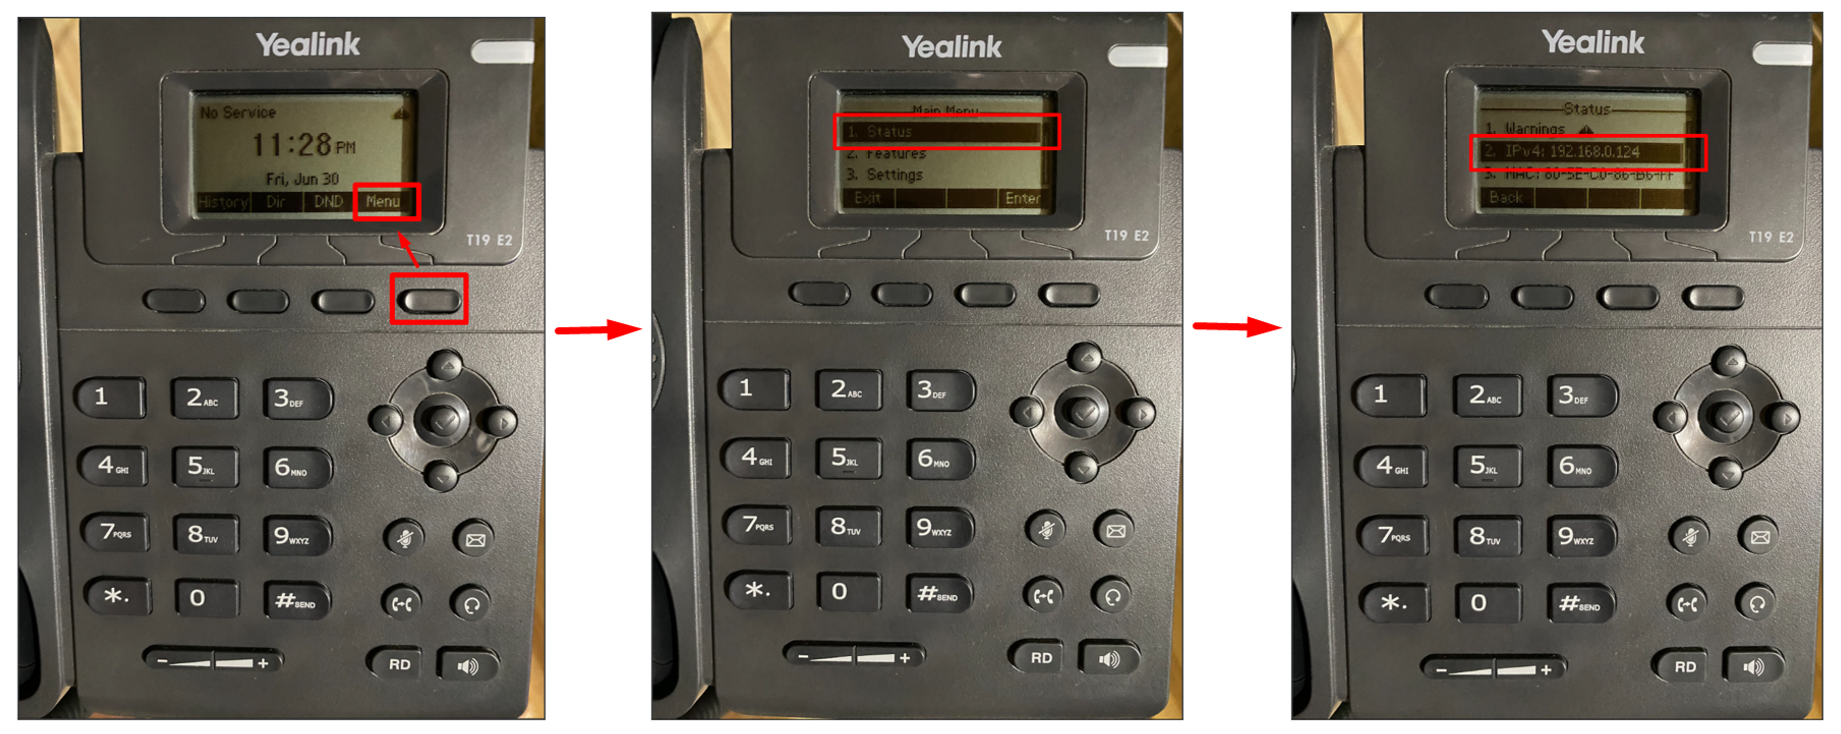
Note: In case the "IP" section displays "Negotiating..." or has no information, it means the IP Phone is not connected to the network.
Step 2: Access the IP address of the IP Phone
Users access the IP address of the IP Phone on the web browser of a computer (or other device) that has the same internet connection as the IP Phone.
After accessing the IP address, the user needs to enter the login information of the IP Phone device (Image 15).

Normally, the login information of the IP Phone provider (IP Phone brand) will default to:
User: admin
Password: admin
If you forget or do not have login information, users need to contact the supplier (the brand) of the IP Phone device for support.
Note: Stringee has no information about the IP Phone device login account because the login account is held, edited, and changed by the user.
Step 3: Configure IP Phone account
Step 3.1: Configure SIP account information
Users access the link: "Account" => "Register" and complete the information items circled in Image 16. The remaining items can be kept as they are without changing the information.
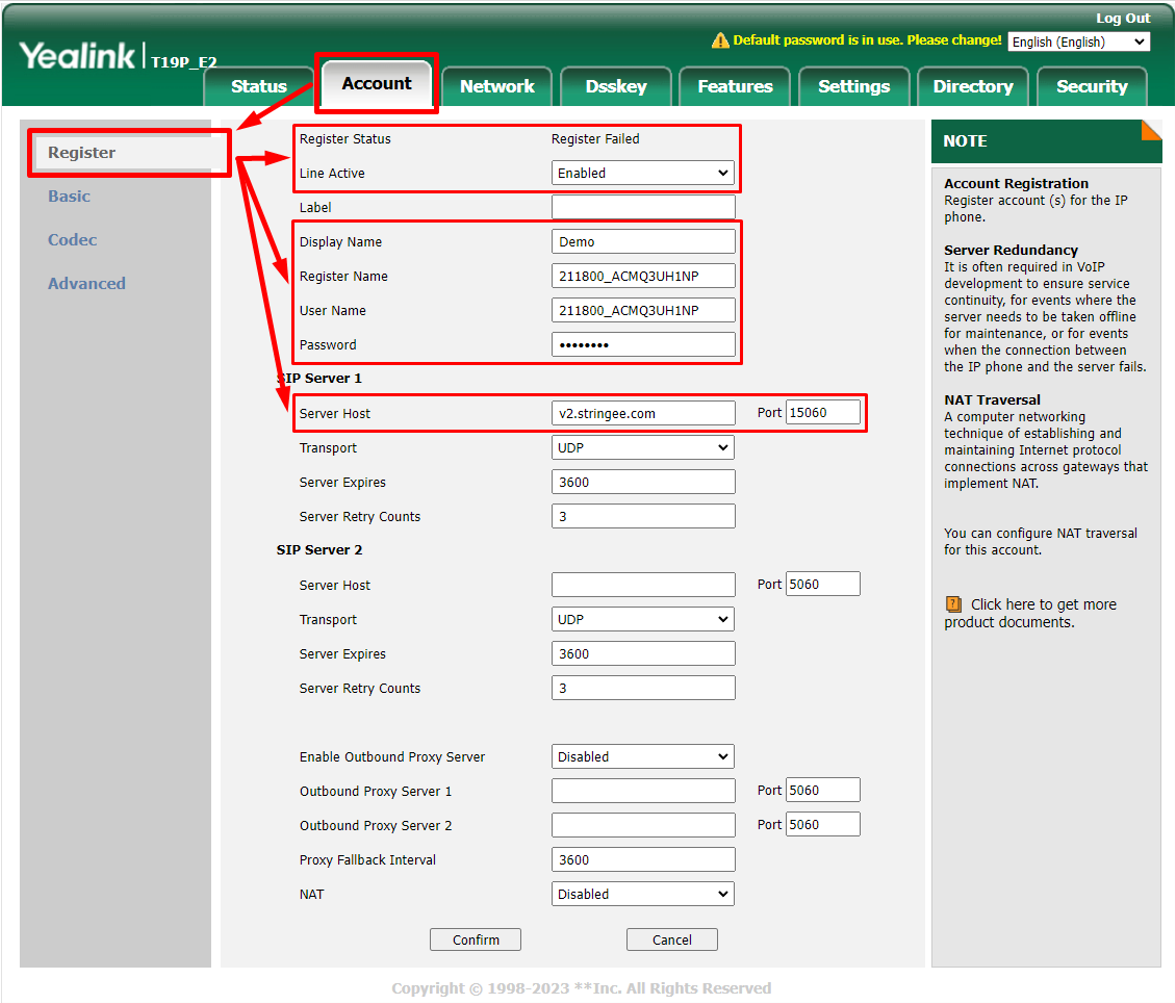
Register Status: IP Phone configuration status results. This result will be returned after updating (applying) the account. If the result is “Registered” => configuration is successful.
Line active: Required selection is “Enabled”.
Display name: the name displayed on the IP Phone device screen. Register name: enter the SIP account username.
Register name: enter the SIP account username.
Username: enter the SIP account username.
Password: enter the SIP account password.
Server Host: enterdomain server Stringee (sip-register-india.stringee.com).
Port: enter port domain server Stringee (5262).
Step 3.2: Configure Keep Alive for IP Phone
Users access the path “Account” => “Advanced”. In the Keep Alive section, complete the following information:
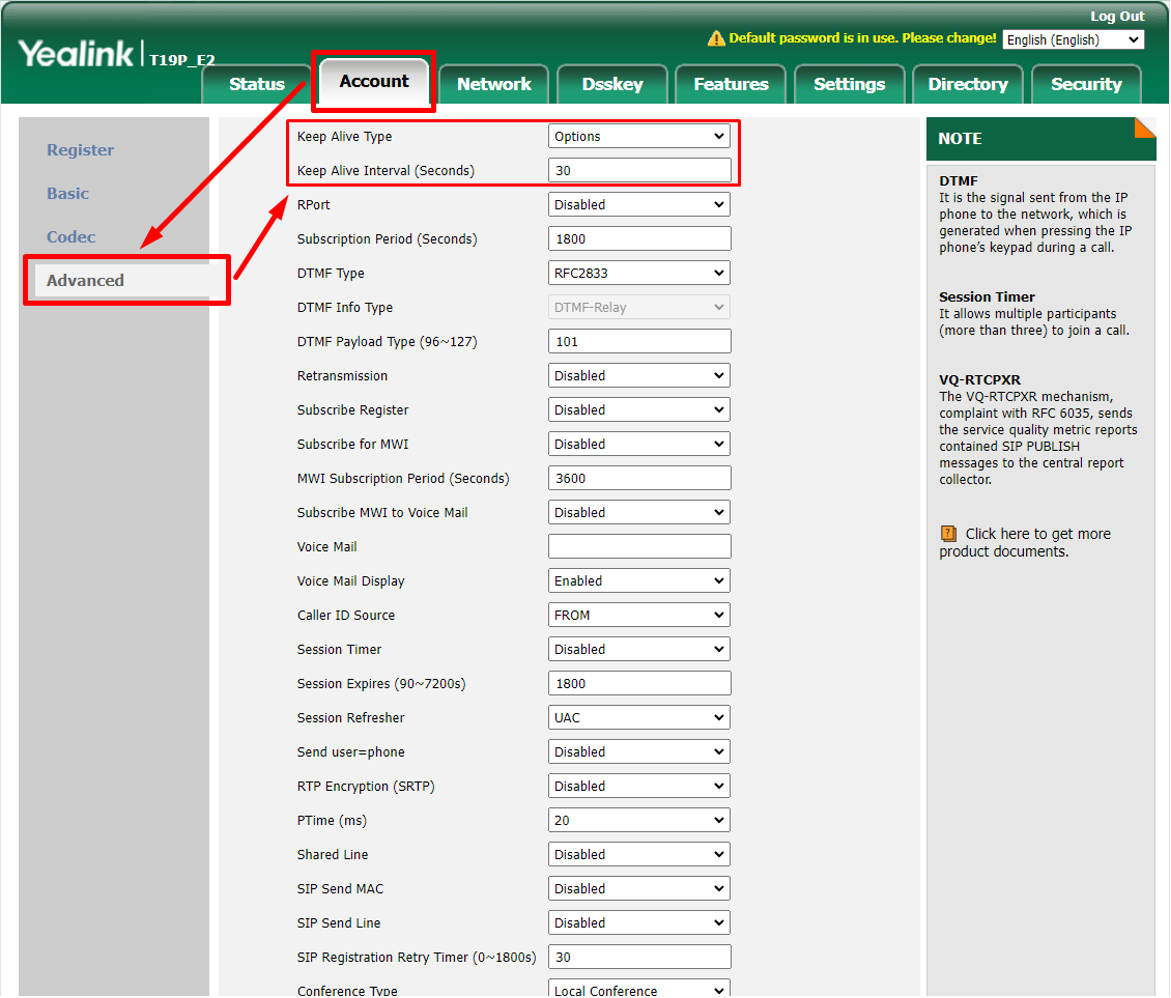
Keep Alive Type: Option.
Keep Alive Interval (Seconds): 30.
Step 3.3: Configure TURN server
Users access the path: "Network" => "NAT" and complete the information items circled in Image 18. The remaining items can be kept as they are without changing the information.
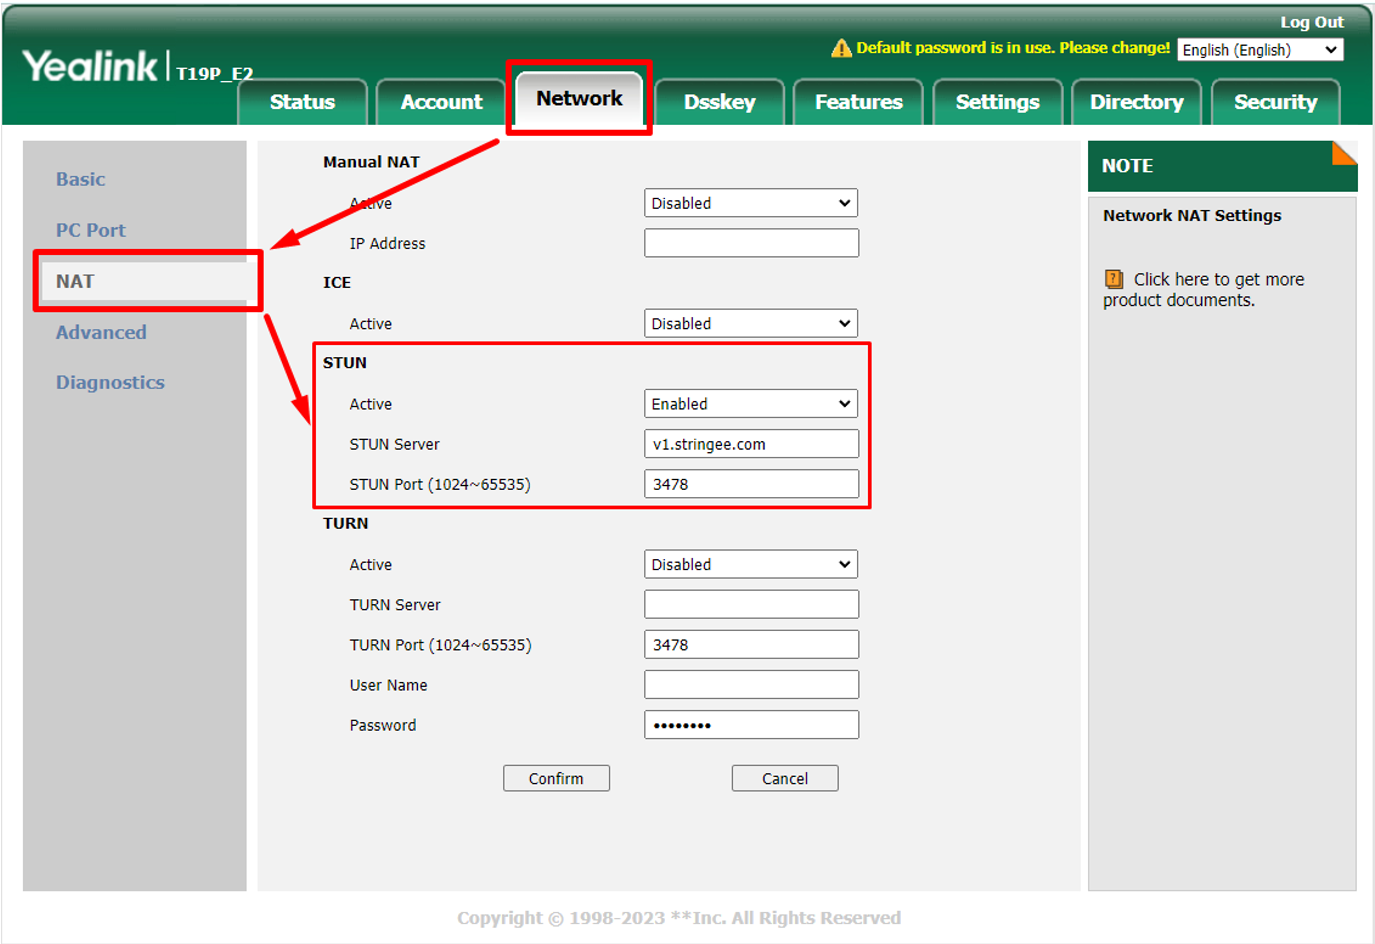
Active: Required selection is “Enabled”.
STUN Server: enter domain server Stringee (v1.stringee.com).
STUN Port: enter port server Stringee (3478).
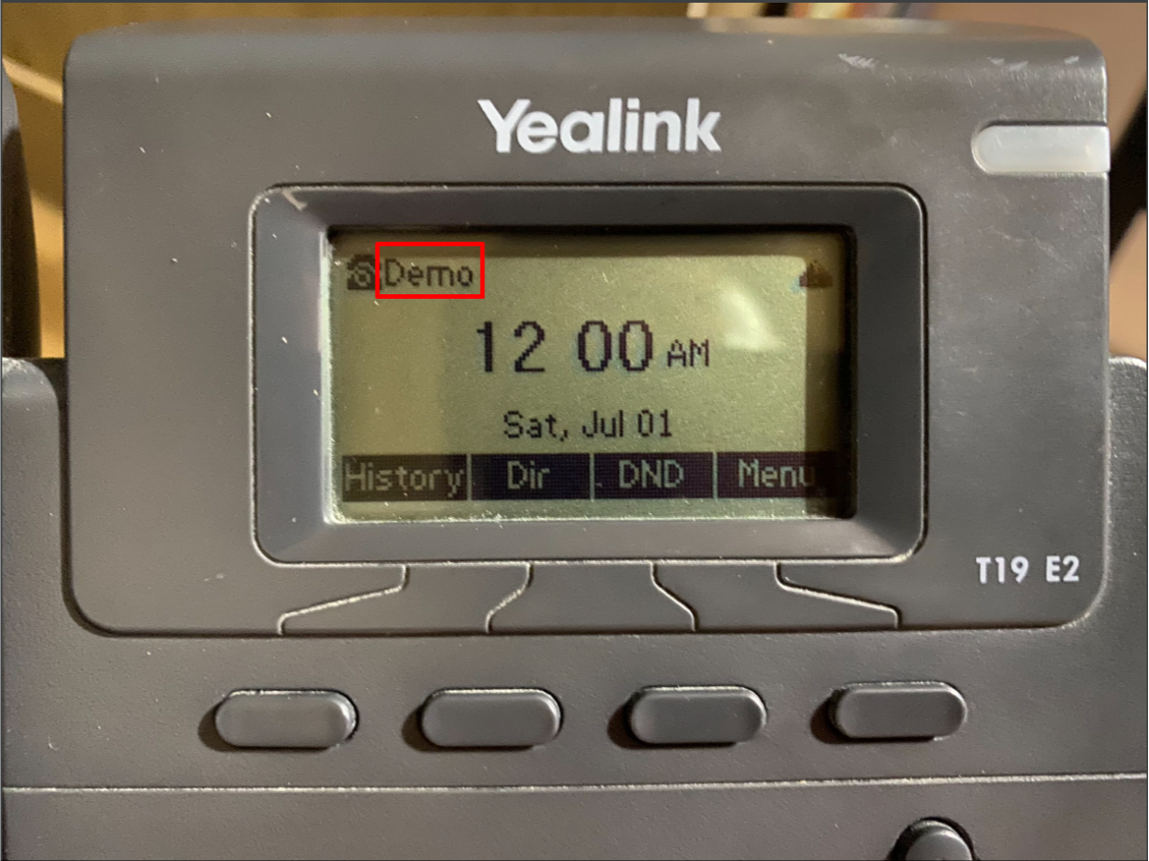
After completing all the above steps, if the IP Phone device screen displays the "Display name" configured in Step 3.1 => Connect the SIP account to the IP Phone device successfully.
SIP Phone – Zoiper
Note: for the Zoiper Free version, users on the mobile app will not have the feature to receive Push (incoming call notifications) because this feature is only available on the paid version (Pro version).
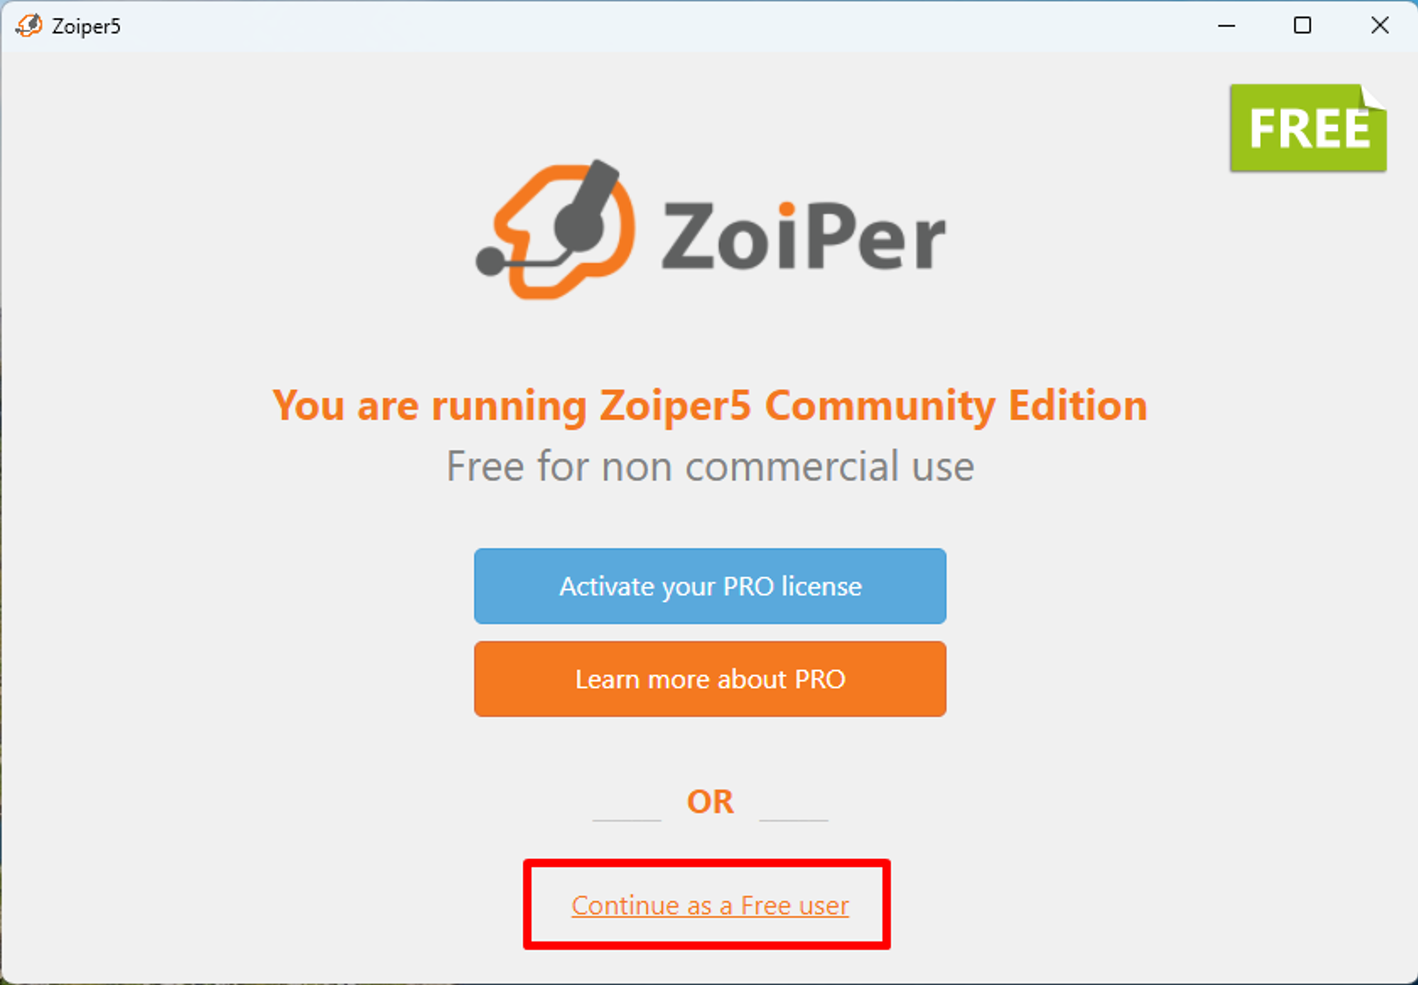
In the interface after installing Zoiper, the user selects "Continue as a Free User".
Step 1: Log in to your SIP account
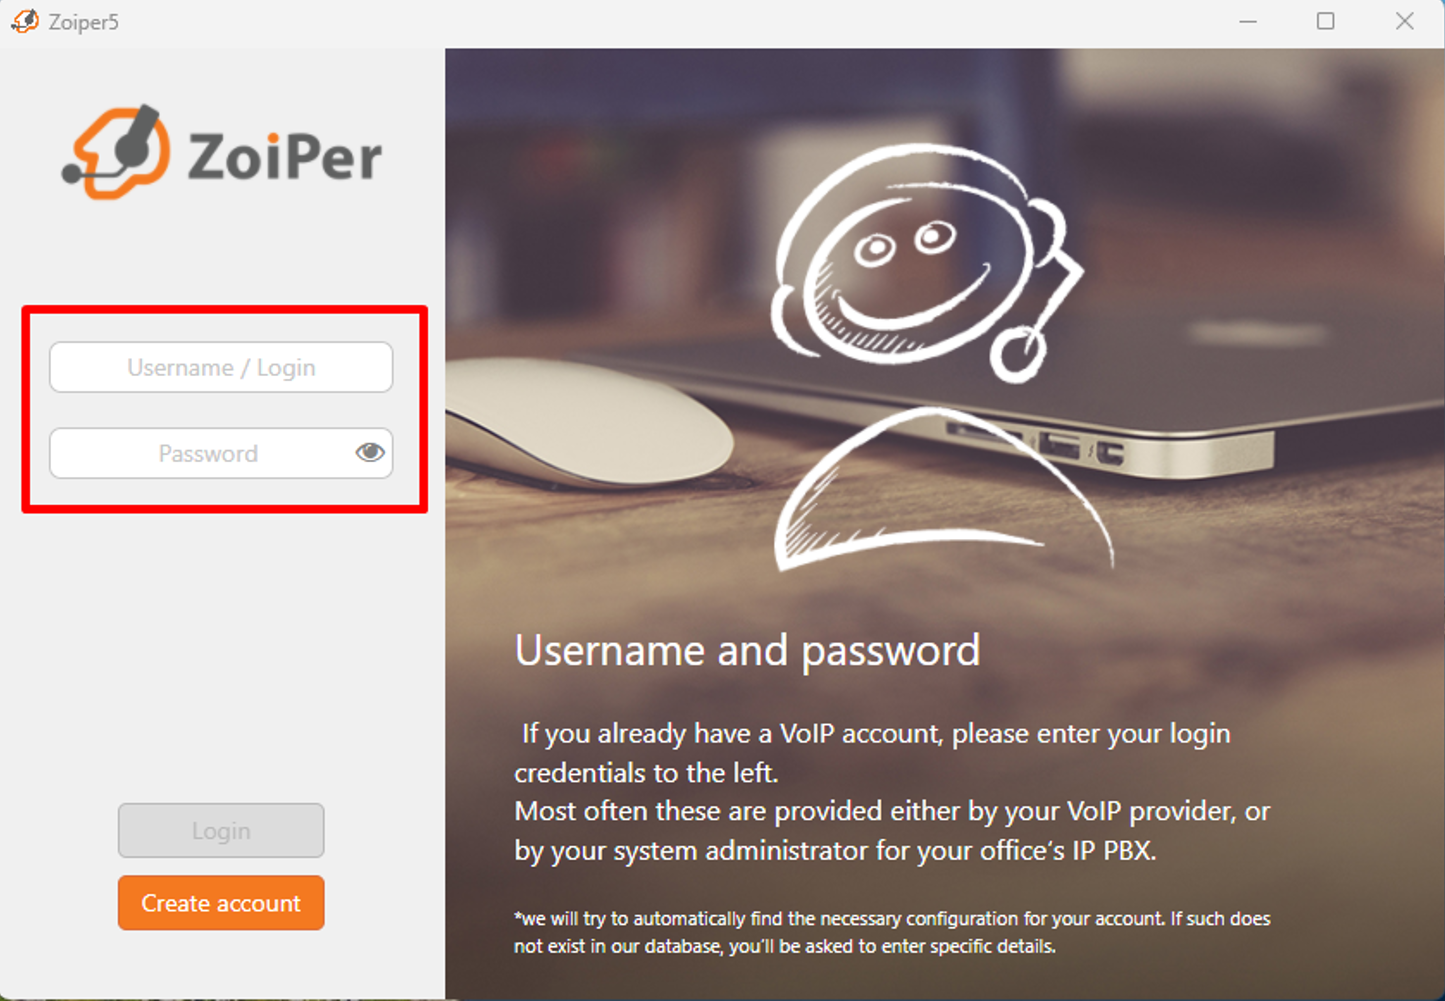
Username: enter the SIP account username
Password: enter the SIP account password
Step 2: Connect with Server Stringee
The user enters Stringee domain: sip-register-india.stringee.com:5262 and selects “Next”.
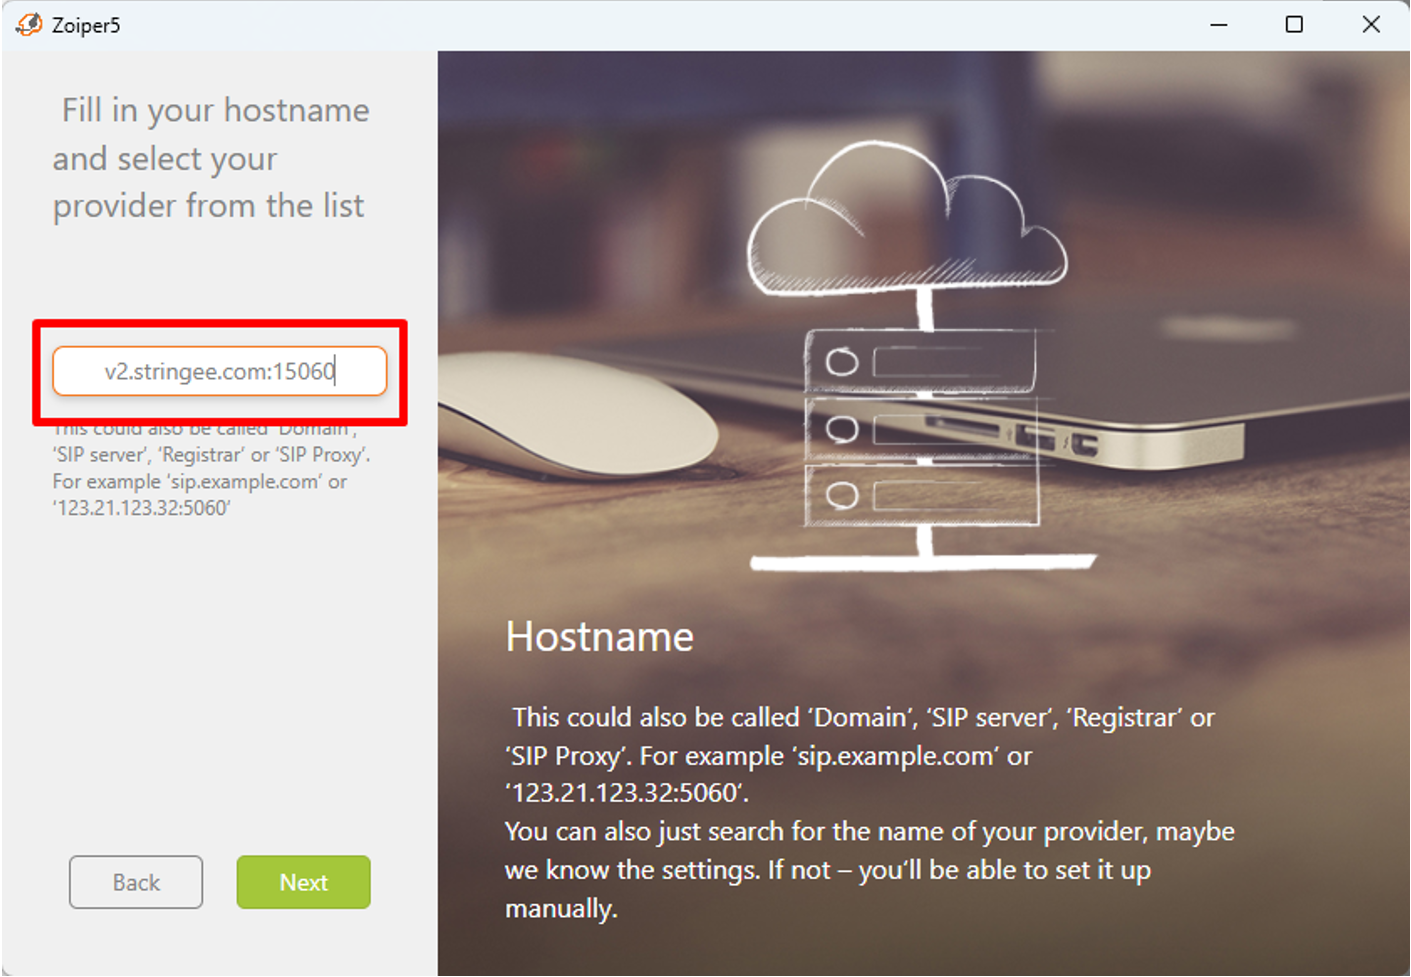
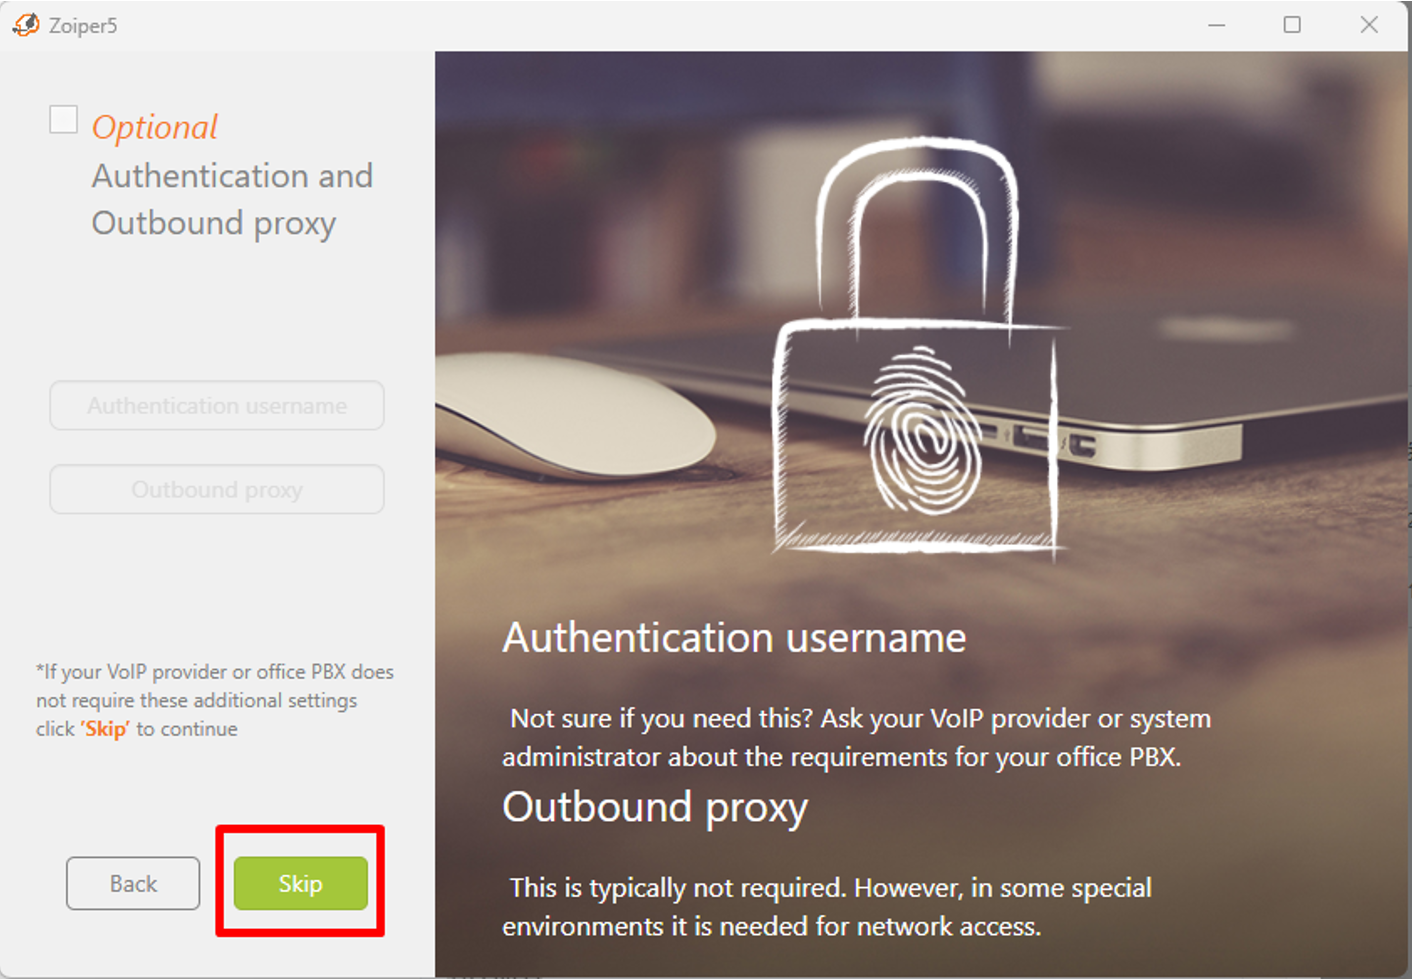
In the next interface (Image 23), select “Skip”.
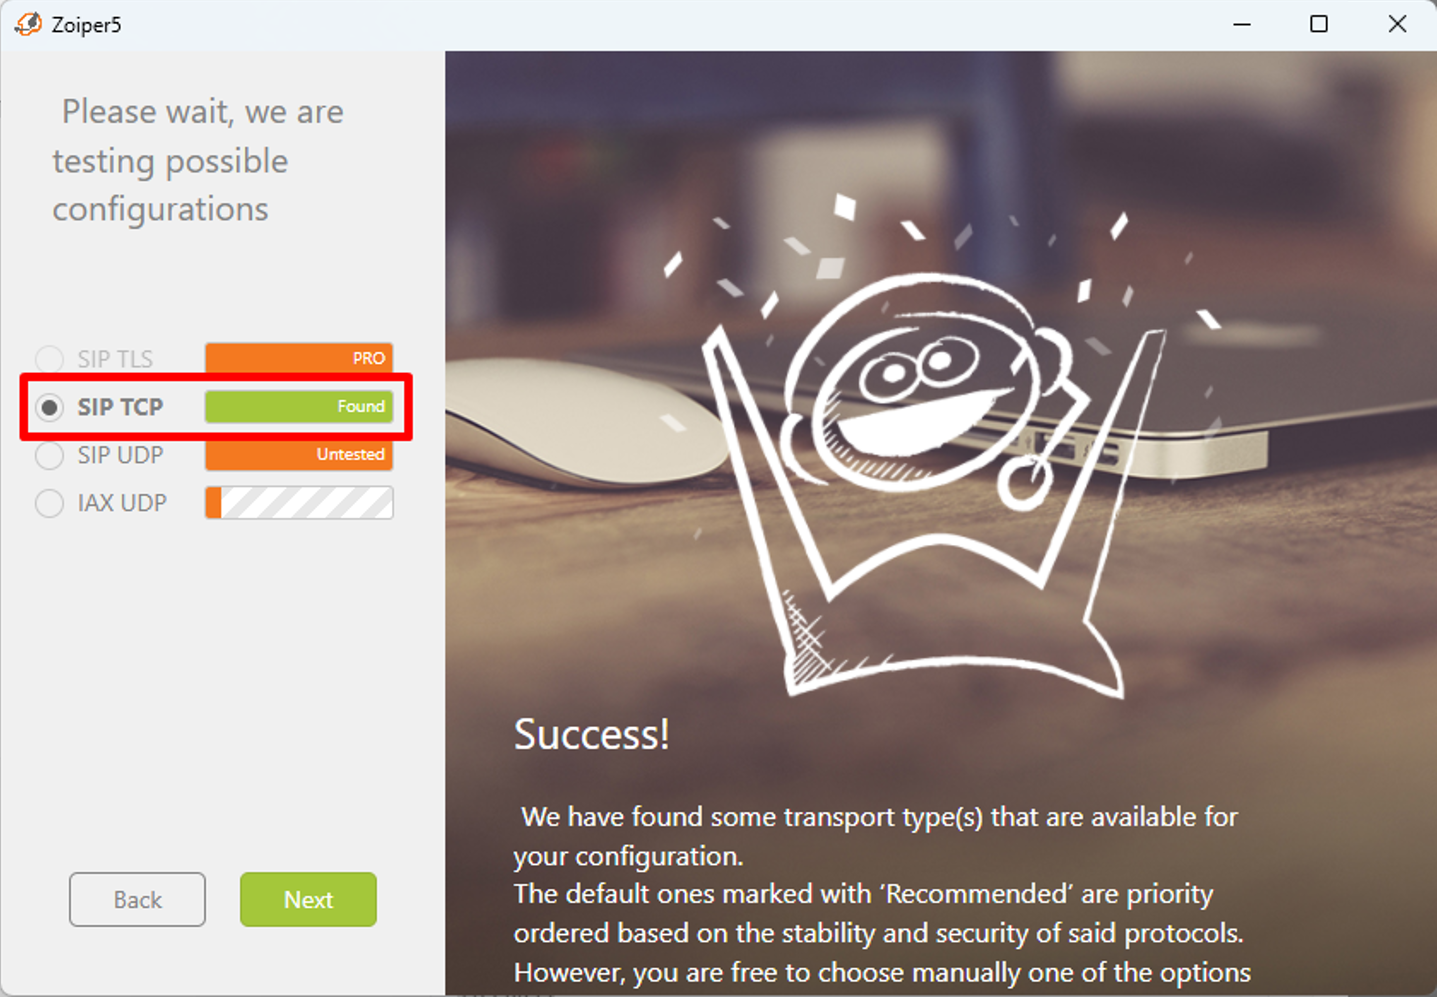
In the next interface (Image 24), if there are SIP TCPs:
“Found”: Successful connection => select “Next”.
“Not found”: Connection failed => user checks domain server and Port again.
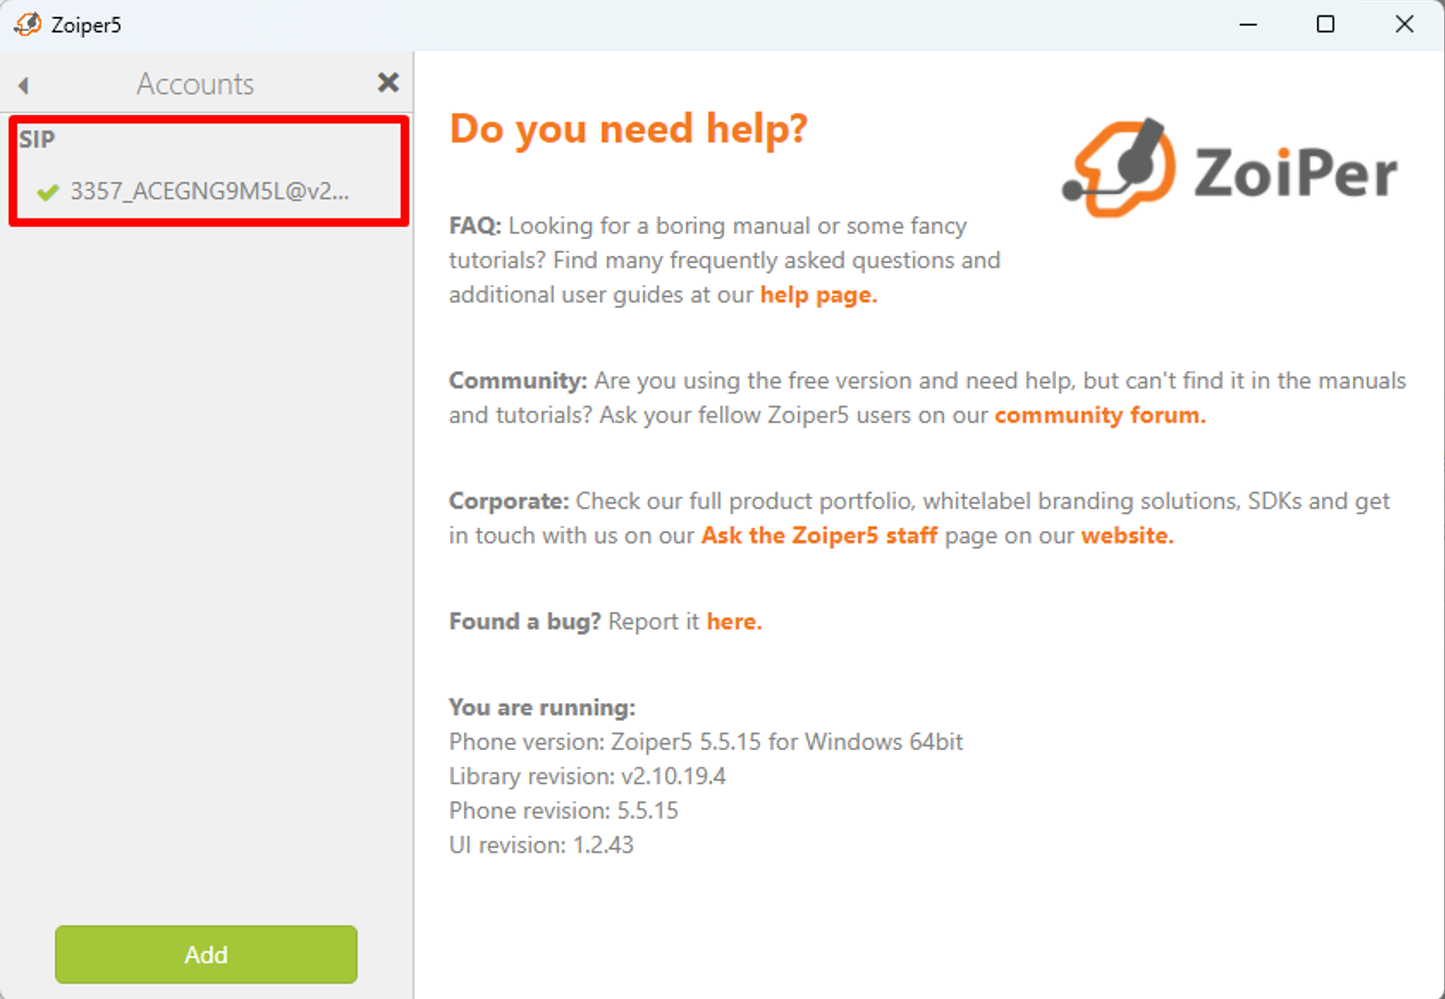
In the next interface (Image 25), if SIP account information is displayed, the configuration has been successful.
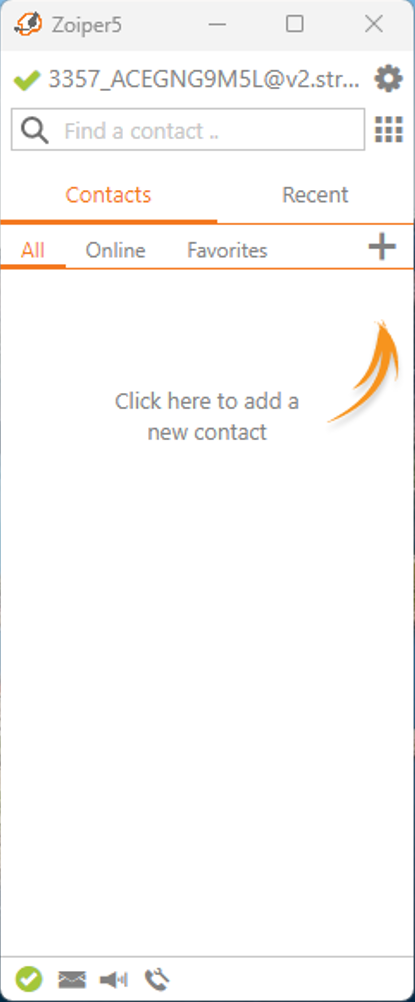
Users return to Zoiper's main interface to use the application.
Last updated