StringeeX
StringeeXContact UsIntegration
English
English
  • I. Introduction
    • 1. Register a new account
    • 2. Log in - Log out
    • 3. Change user information
    • 4. Making outbound calls
    • 5. Receive inbound calls
    • 6. Actions in the call
    • 7. Account Status
  • II. System Features
    • 1. Dashboard
      • 1.1. Inbound calls
      • 1.2. Outbound calls
      • 1.3. Chats
      • 1.4. Tickets
      • 1.5. Campaign
    • 2. Company
      • 2.1. Company management
      • 2.2. Company details
      • 2.3. Create a company filter
    • 3. Contact
      • 3.1. Contact management
      • 3.2. Contact details
      • 3.3. Create contact filter
    • 4. Ticket
      • 4.1. Ticket management
      • 4.2. Ticket details
      • 4.3. Advanced filter for tickets
    • 5. Advanced filter
    • 6. Reports
      • 6.1 Statistical reports
        • 6.1.1 Call
          • Call reports
          • Call history reports
          • Report on call center performance by time
          • ACD(Automatic Call Distributor) performace
          • History of call distribution to agent
        • 6.1.2 Chat
          • Chat statistics
          • Chat history
          • Agent's chat performance
        • 6.1.3 Agent
          • Agent activity report
          • Agent performance
          • Agent status change history
          • Agent status report
          • Report agent by ticket fields
        • 6.1.4 Ticket
          • Ticket report
          • Deleted ticket report
          • Report of ticket by drop-down field
        • 6.1.5 SMS
          • SMS report
          • SMS history report
        • 6.1.6 SLA
        • 6.1.7 Outbound call campaign
          • Customer report
          • Call report
        • 6.1.8 Email campaign
          • Email campaign report
          • Survey summary report
        • 6.1.9 eKYC
      • 6.2 Real-time monitoring
        • 6.2.1 Call monitoring
        • 6.2.2 Chat monitoring
        • 6.2.3 Agent monitoring
        • 6.2.4 Queue monitoring
    • 7. Chat
      • 7.1. Chat details
      • 7.2. Chat notes
    • 8. Knowledge base
    • 9. Settings
      • 9.1 Service management (Customer service)
        • 9.1.1 Details
        • 9.1.2 Role & Permission
        • 9.1.3 Personnel list
        • 9.1.4 Configure receiving channels
          • Channels
            • Queue
            • IVR Tree
            • Hotline numbers
            • Routing
            • Greeting message file
            • Blacklist numbers
            • Call settings
            • SIP account
          • Internet calls
          • Email
          • Live chat
          • General configuration
          • Facebook
          • Zalo
        • 9.1.5 Ticket configuration
          • Ticket field configuration
          • Marco
      • 9.2 HR & Team management
        • 9.2.1 Personnel
          • Agent list management
          • Set up personnel information
        • 9.2.2 Group
          • Group list management
          • Create a group
      • 9.3 Field configuration
        • 9.3.1 Contact field
        • 9.3.2 Company field
        • 9.3.3 Contact data entry field
        • 9.3.4 Ticket field
      • 9.4 Trigger configuration
        • 9.4.1 Trigger introduction
        • 9.4.2 Trigger list management
        • 9.4.3 Create a new trigger
      • 9.5 SLA & Automation Configuration
        • 9.5.1 Definition of SLA - Automation
        • 9.5.2 List Management
        • 9.5.3 Create new SLA/ Automation
      • 9.6 Other configurations
        • 9.6.1 Custom status
        • 9.6.2 IPs Configuration
        • 9.6.3. Display permission
        • 9.6.4 Portal configuration
          • Time zone & Language
          • Login Method
        • 9.6.5 Working time
      • 9.7 Campaign management
        • 9.7.1 Outbound call campaign
          • Types of campaigns
          • Setup a campaign
          • Steps to participate in a campaign
          • Campaigns
          • Customers
          • Agents
          • Survey template
          • Survey answers
          • Customer warehouse
        • 9.7.2 SMS Campaign
          • Campaigns
          • Customers
          • Campaign history
        • 9.7.3 Email campaign
          • Campaigns
          • Customers
          • Survey template
          • Email template
          • Sendgrid account list
          • Survey answers
          • Do-not-send email list
      • 9.8 Integration
      • 9.9 Knowledge base
      • 9.10 Payment
        • 9.10.1 Topup
        • 9.10.2 Plans
        • 9.10.3 Payment history
      • 9.11 Stringee connection
  • III. Mobile app
    • IOS APP
      • 1. Log in
      • 2. Ticket
      • 3. Contact
      • 4. Make a call
      • 5. Call history
      • 6. Setting
      • 7. Set up call notifications on the phone app
    • Android APP
      • 1. Log in
      • 2. Ticket
      • 3. Contact
      • 4. Make a call
      • 5. Call history
      • 6. Settings
      • 7. Set up call notifications on the phone app
  • IV. Frequently asked questions
    • 1. Forget a password
    • 2. Change a language
    • 3. Permissions for devices (headset/microphone)
    • 4. Setting the method of call distribution for agents
    • 5. Convert contacts from one account to another completely
    • 6. Note when uploading contacts via excel file
    • 7. Delete contacts in bulk
    • 8. Merge duplicate contacts
    • 9. Check a current balance of a portal
    • 10. Manage app notifications
    • 11. Clear browser cache
    • 12. Configure IP Phone connection with Stringee contact center
    • 13. Common errors when making calls
    • 14. Log in and report Captcha Invalid error
    • 15. How to create multiple business hours
    • 16. File formats supported on StringeeX
    • 17. Instructions for getting call code (call ID)
    • 18. Using Google and Microsoft Accounts for Registration, Login, and Account Linking
    • 19. Two-factor authentication
    • 20. Incoming calls have popup but no ringtone
Powered by GitBook
On this page
  • Register using Email and Password
  • Register using Google Account
  • Step 1: Click Google Icon on the Registration Screen
  • Step 2: Select Your Google Account to Log In
  • Step 3: Authorize Your Google Account Information for our application
  • Step 4: Enter Additional Information
  • Log In using Google Account
  • Step 1: Access the Login Screen and Choose Google Account Login Method
  • Step 2: Select Your Google Account to Log In and Authorize Login
  • Linking Newly Account with Existing Account
  • Step 1: Click the Link Account Button
  • Step 2: Enter the Email Address of the StringeeX Account to Link
  • Step 3: Enter the Verification Code
  • Manage Linked Accounts
  • Step 1: Log in and Access the Account Management Screen
  • Step 2: Select the Linked Accounts Tab
  1. IV. Frequently asked questions

18. Using Google and Microsoft Accounts for Registration, Login, and Account Linking

Previous17. Instructions for getting call code (call ID)Next19. Two-factor authentication

To enhance convenience, Stringee provides the feature of registering using Google and Microsoft accounts on both the Stringee and StringeeX platforms. This feature saves time and provides a convenient and fast login experience. Additionally, linking a newly registered account with an existing one helps maintain personalization and seamlessly transfers data without losing login information or transaction history. This flexibility is valuable for managing multiple accounts. Users can use both email addresses to log in, simplifying account and login information management. Moreover, it is beneficial for sharing specific access rights with different individuals by using multiple login accounts.

Finally, administrators can manage login methods for their company's portal by integrating StringeeX with the authentication system. This involves sending login activity information to the pre-set path, allowing your system to track and record login activities for analysis and security purposes, enhancing safety and monitoring during agent login into the system.

Register using Email and Password

You can register similar .

Register using Google Account

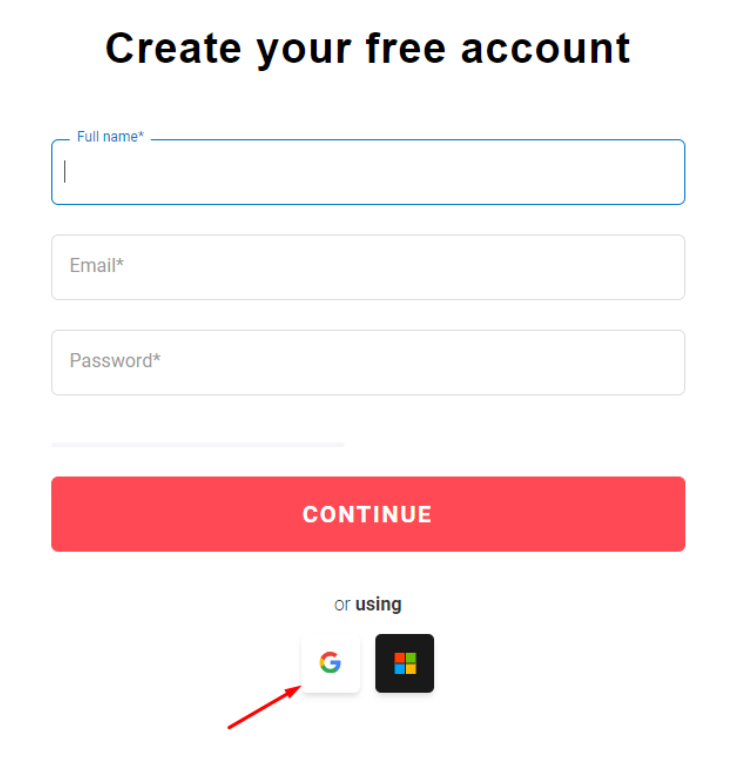
Step 1: Click Google Icon on the Registration Screen

Step 2: Select Your Google Account to Log In
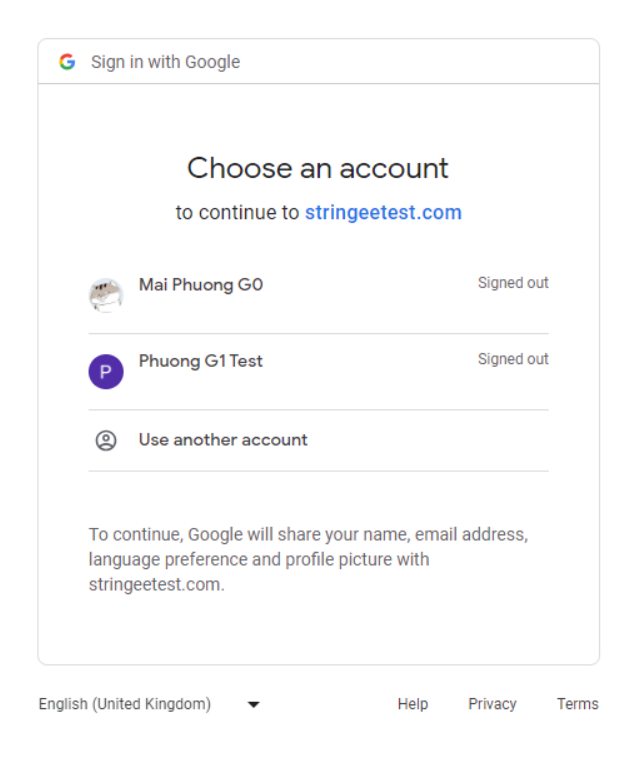
Step 3: Authorize Your Google Account Information for our application
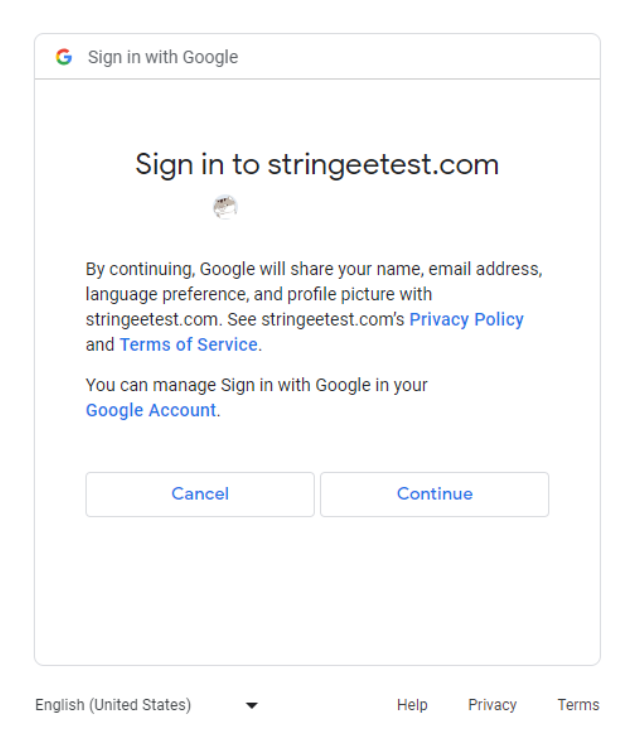
Note: Stringee only accesses limited information such as name, profile picture, and email address. It also receives authorization to log in to your Google account without needing the password.

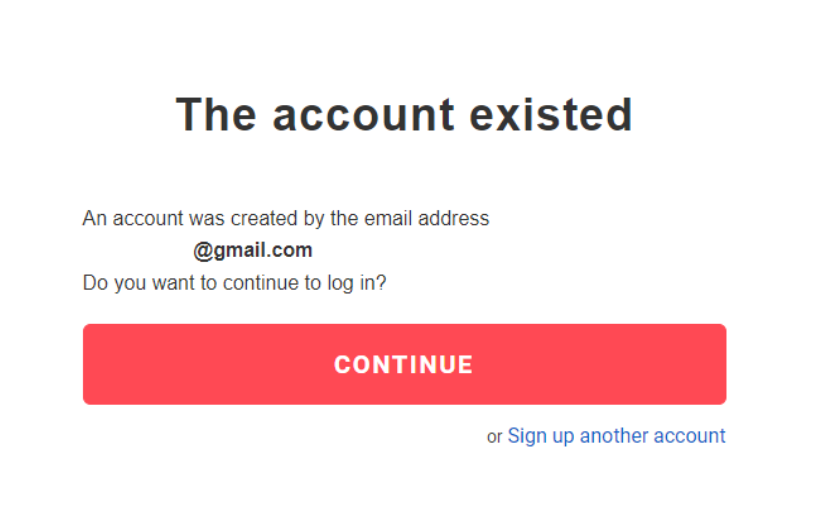
To successfully register, ensure your Google account has not been used to register on StringeeX. If the account is already registered, the screen will display a button to help you log in as follows:

If your Google account is valid (has not been used to register on StringeeX), you can proceed to step 4.

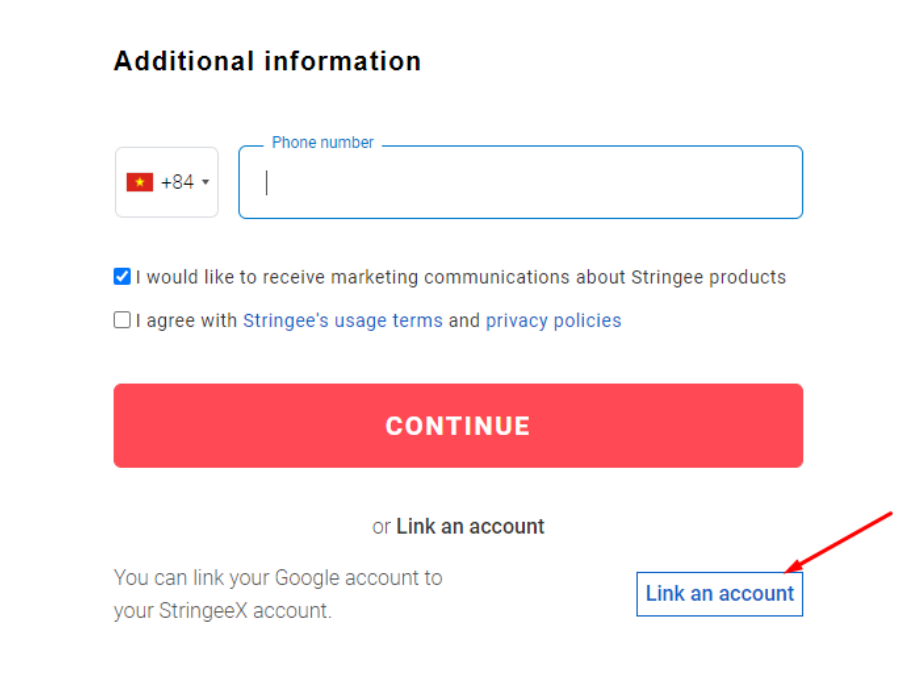
Step 4: Enter Additional Information
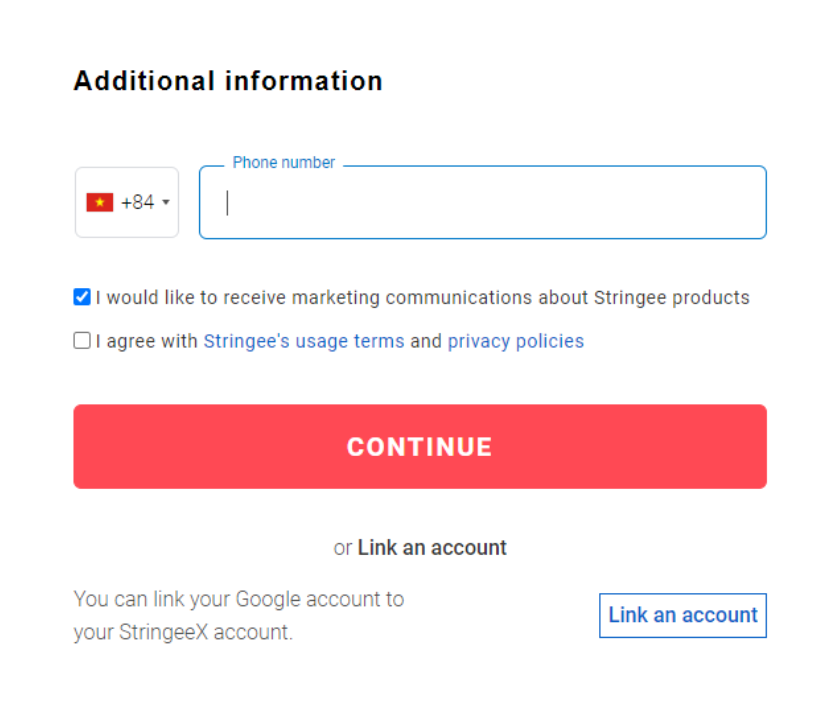
  • Optionally, enter your phone number.

  • Check 'Agree to Terms of Use and Privacy Policy.'

  • Optionally, select 'Agree to receive emails' if you want to receive marketing emails from Stringee.’

  • Click "Continue."

At this point, you have completed the StringeeX account registration process using a Google account. You can use the Google account to log in (see login details below) and access StringeeX features and services.

Registering using a Google account enables automatic authentication for your account.

Log In using Google Account

Step 1: Access the Login Screen and Choose Google Account Login Method
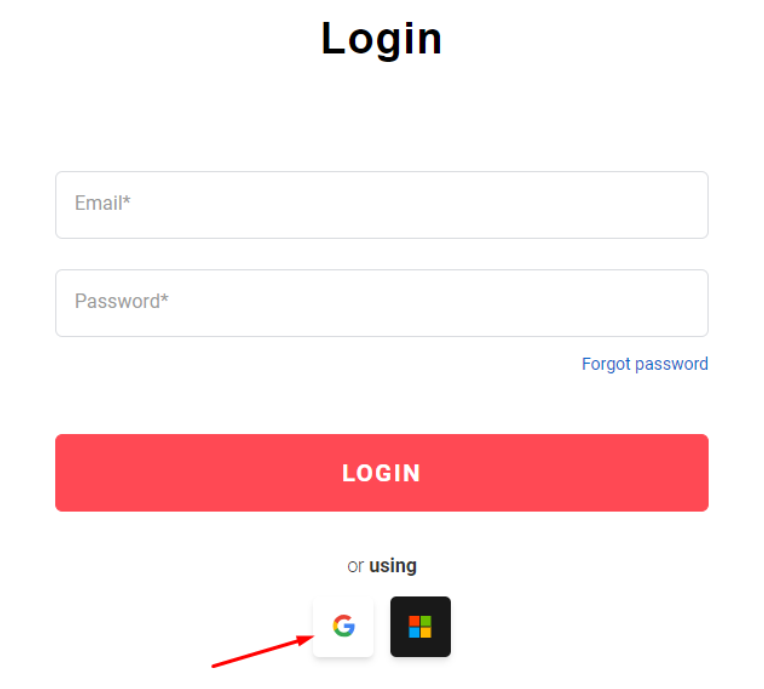
Step 2: Select Your Google Account to Log In and Authorize Login
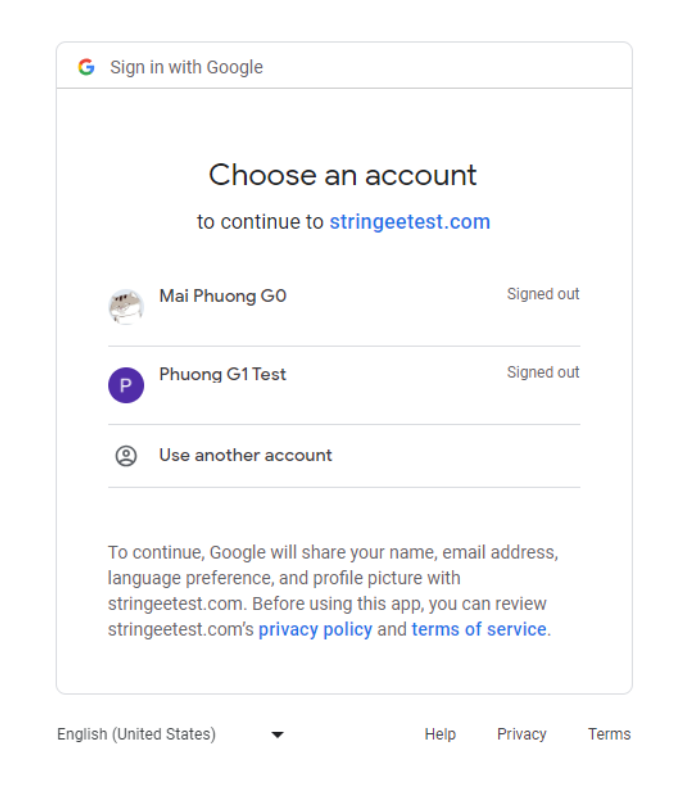
If the Google account is authorized for our application and the access token is valid, the authorization screen will not appear.

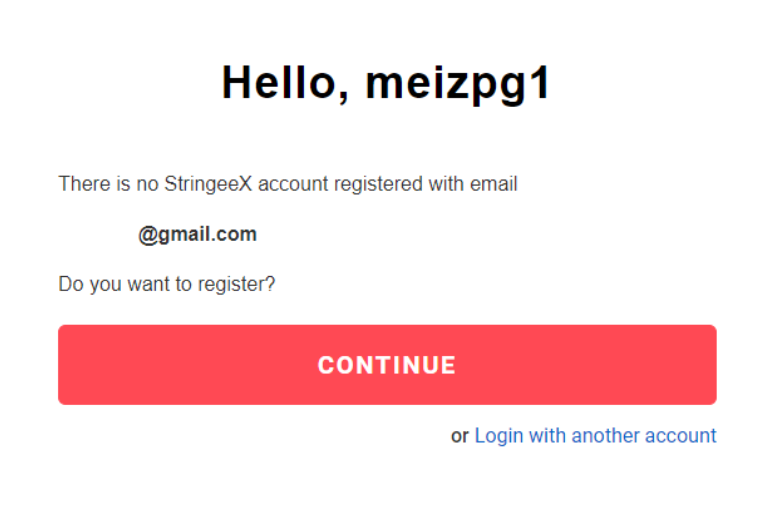
After this step, the system will check if the account is registered. If not, the following screen will be displayed:

At this point, you can proceed to register with the Google account used by clicking 'Continue'.

If already registered, the system will automatically access the account using the Google account information.

Linking Newly Account with Existing Account

Link the newly Google or Microsoft account with the account you want to use.

  • After, You follow next steps.

Step 1: Click the Link Account Button

Step 2: Enter the Email Address of the StringeeX Account to Link
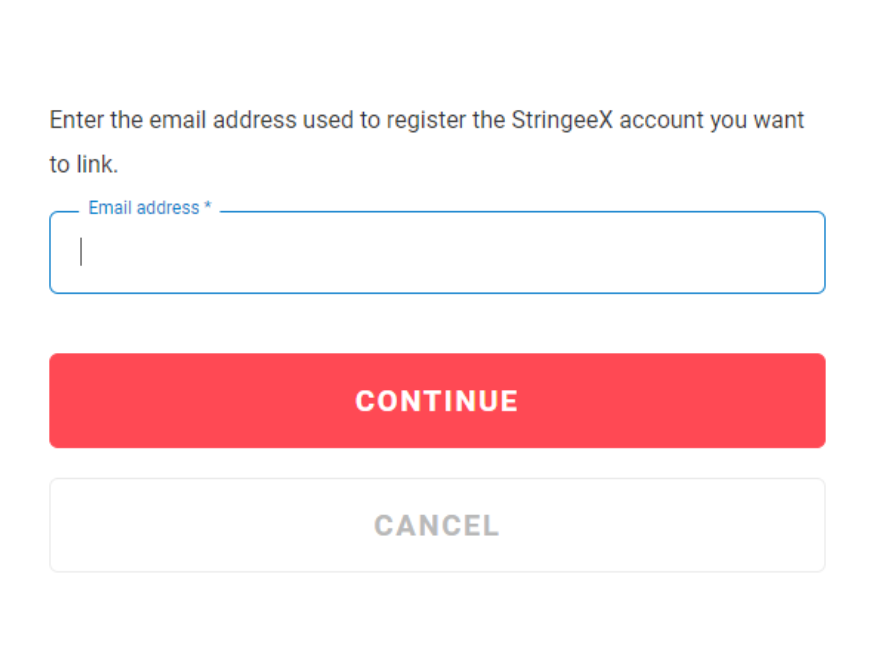
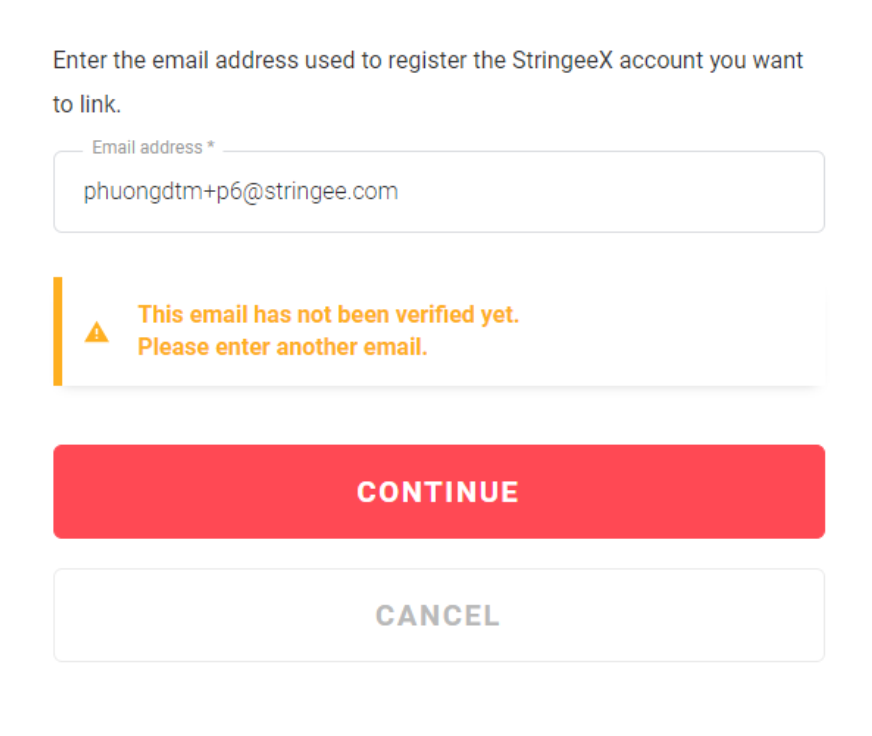
You need to enter the email address in the correct format.

Note: The entered email should be the verified email of the StringeeX account. If not, the system will display the following message:

If the entered email satisfies the conditions, the system will send an email, and you can proceed to Step 3.

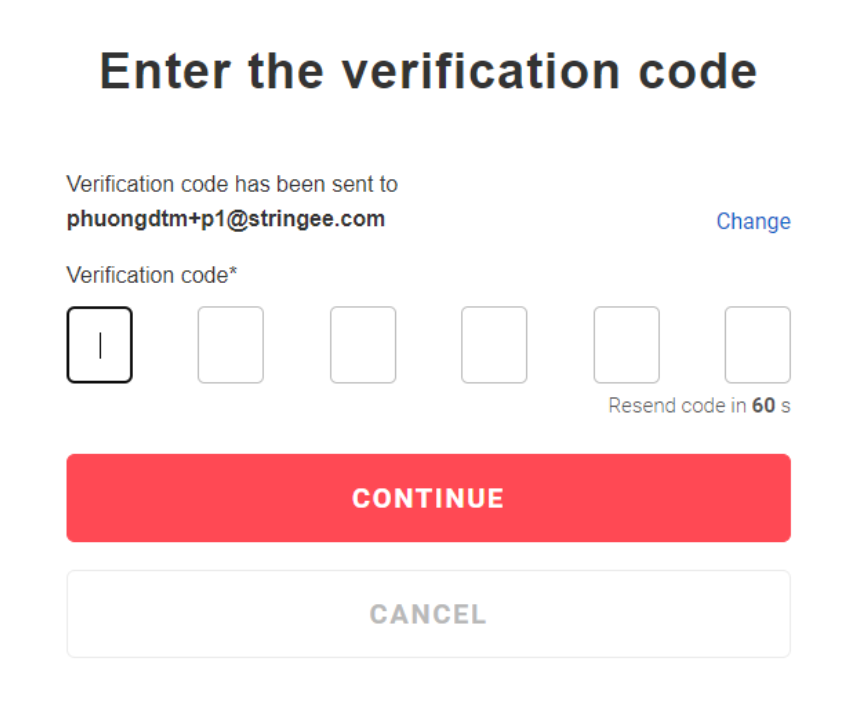
Step 3: Enter the Verification Code
  • The system sends a verification code to the email entered in Step 3.

  • The verification code consists of 6 digits and is valid for 2 minutes.

  • Check your email and enter the code in the field below.

At this step, you can change the primary email to link with another account by clicking on the 'Change' button.

If you haven't received the email or the verification code has expired, you can get a new code by clicking 'Resend Code.'

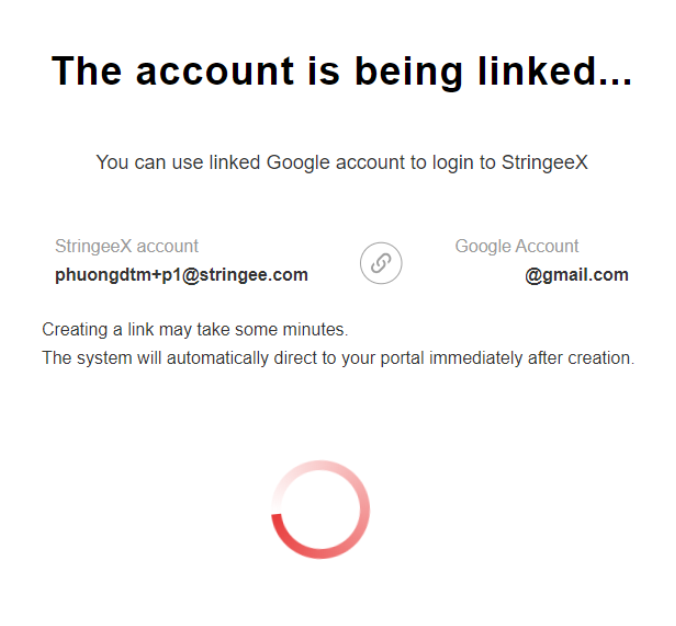
If the correct and valid code is entered, the system will link the new account to the primary account and display the following screen:

After 5 seconds, the system will allow you to access StringeeX with the information of the primary account.

Therefore, after successfully completing Step 4, you can use both email addresses to log in to StringeeX.

Manage Linked Accounts

Easily manage and control all linked accounts and the primary account through a screen on Stringee and StringeeX.

Step 1: Log in and Access the Account Management Screen
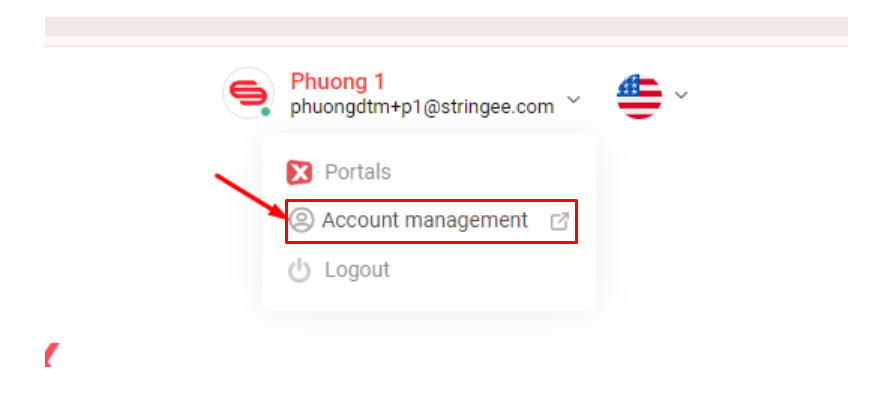
Step 2: Select the Linked Accounts Tab
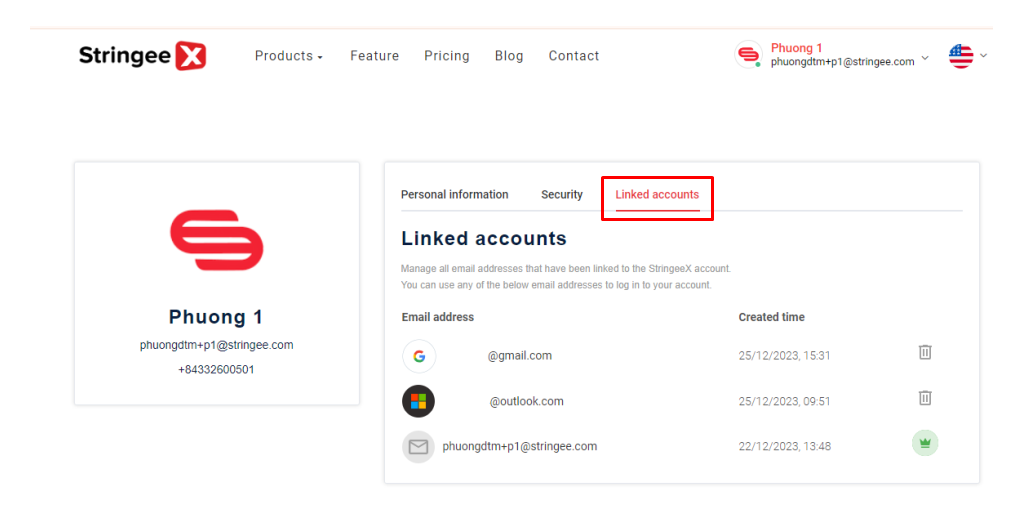
  • To view the list of account emails, click on the Linked accounts tab.

Here, you can see all account emails, including the primary email and linked emails.

  • Primary Email: The primary email of the account used in main threads such as changing the password.

  • Linked Emails: All linked emails used for logging into the primary account.

You cannot delete the primary email.

You can delete linked emails, so you cannot use the deleted email for login. This feature is useful when you do not want to share login rights for linked emails.

If you are using https://stringee.com: Log in and click on “Profile” to use this feature.

Follow Steps 1 to 3 of .

Register using Google Account
here