Marco
Definition
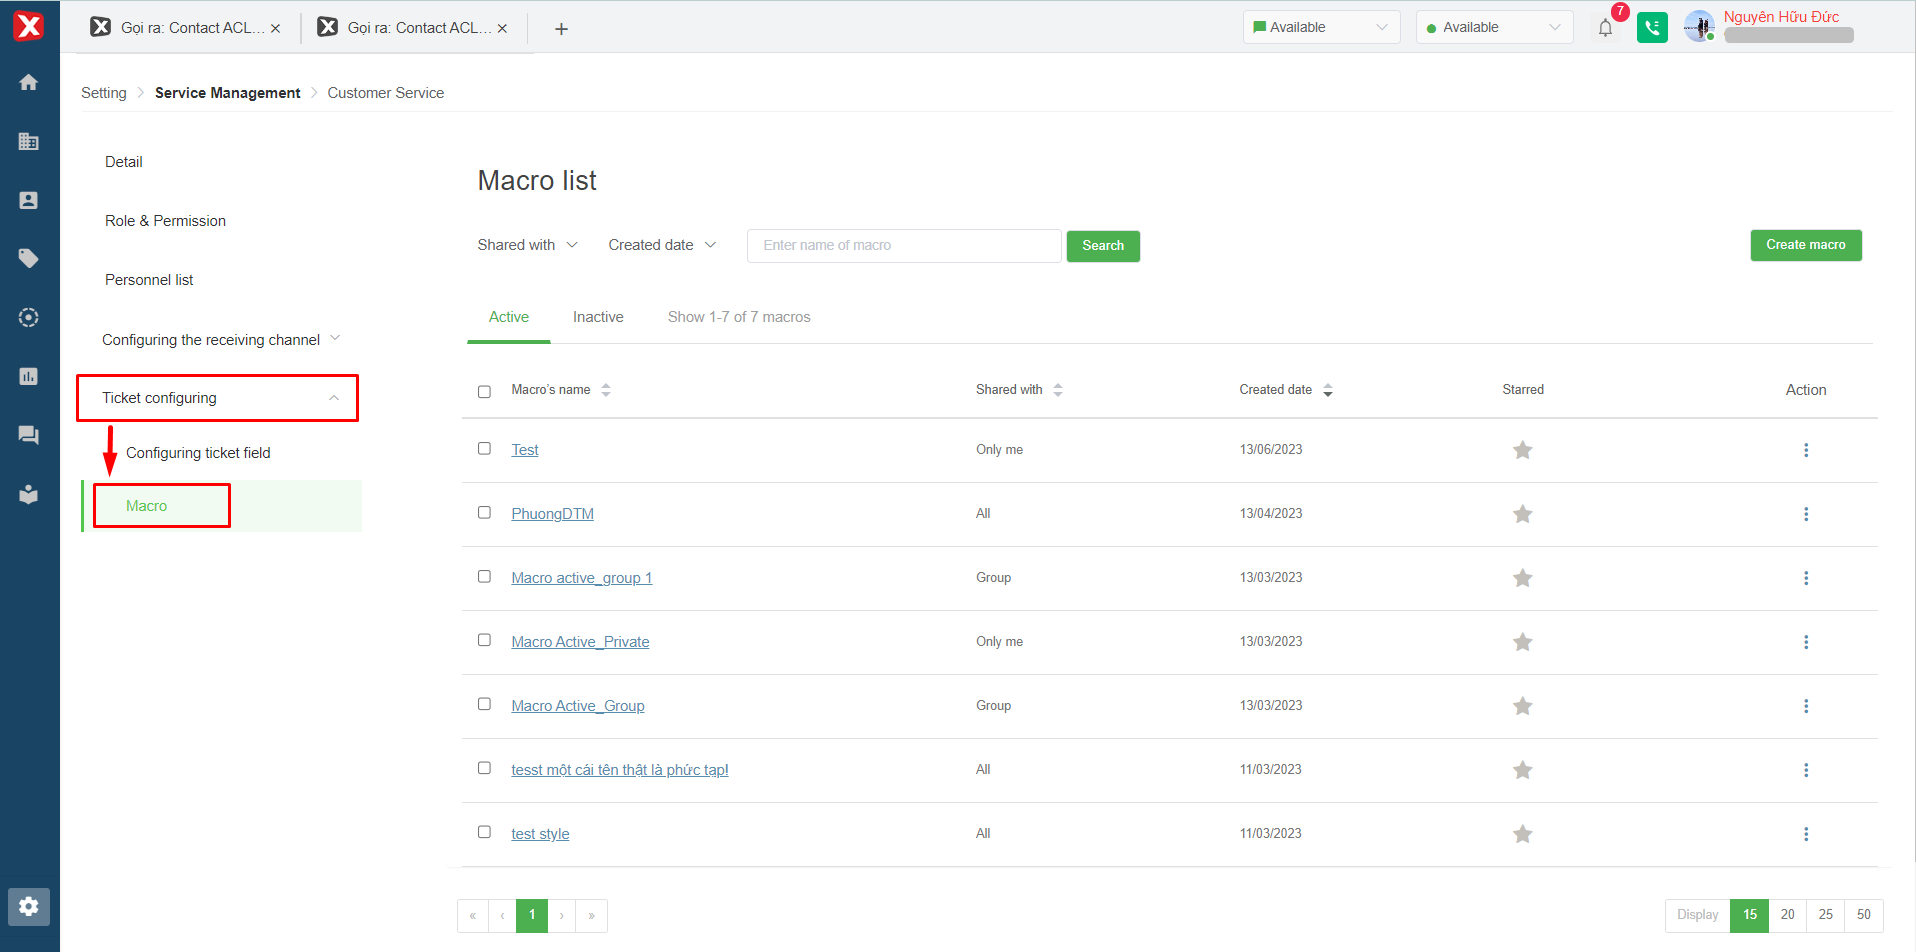
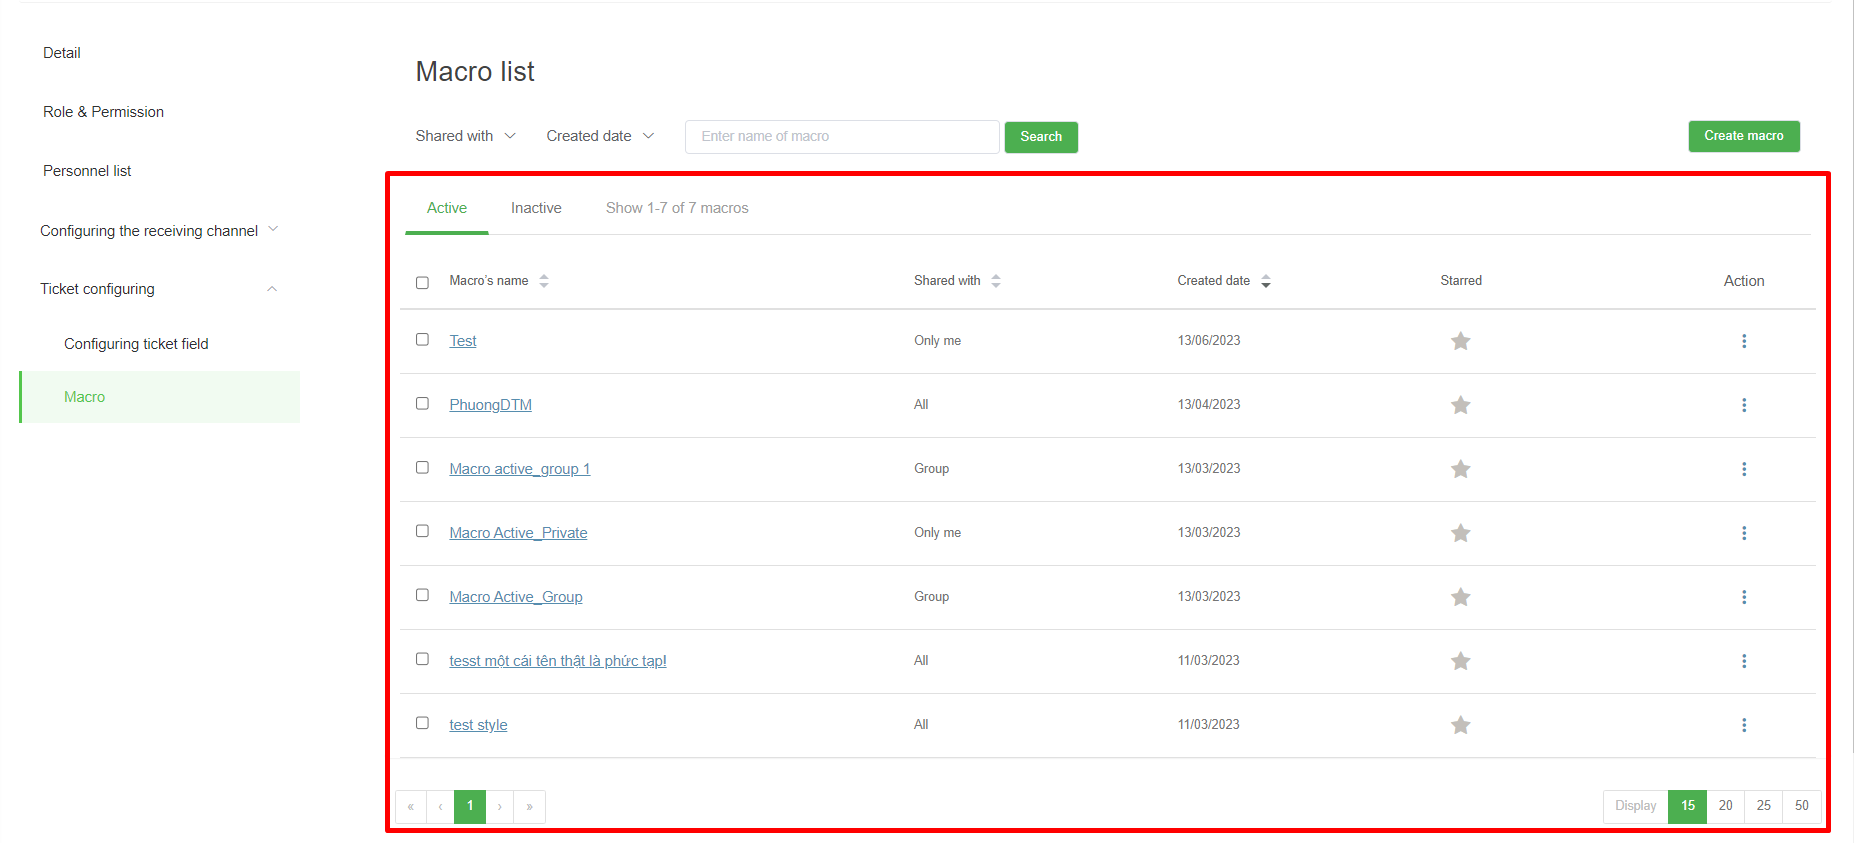
Macro filter

Statistical table of Macro
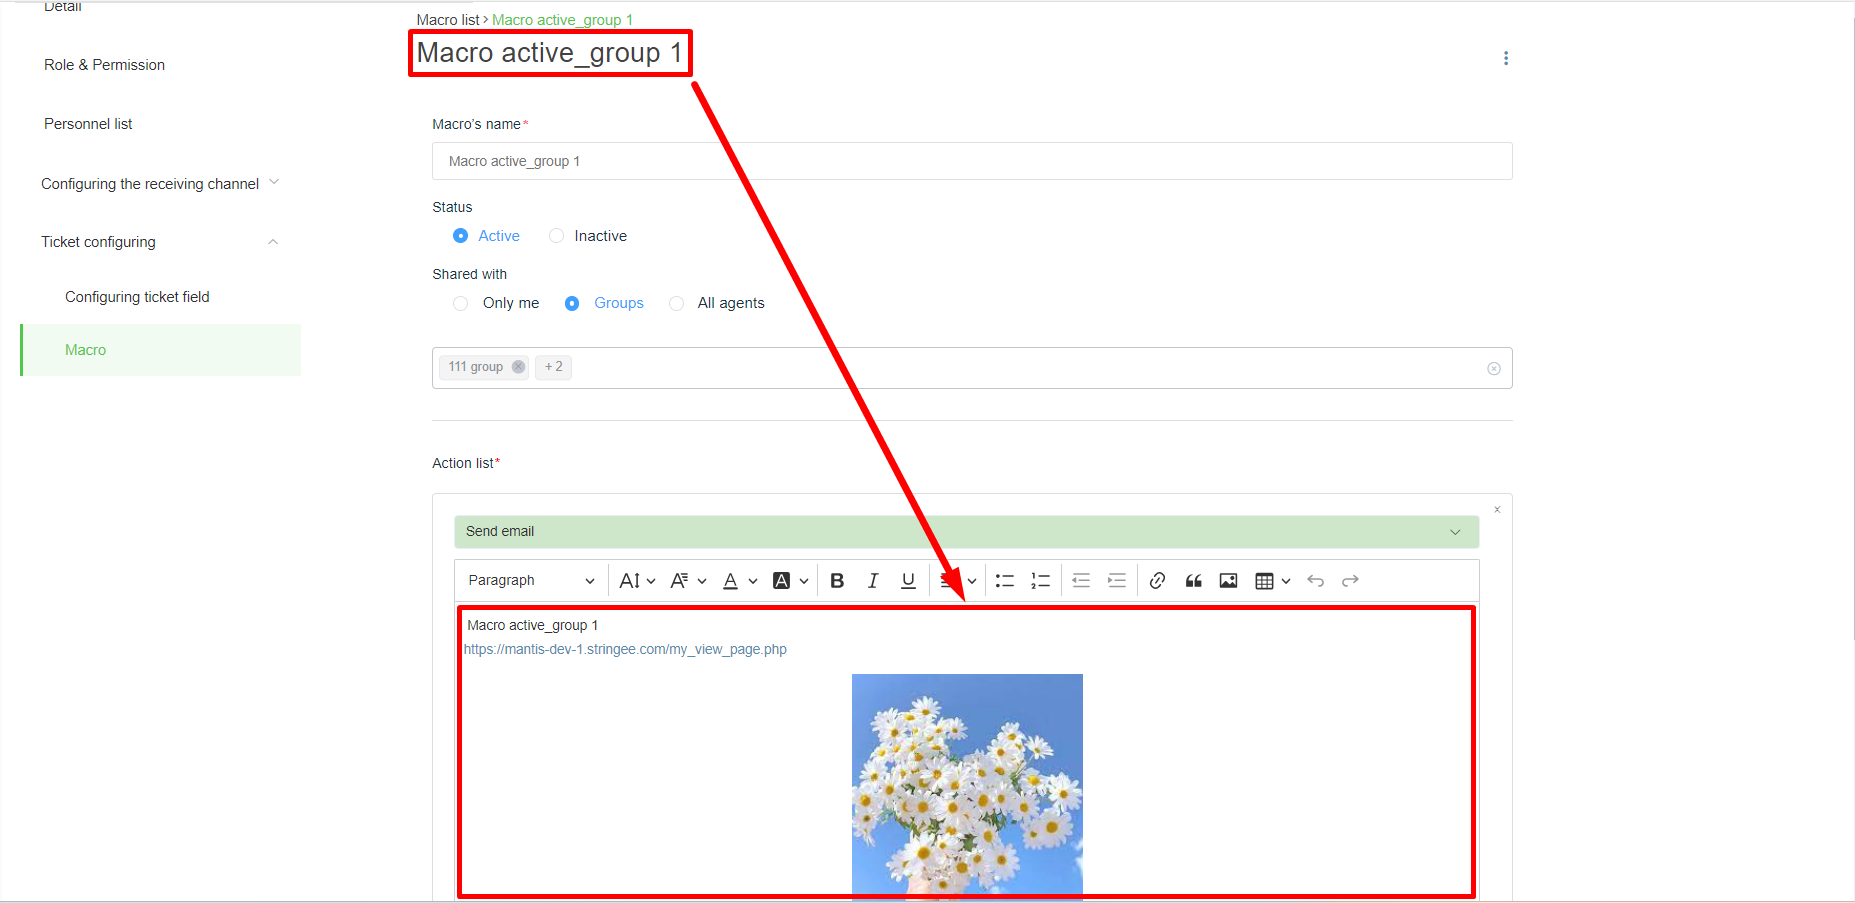
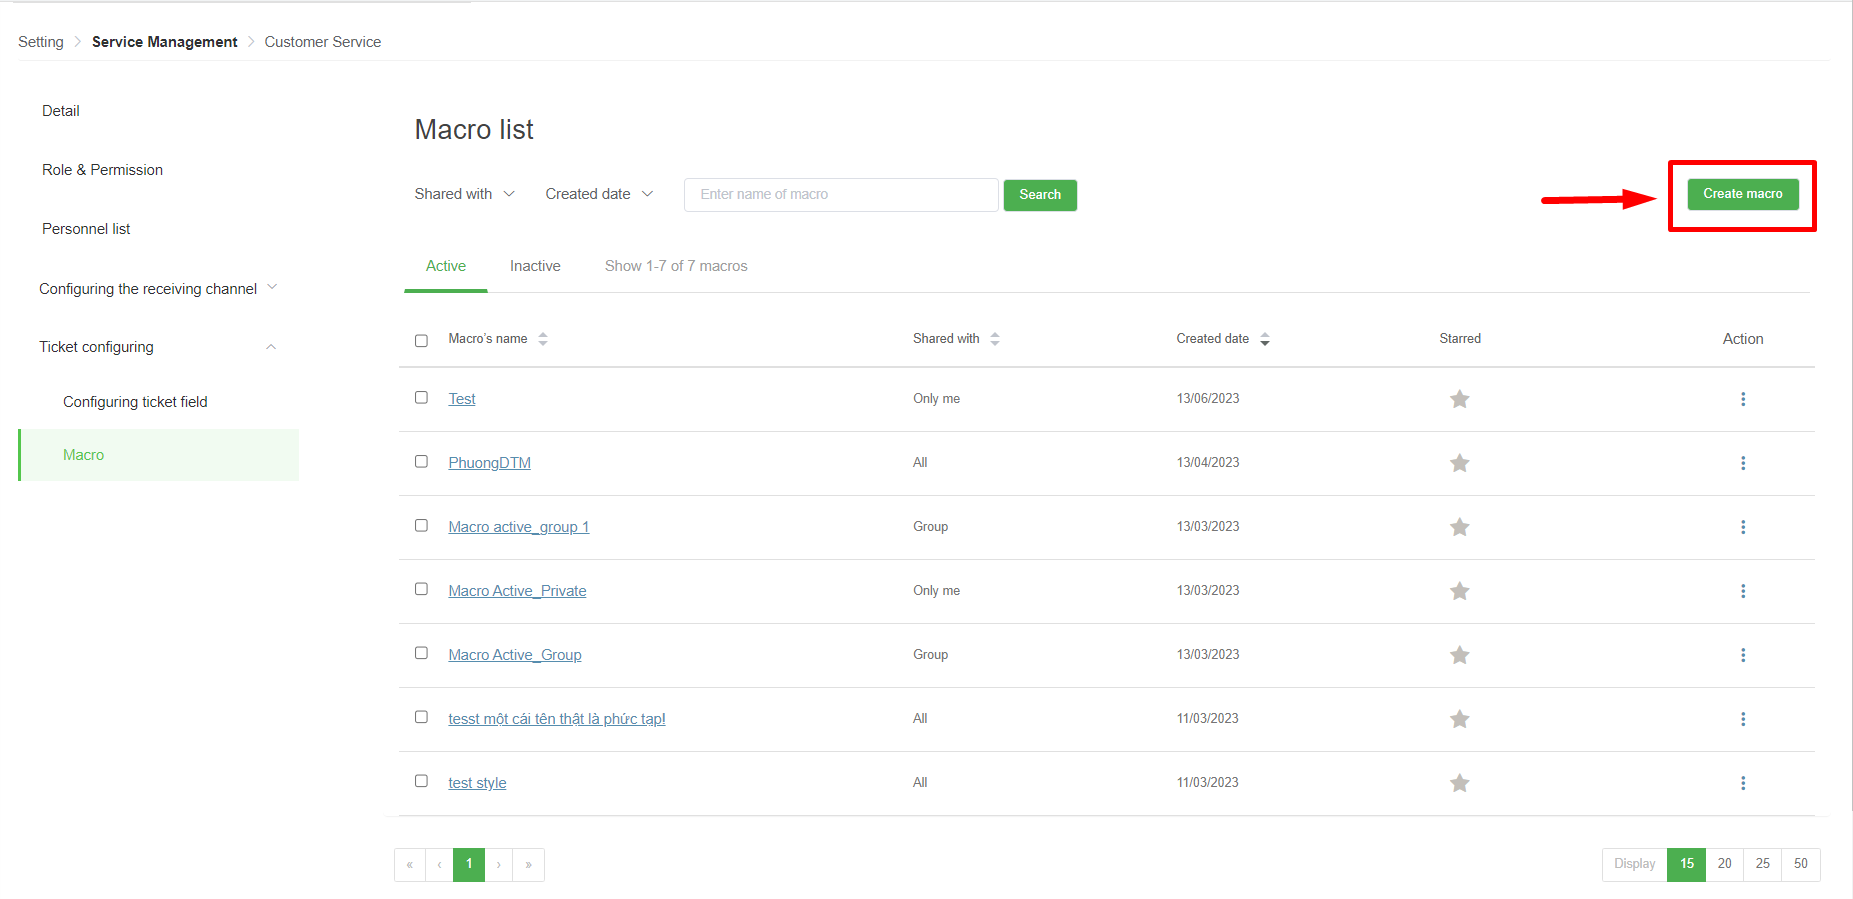
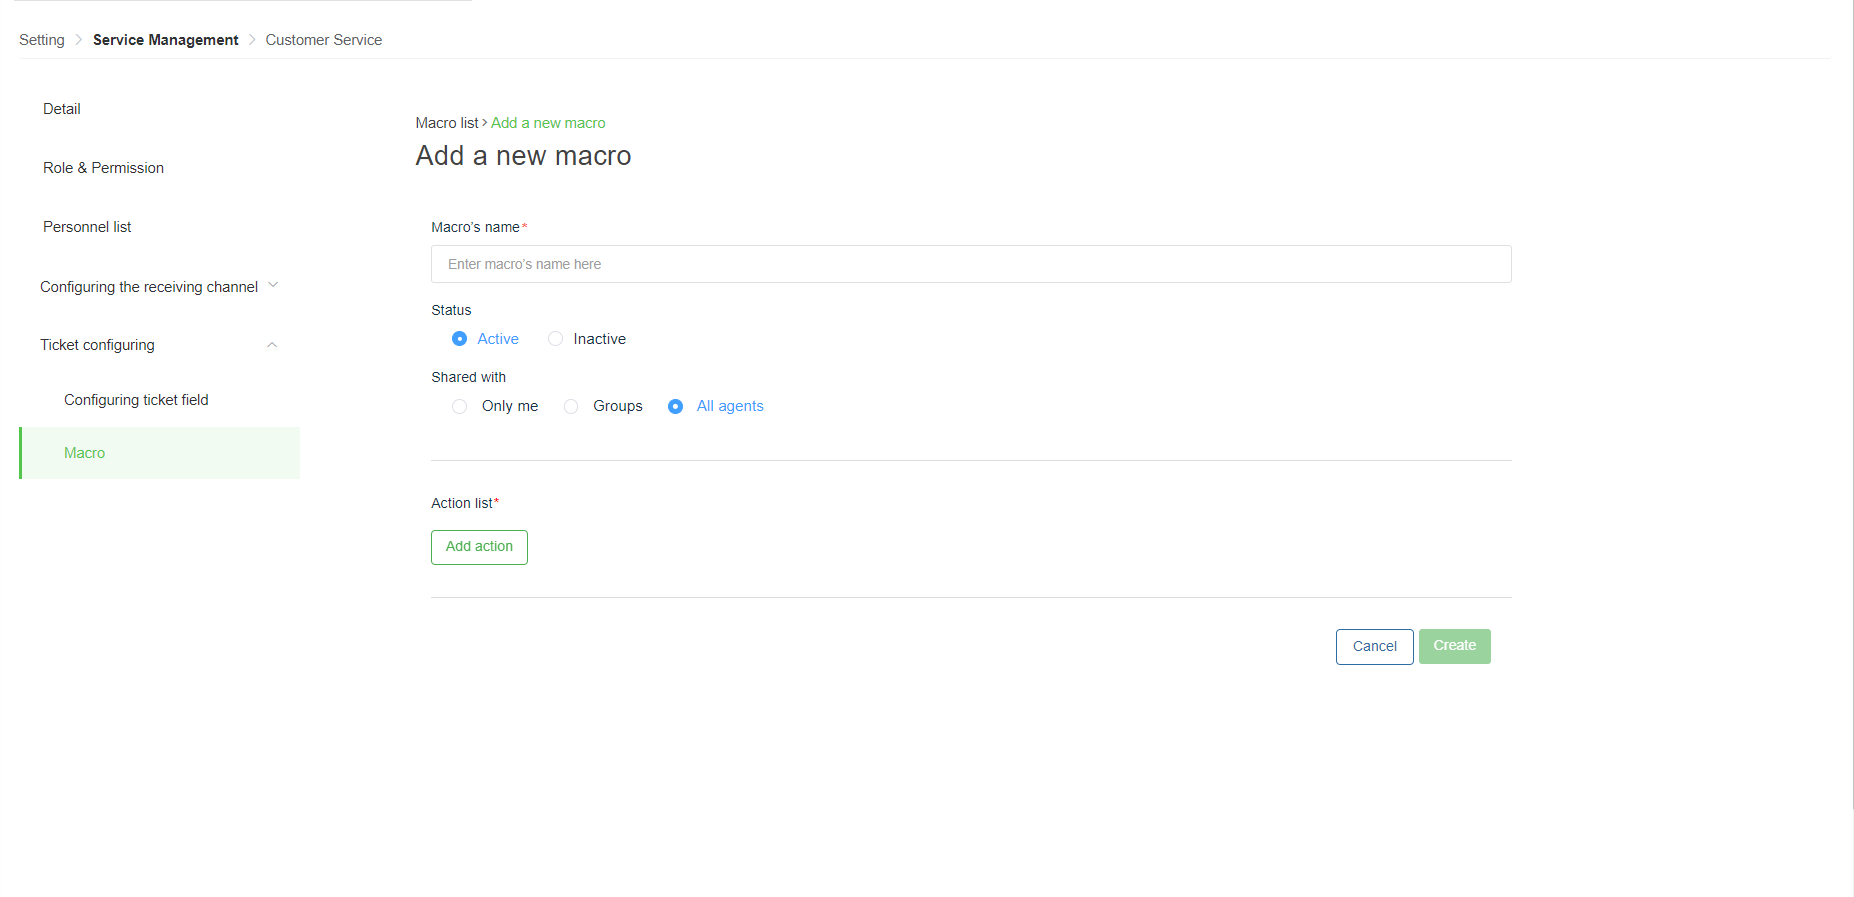
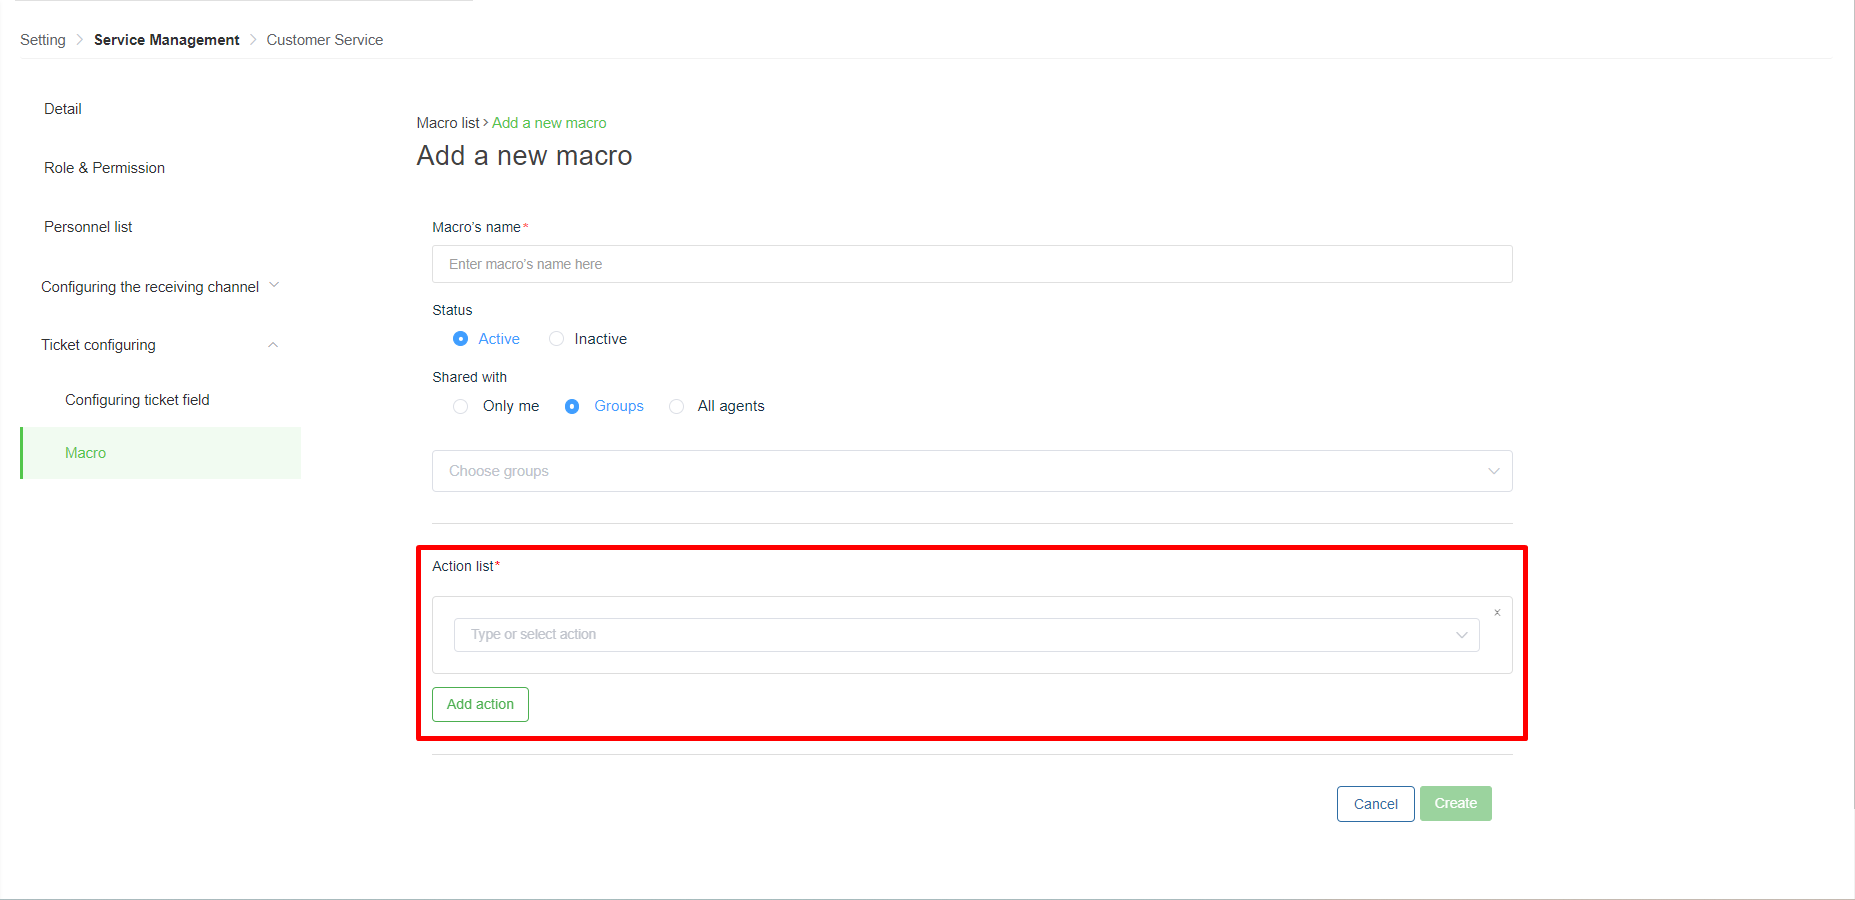
Create a Macro
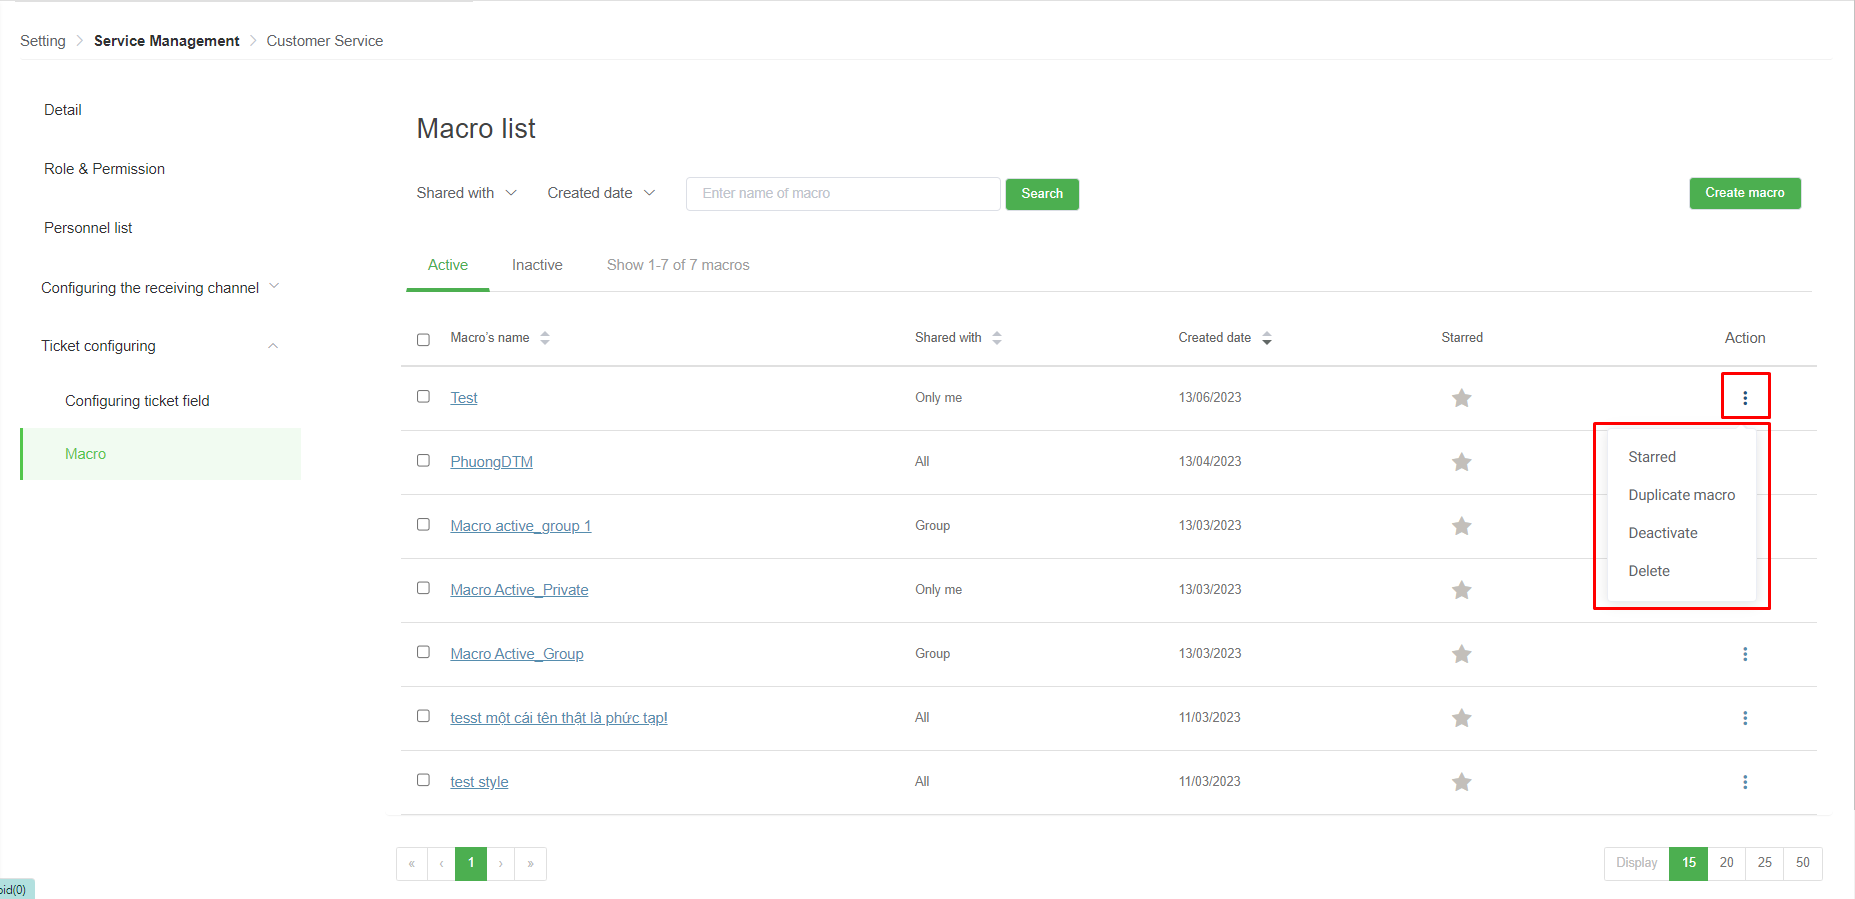
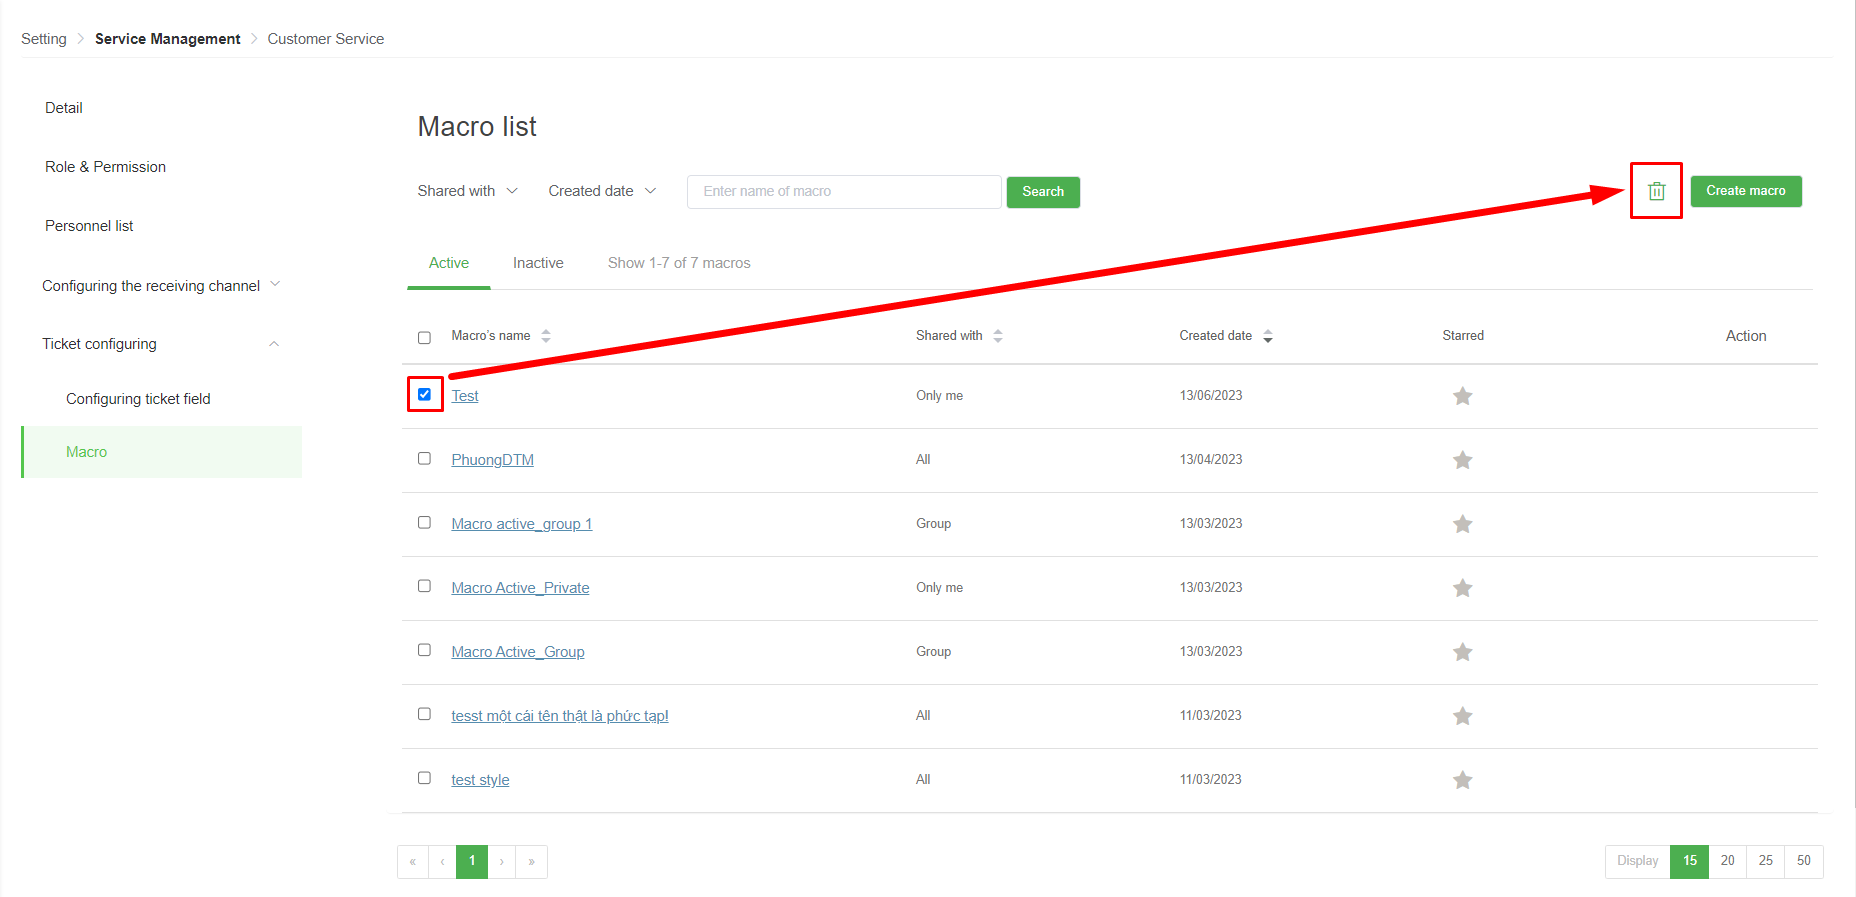
Macro configuration


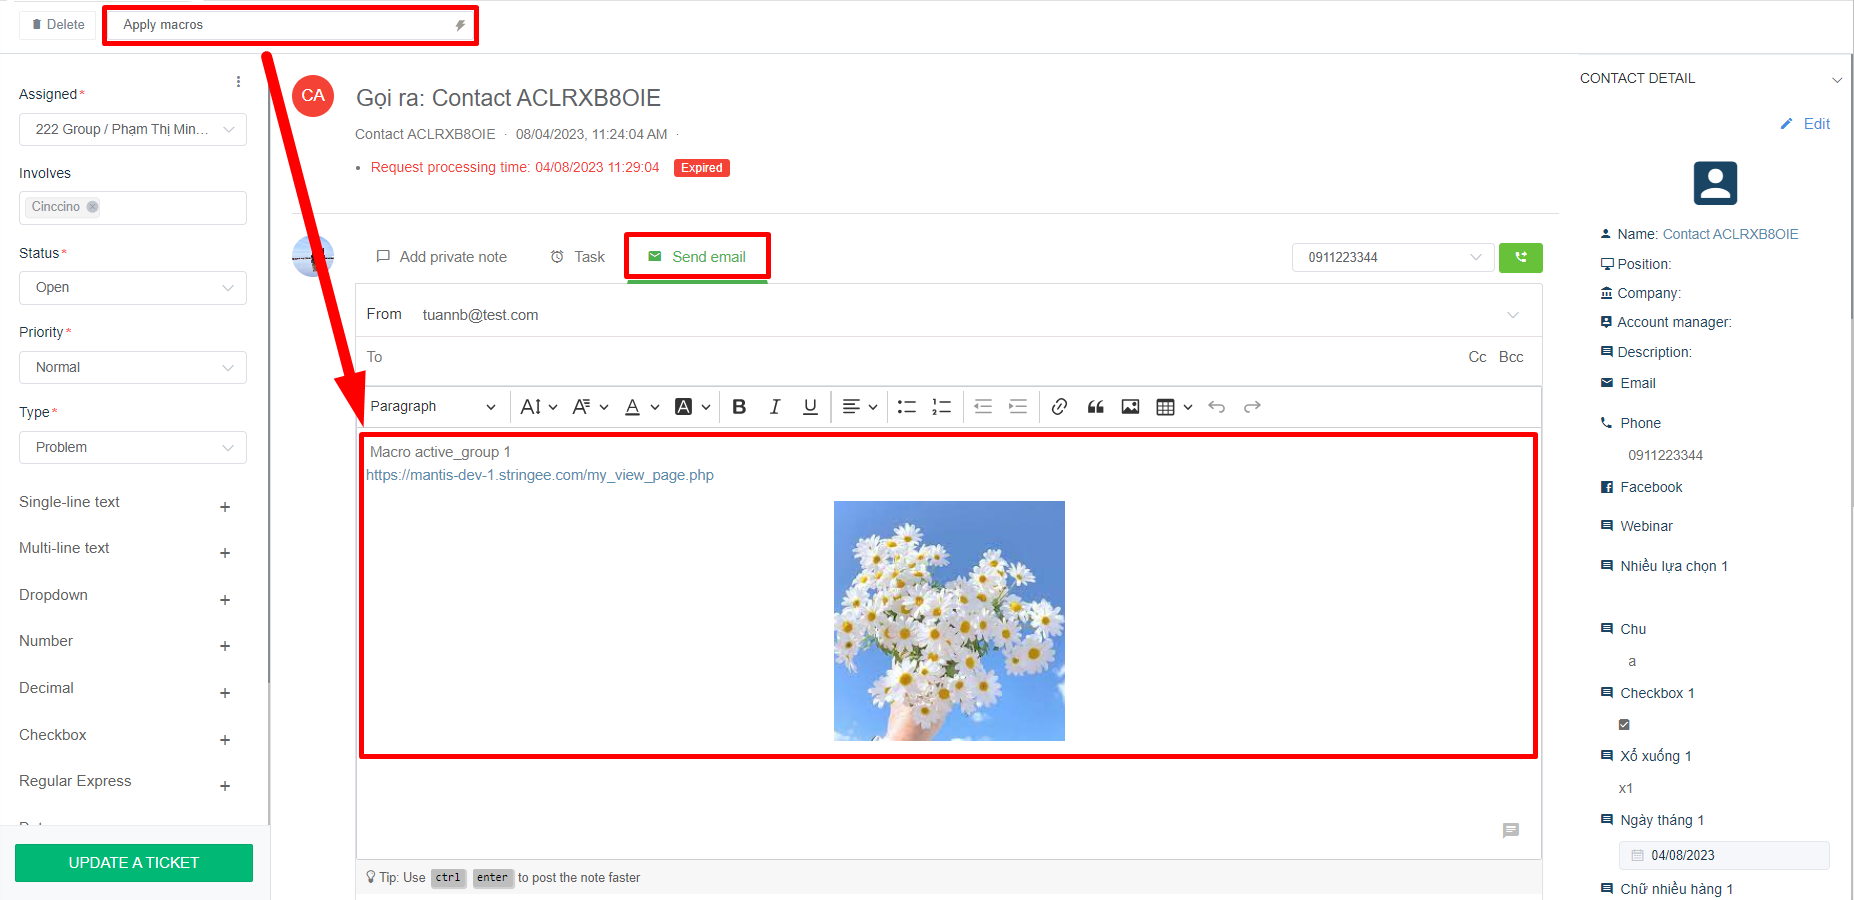
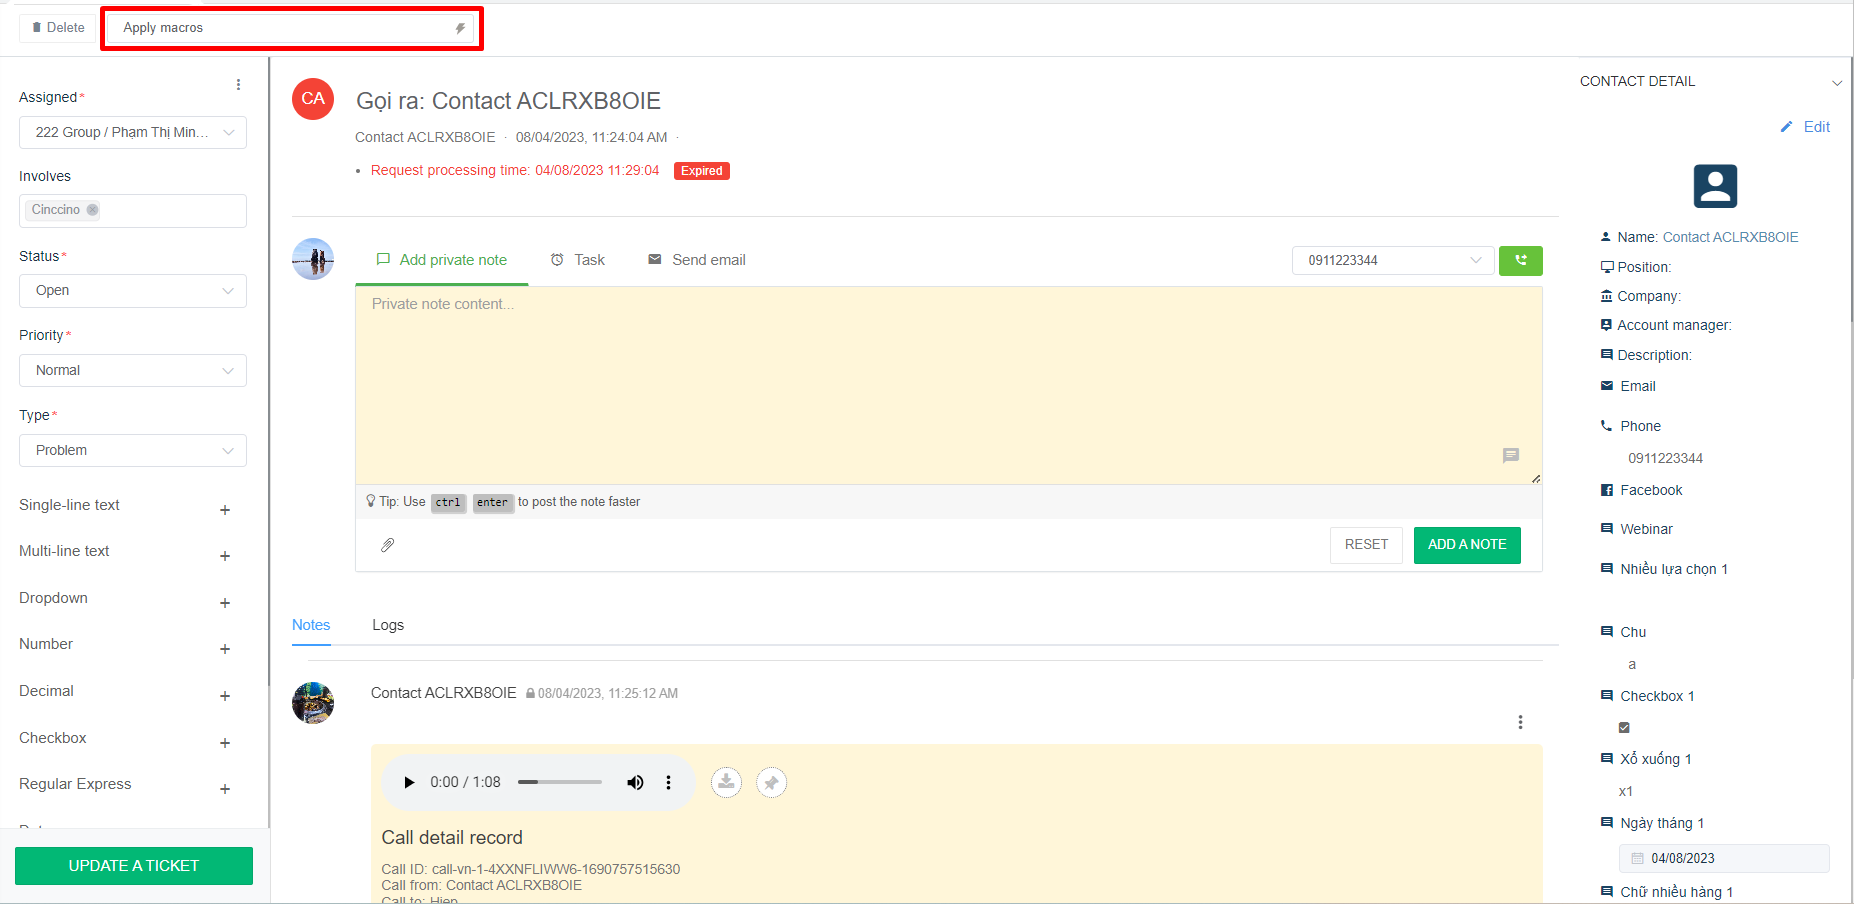
Create a Macro in a ticket
Macro to send Email