
Hotline numbers
The hotline number is a number configured as a SIP trunk, not a normal phone number, making calls through the Internet.
Create a hotline
Mobile hotline number and virtual phone number
(Note: “Virtual number” cannot make outbound calls)

When users choose to create hotline numbers on the system, they need to select the following information:
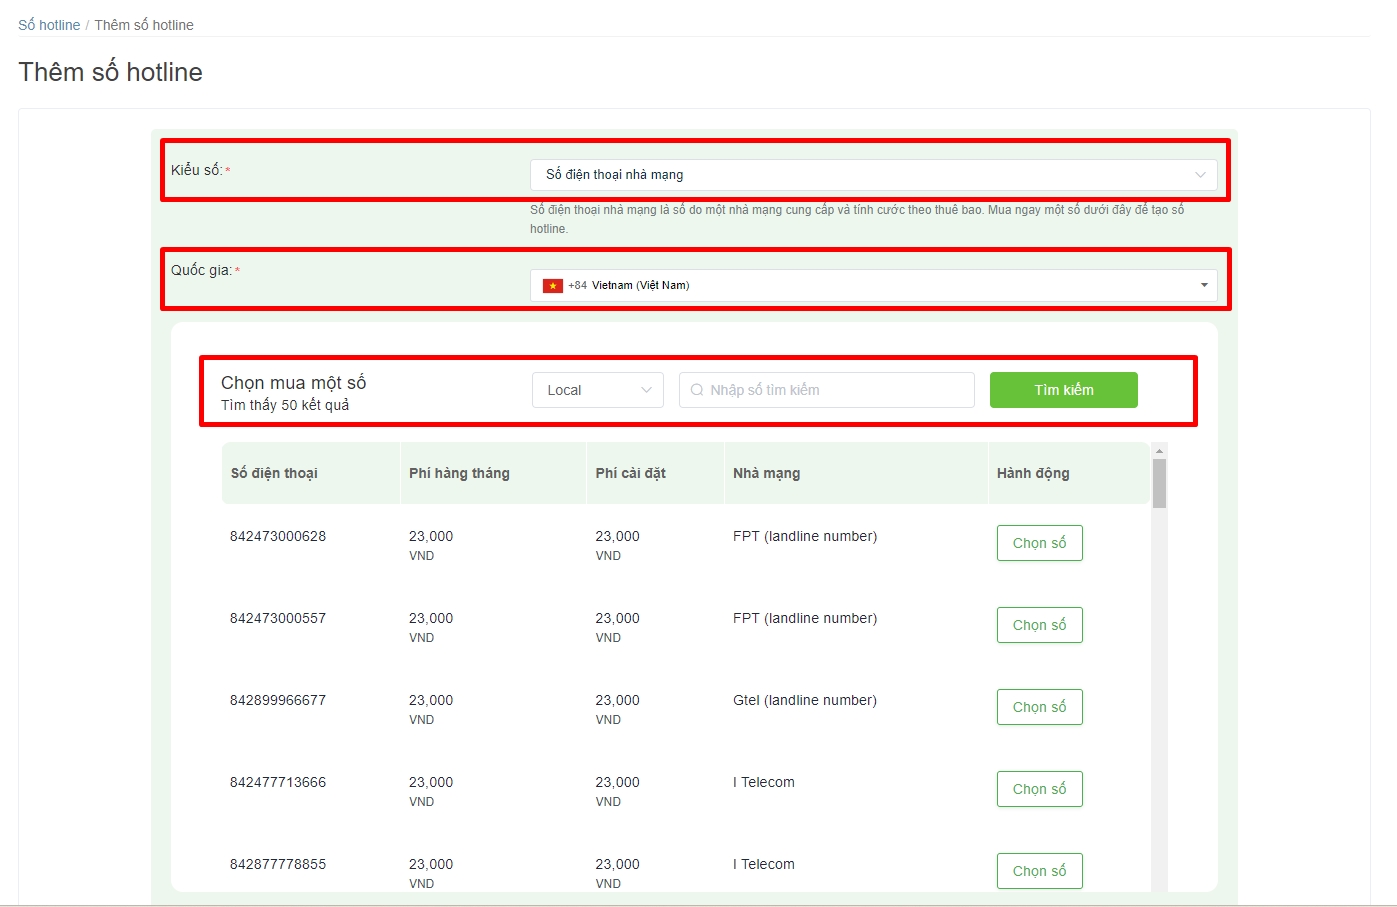
Number type: the phone number of the carrier (which is the number of normal telecommunications carriers) or virtual phone number (which is a virtual number without a specific telecommunications operator). The virtual number is used for the purpose of receiving calls, making internal calls or used as a connected slip number.
Country: the area of the hotline number.
Number type: local, mobile or toll-free depending on the purpose and needs.
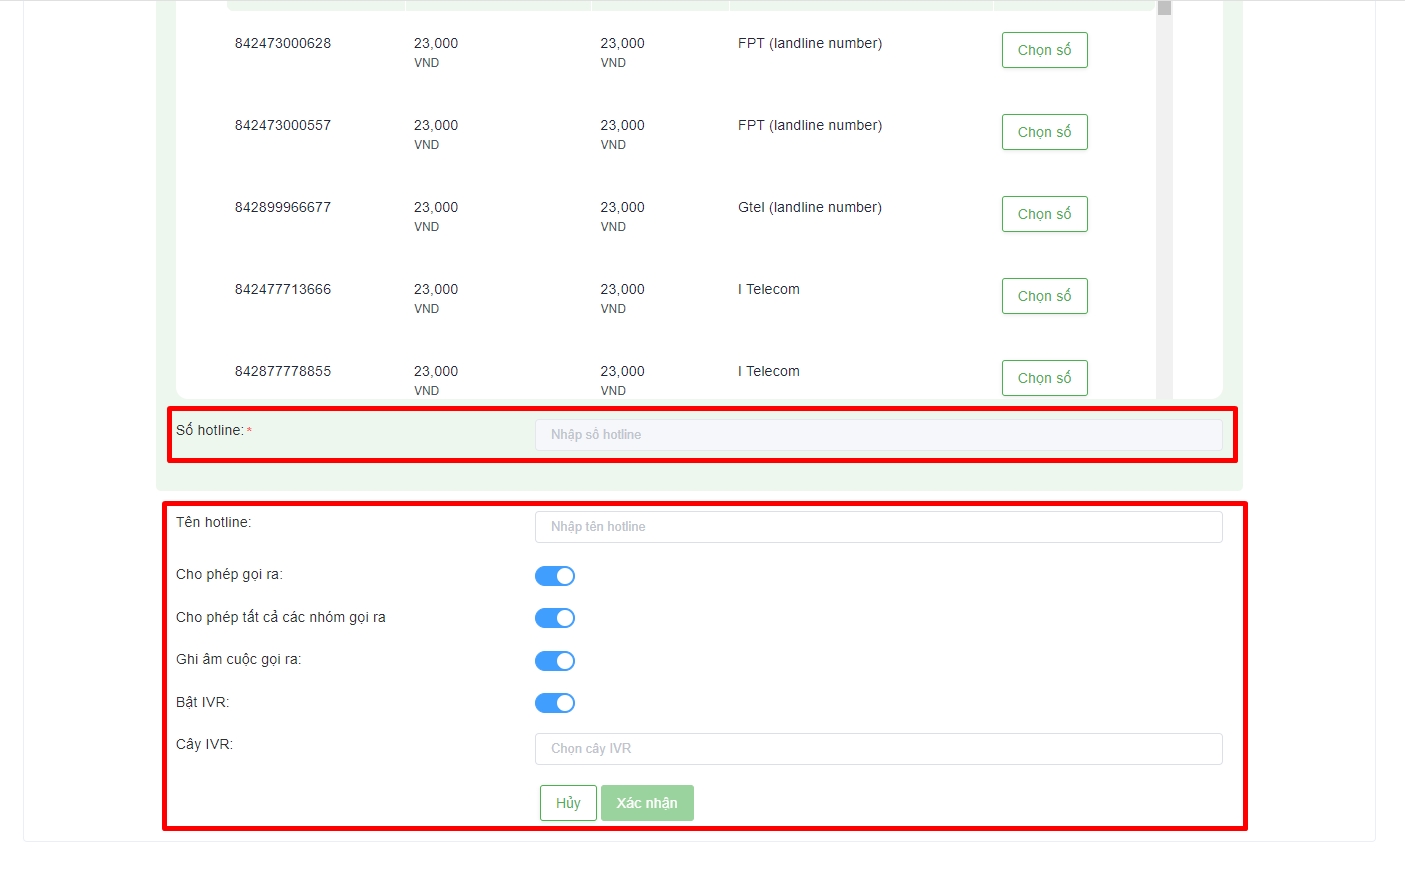
Hotline number: applied to the case of creating a virtual phone number.
Hotline name: the name displayed on the system (Portal).
Allow call out: enable/disable call out feature for hotline number.
Allow all groups to call out: users can set to allow all or only certain groups to be allowed to call out to the hotline number.
Call recording: enable/disable call recording.
IVR: allow/disallow hotline numbers to use IVR. In case IVR is turned off, the user will choose the appropriate queue for the call to flow.
IVR Tree: select the IVR tree you want to assign to the hotline number.
Queue: select a queue for the call to be distributed.
Hotline number received on-net numbers automatically
The hotline number that automatically receives the network, also known as the "Adaptive number", will select the hotline number that uses the telecommunication network of the customer number.
Example: Users need to call out to customers using Viettel's phone number, then the system will automatically select the hotline number of Viettel network to make calls. If the system does not have a hotline number, Viettel will randomly choose or a designated hotline number of the system to call out.
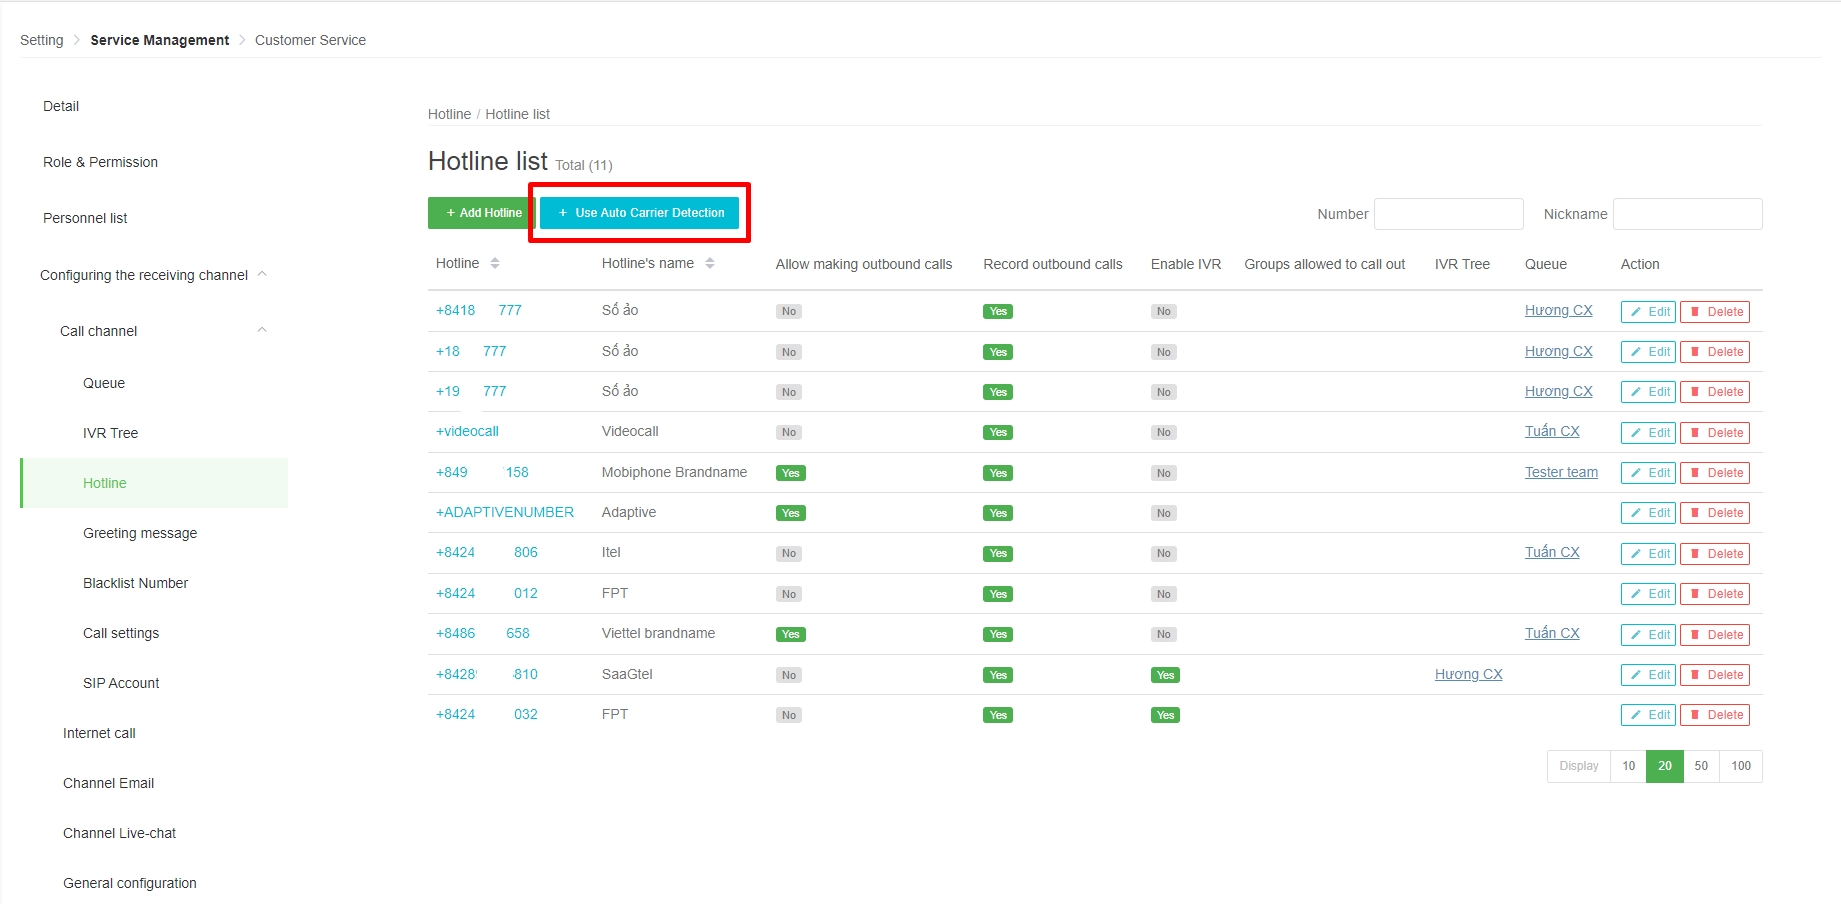
Adaptive Number configuration options:
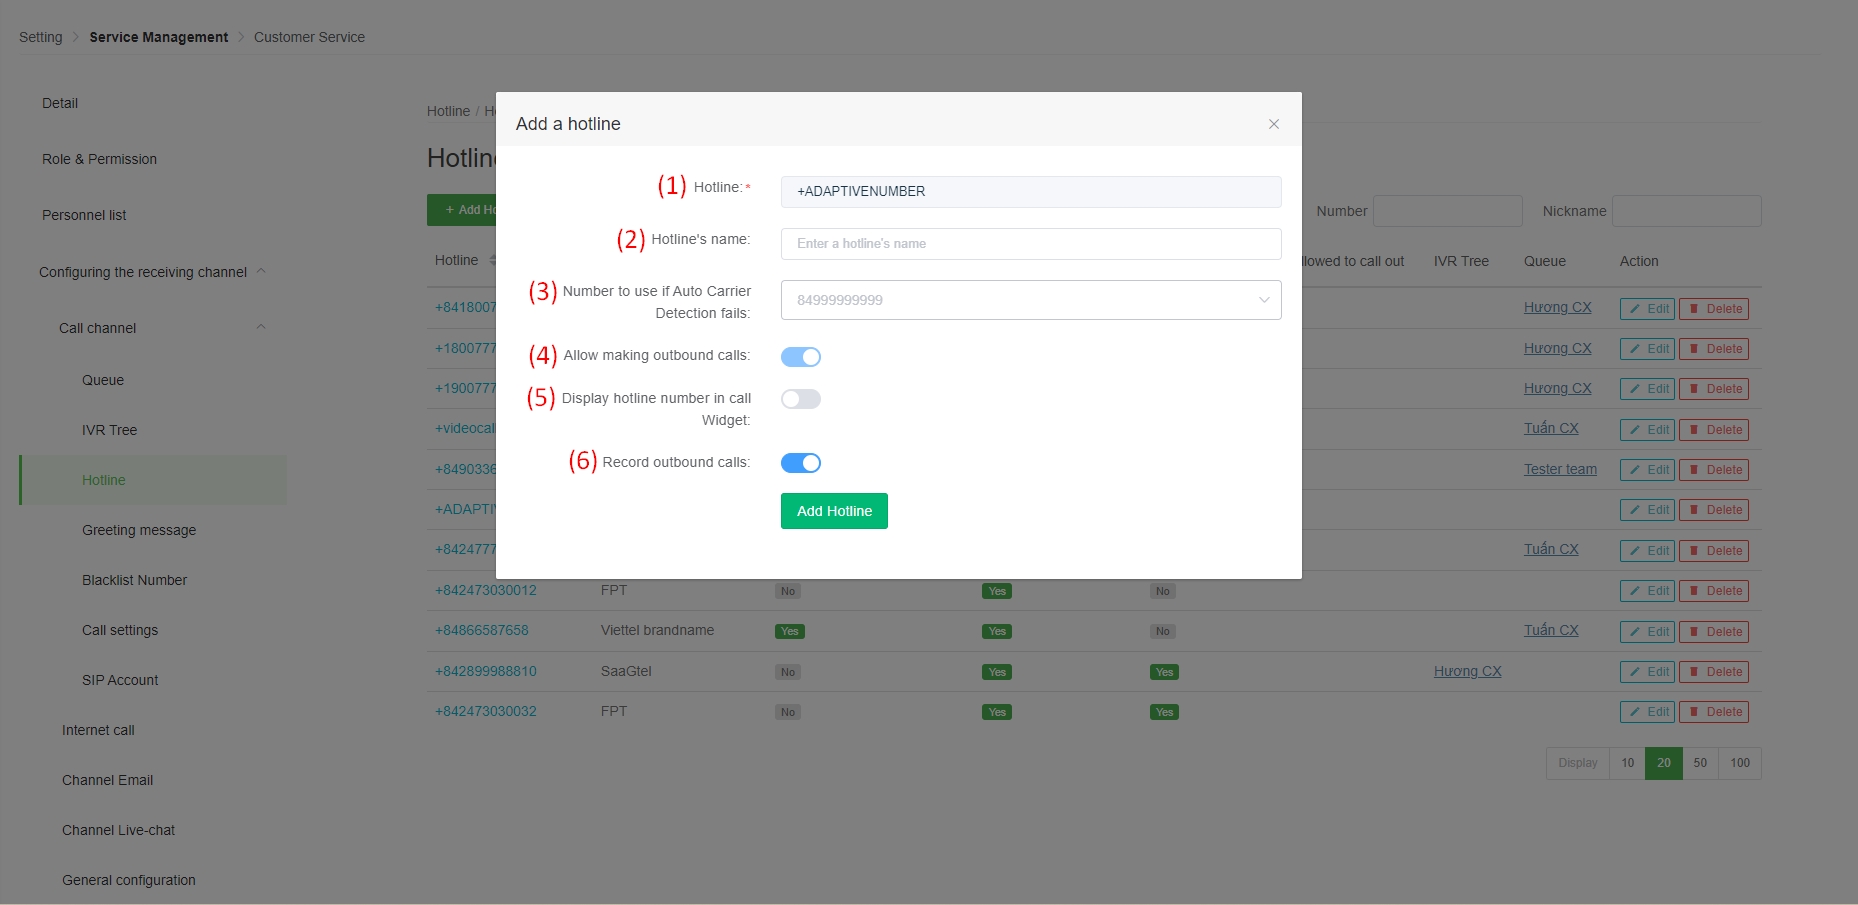
(1) Hotline.
(2) Hotline's name: the name displayed on the system (Portal).
(3) Number to use if Auto Carrier Detection fails: If there is no hotline number on the same network as the Customer's subscriber number, the system will select this number to call out.
( 4) Allow making outbound calls: enable/disable the feature to allow hotline numbers to be called out.
(5) Display hotline number in call Widget: applicable to customers using Button call. When this feature is enabled, the hotline number will be displayed in the number selection section at Button call.
(6) Record outbound calls: enable/disable recording of outgoing calls.
Integrate business phone numbers into the contact center
If users want to use existing phone numbers of individuals and businesses to integrate into the system to act as a hotline number, users need to convert to SIP trunk number format and contact a support staff of Stringee via hotline 1800 6670.
If there is already a sales staff in charge of consulting and taking care of you, contact directly to have the support staff make a request to connect the phone number to the switchboard on the system.
In case there is already a sales staff in charge of consulting and taking care of you, contact directly to have the support staff make a request to connect the phone number to the switchboard on the system.
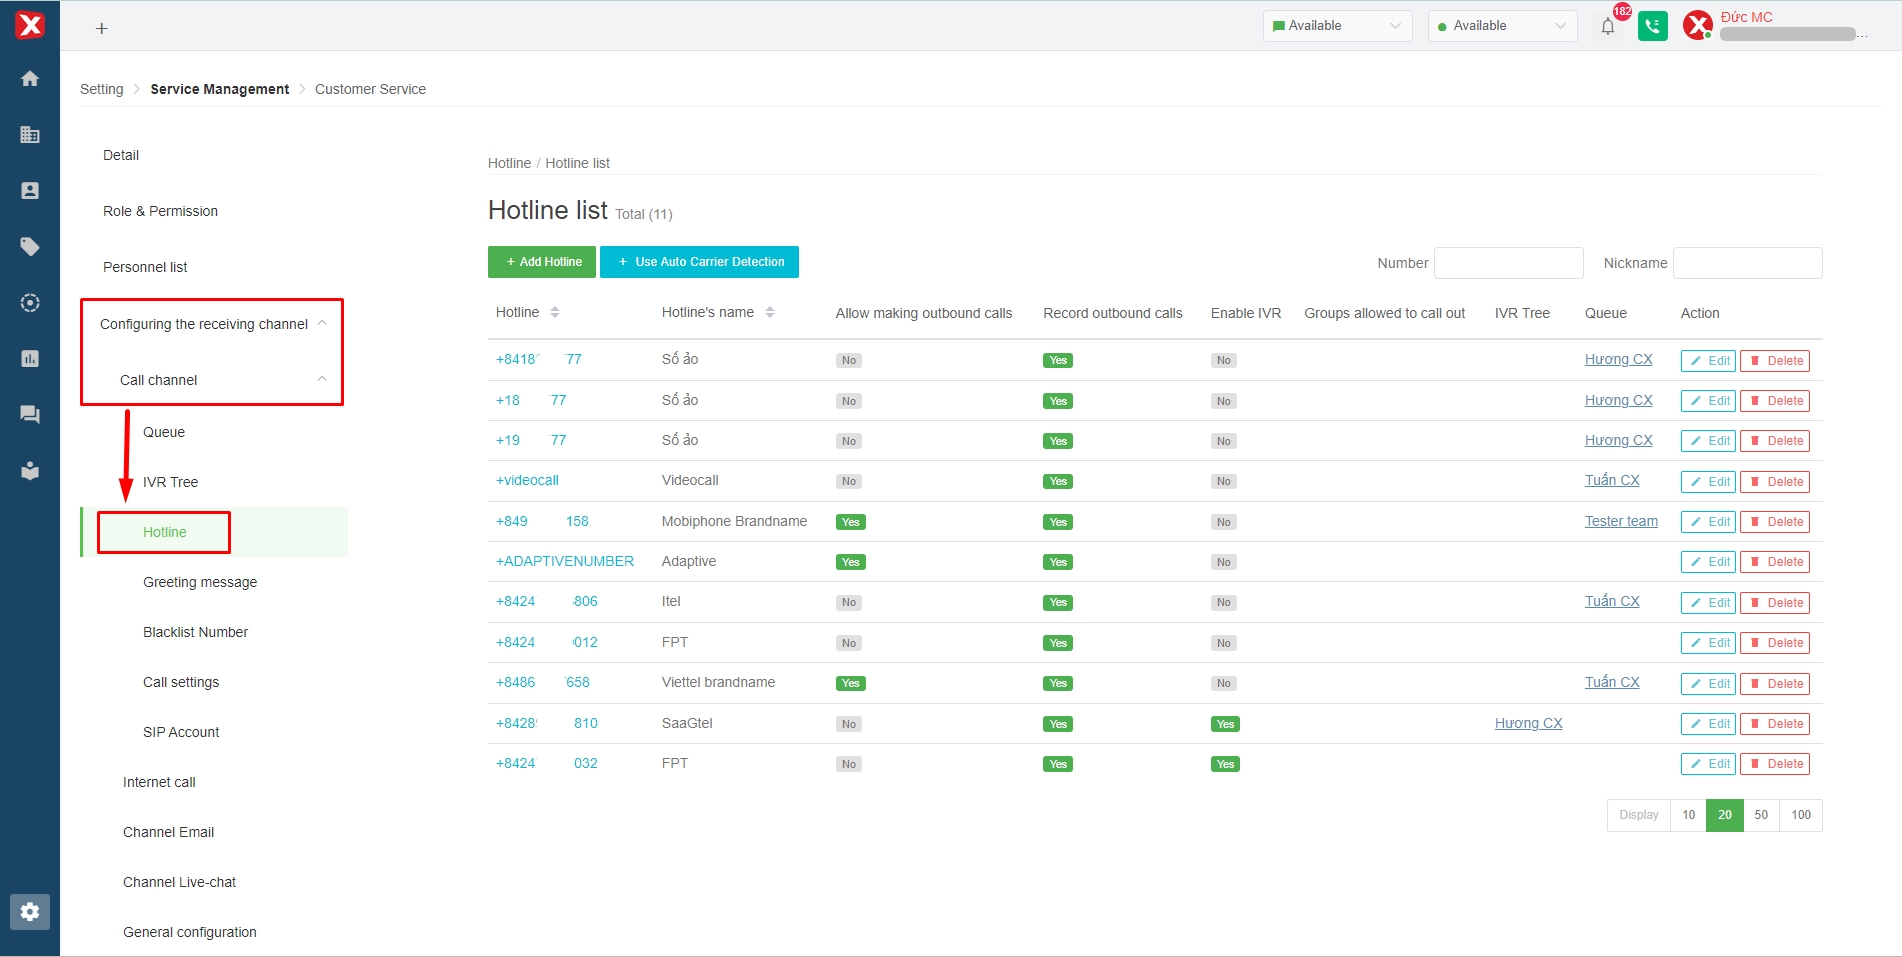
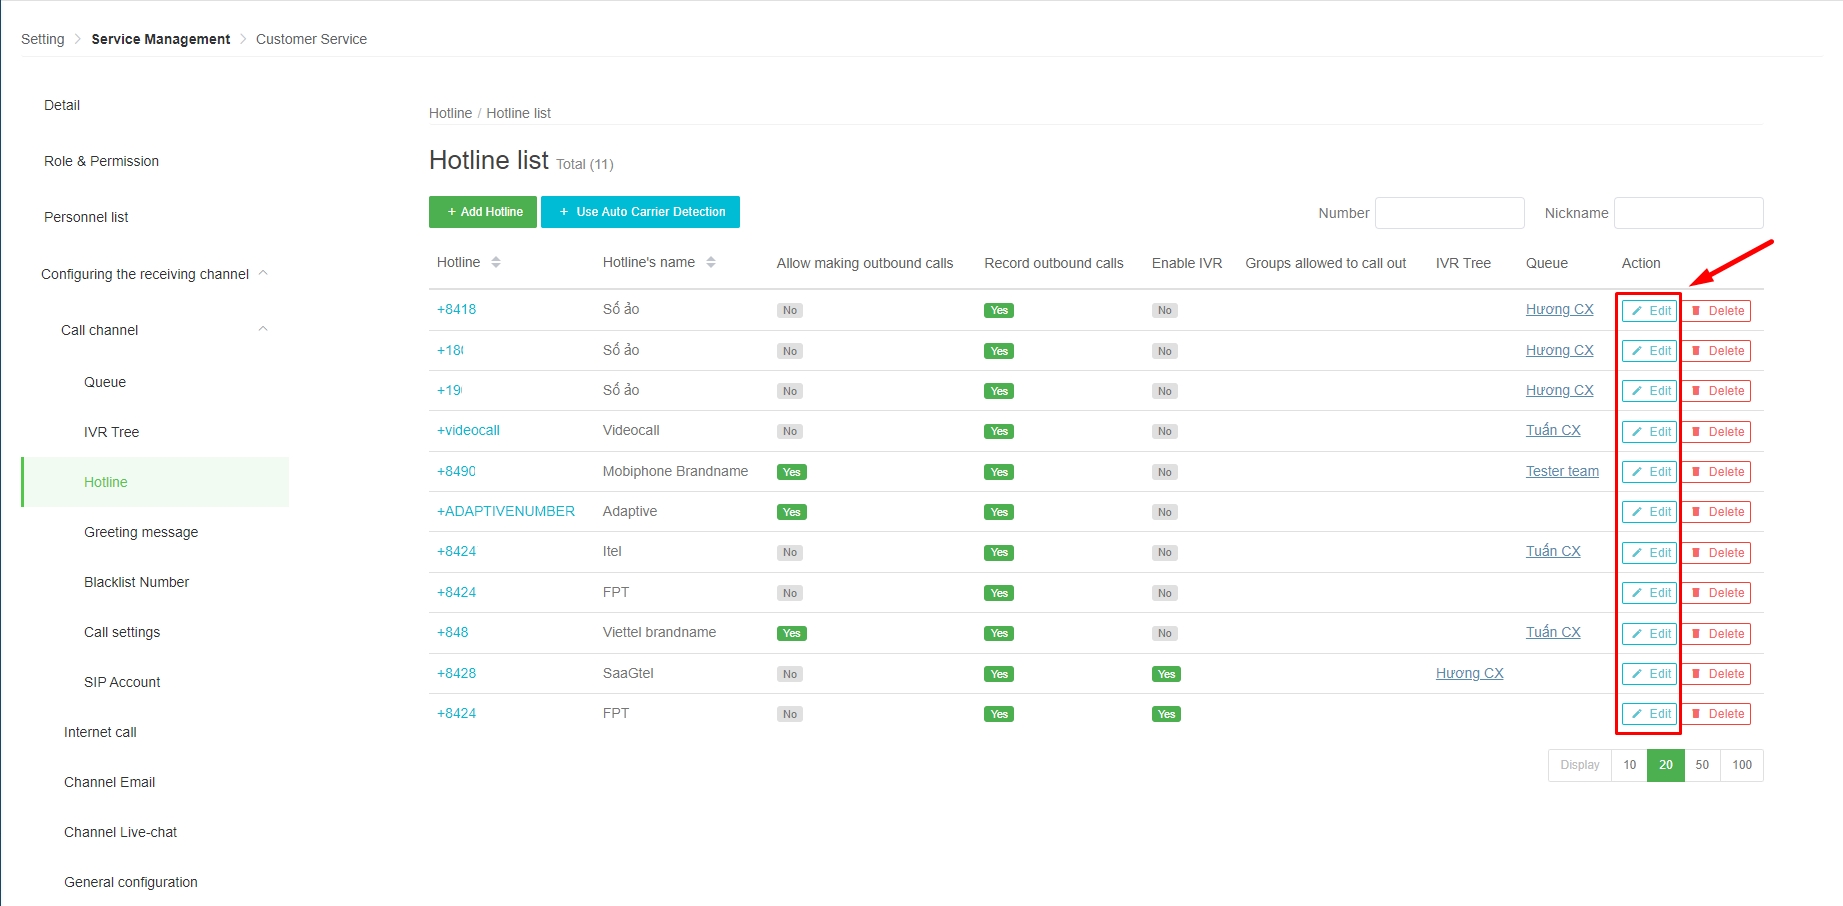
Configure a hotline number
To configure details for a hotline number. Users will click on the item to edit the hotline number at the interface.
Detailed configuration of hotline numbers:
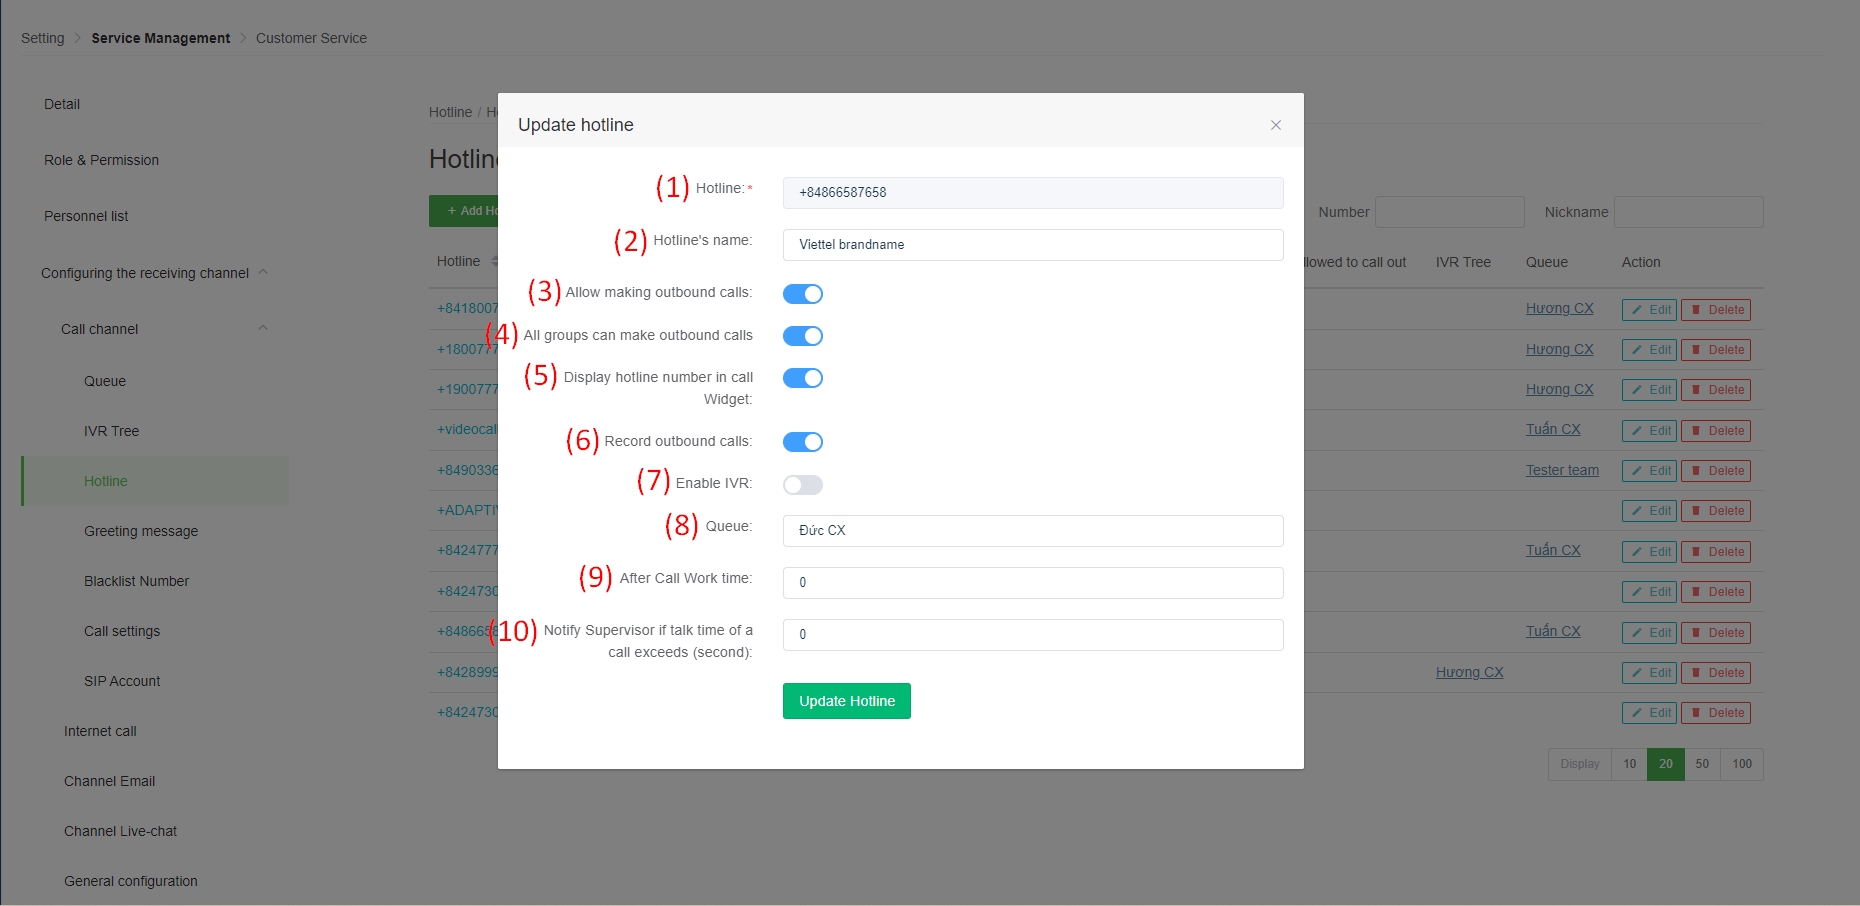
(1) Hotline.
(2) Hotline name: the name displayed on the system (not displayed when calling out to the Customer).
(3) Allow making outbound calls: yes/no
(4) All groups can make outbound calls: users can set to allow all or only certain groups to be allowed to call out to the hotline number.
(5) Display hotline number in call Widget: applicable to customers using Button call. When this feature is enabled, the hotline number will be displayed in the number selection section at Button call.
(6) Record outbound calls: enable/disable call recording outbound calls.
(7) Enable IVR: allow/disallow hotline numbers to use IVR. If IVR is turned off, the user will choose the appropriate queue for the call to flow.
(8) IVR/Queue: select the IVR tree you want to assign to the hotline number/select a queue for the call to be distributed.
(9) After Call Work time: the time (in seconds) of the User's break when the call is completed (successfully). During this time the User will not have any inbound calls.
(10) Notify Supervisor if talk time of a call exceeds (second): the system will have a warning message for calls that exceed the specified time (in seconds).