4.2. Ticket details
The ticket details will include all information of the calls, chats, emails or can be a self-created ticket related to one or more Customers.
In the ticket details, there will be information items including: Tab and ticket options, Ticket fields, Ticket title, Ticket notes, Ticket history, Contact details, Contact history.
Tab and ticket options
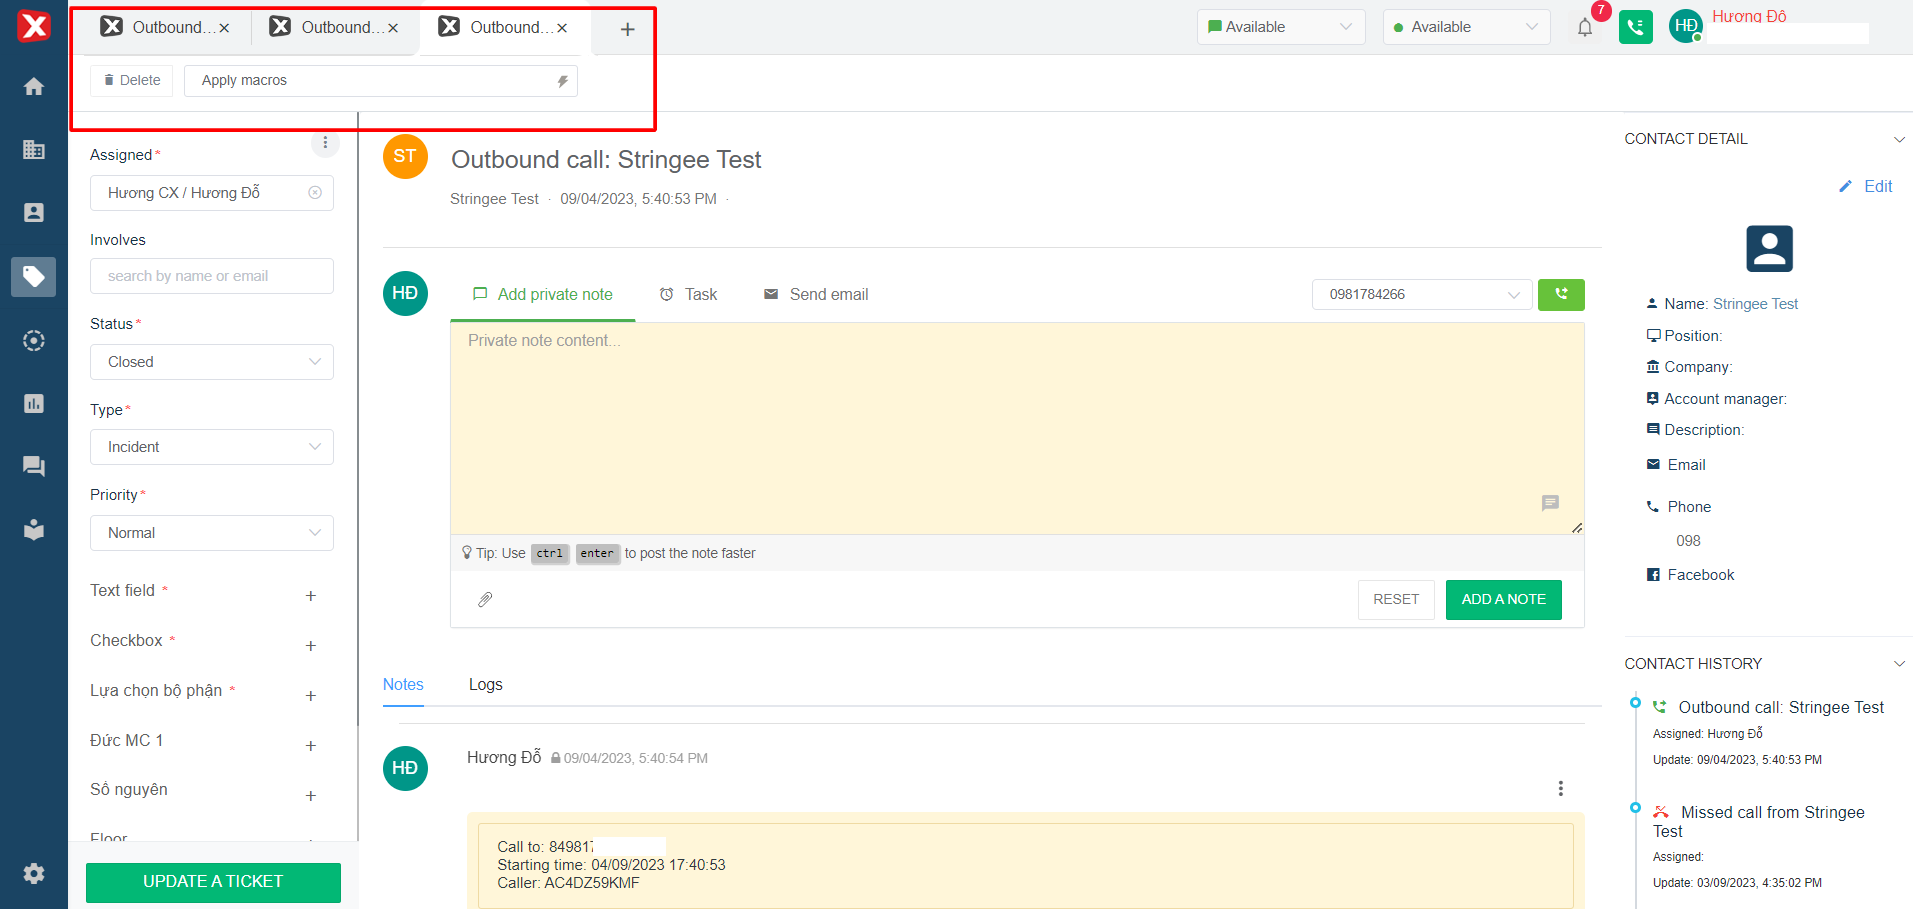
Ticket tab: The system allows users to open multiple tabs at once.
Delete: allows users to delete tickets on the system.
Apply macro: The user can apply the created macro to the currently opened ticket.
Ticket fields
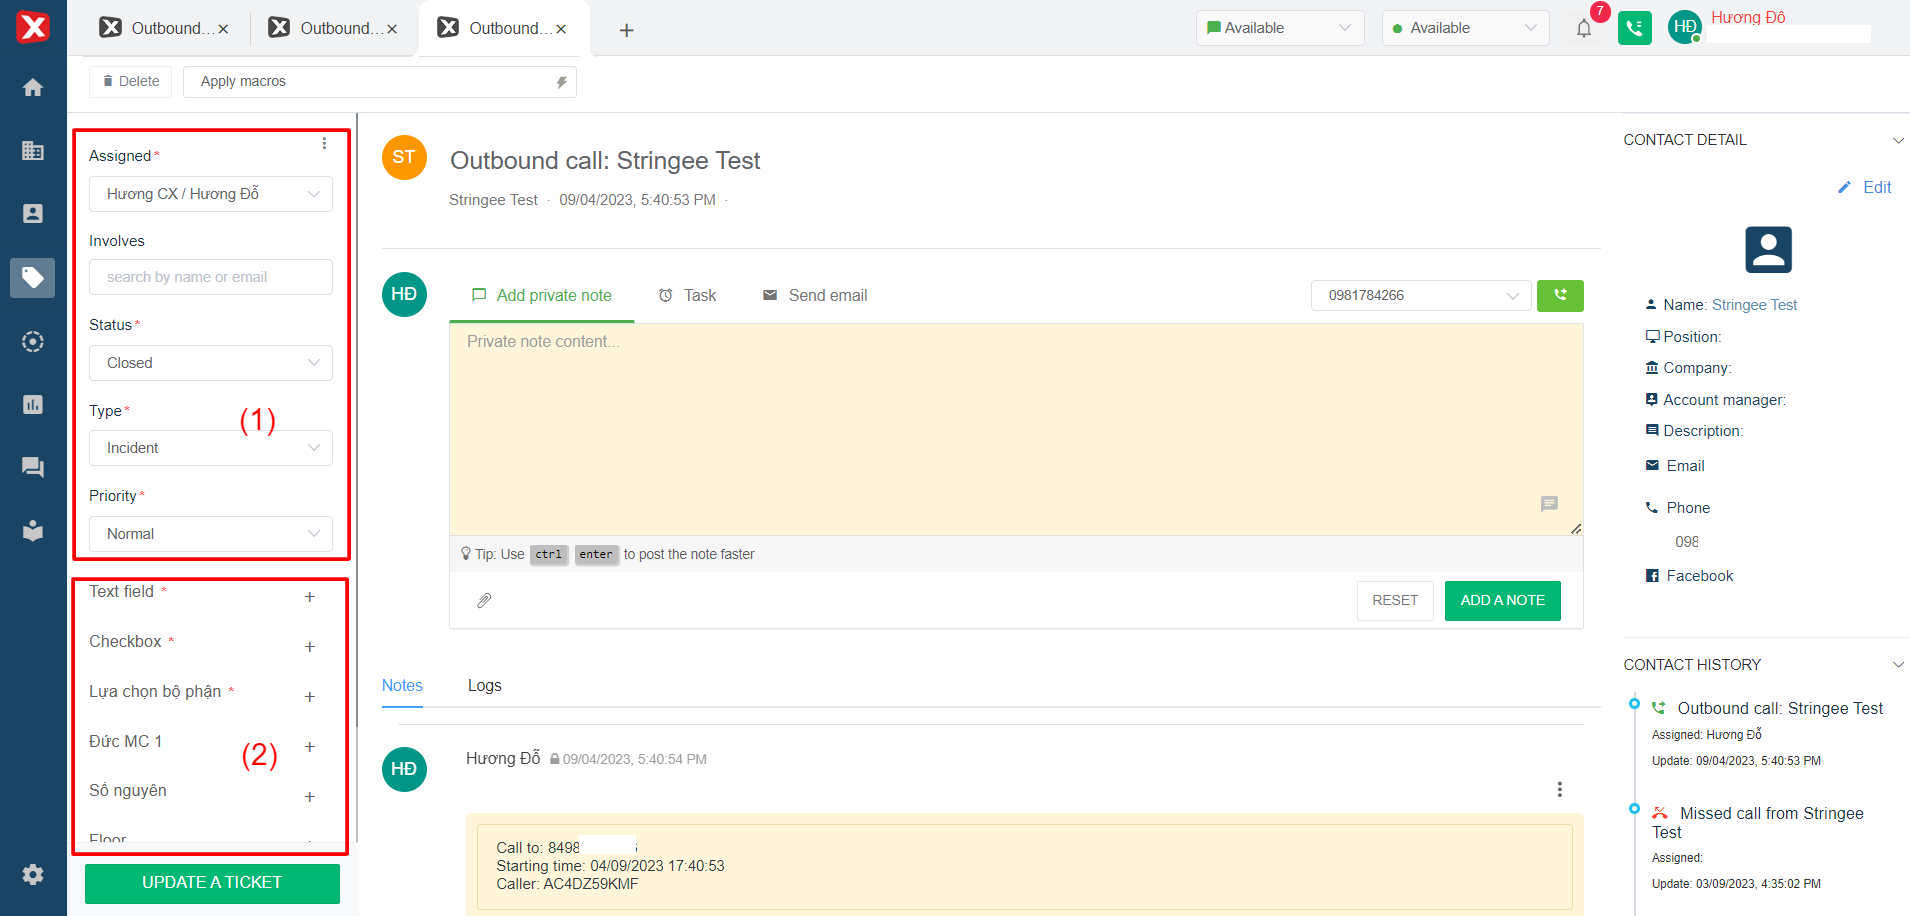
A place for users to enter and select fields related to tickets and Customers.
Default ticket fields (1): are the default information fields available on the system that the user cannot delete or modify the information.
- Assigned to: The recording sheet is assigned to the department, the individual belonging to the department or the individual in charge of handling the ticket.
- CCs: the system will automatically send a notification email in the form of “CC” to the selected user account on the system.
- Status: the status of the tickets.
- Type: classification of tickets.
- Priority: priority of ticket processing.
Created ticket fields (2): These are the information fields created in the "Ticket field configuration" section.
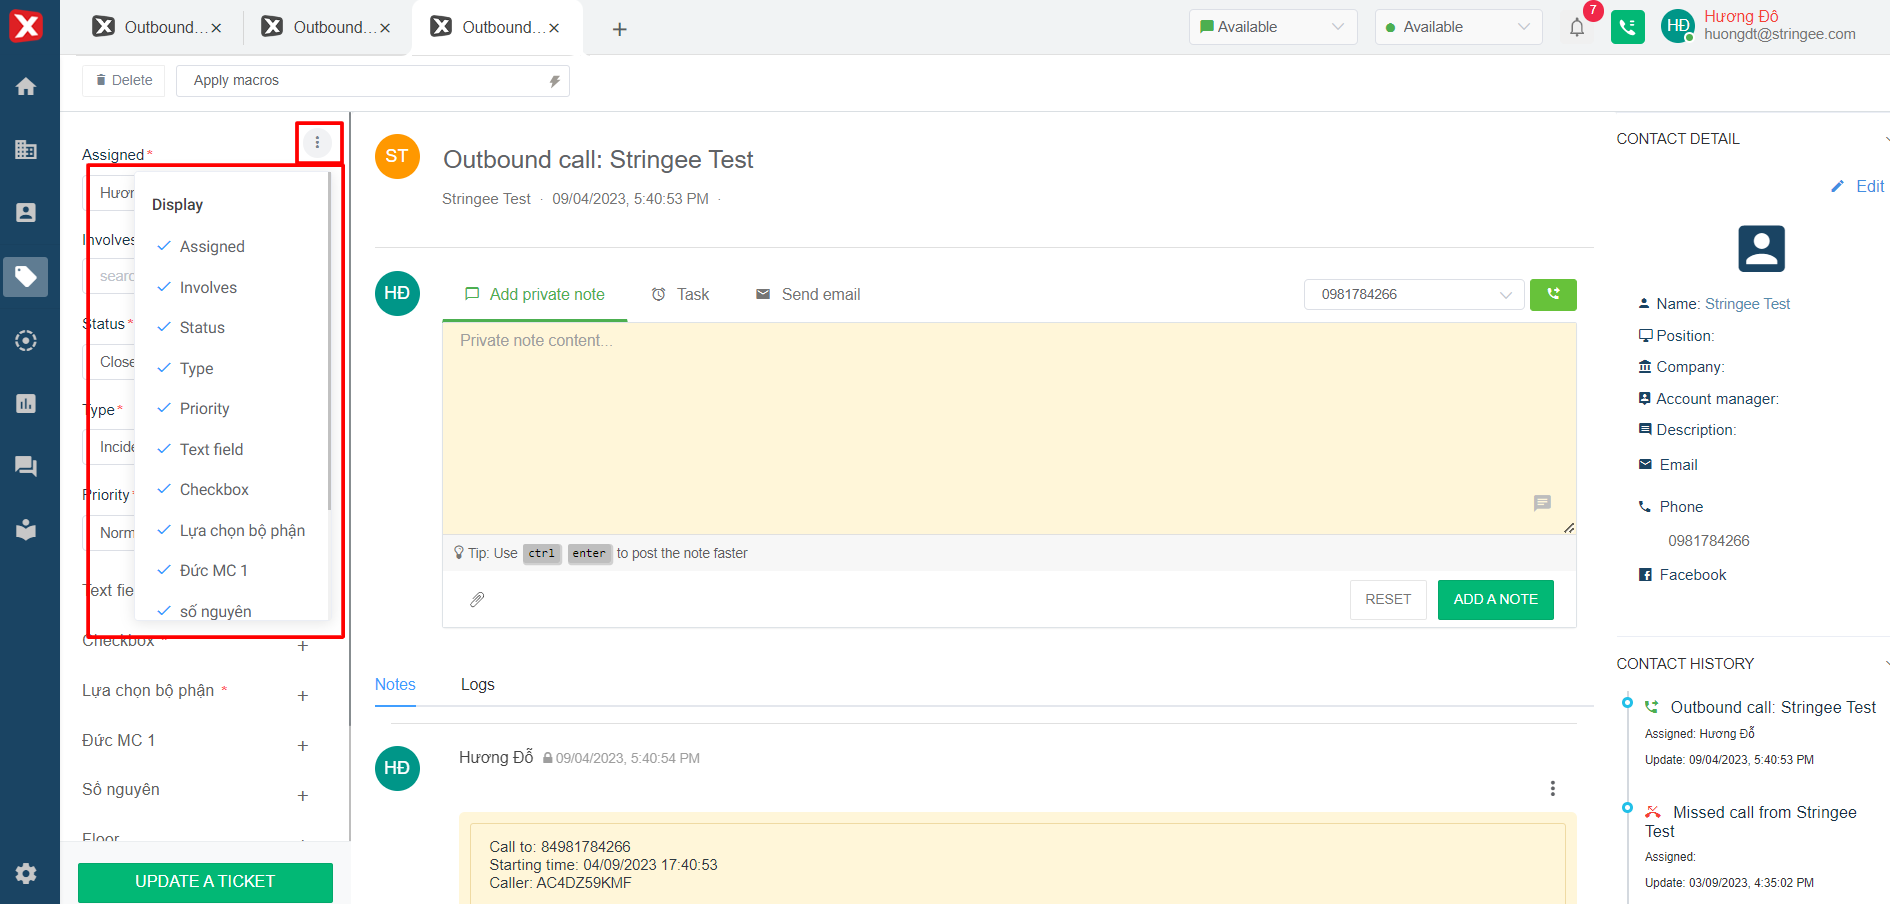
In addition, the user can manage the display of the required fields instead of displaying them all. Users click on the "3 vertical dots" icon as shown in Image 4 and then select the ticket fields you want to show or hide.
In addition, the user can manage the display of the required fields instead of displaying them all. Users click on the "3 vertical dots" icon as shown in Image 4 and then select the ticket fields you want to show or hide.
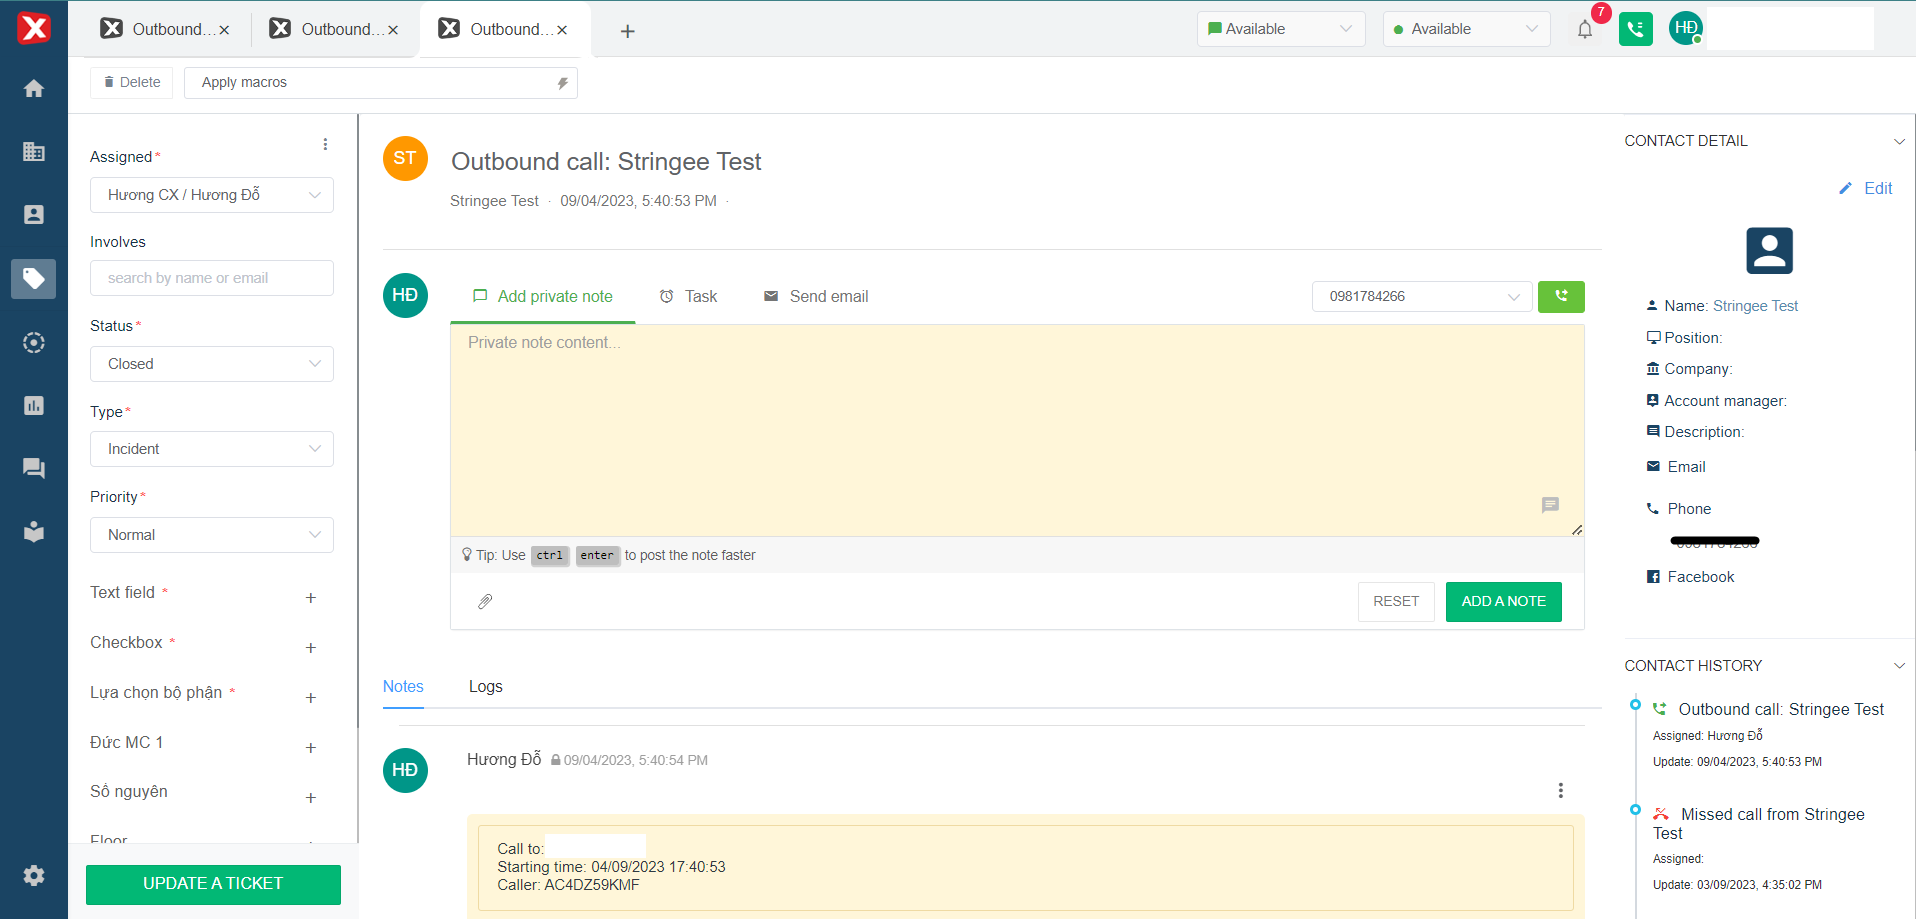
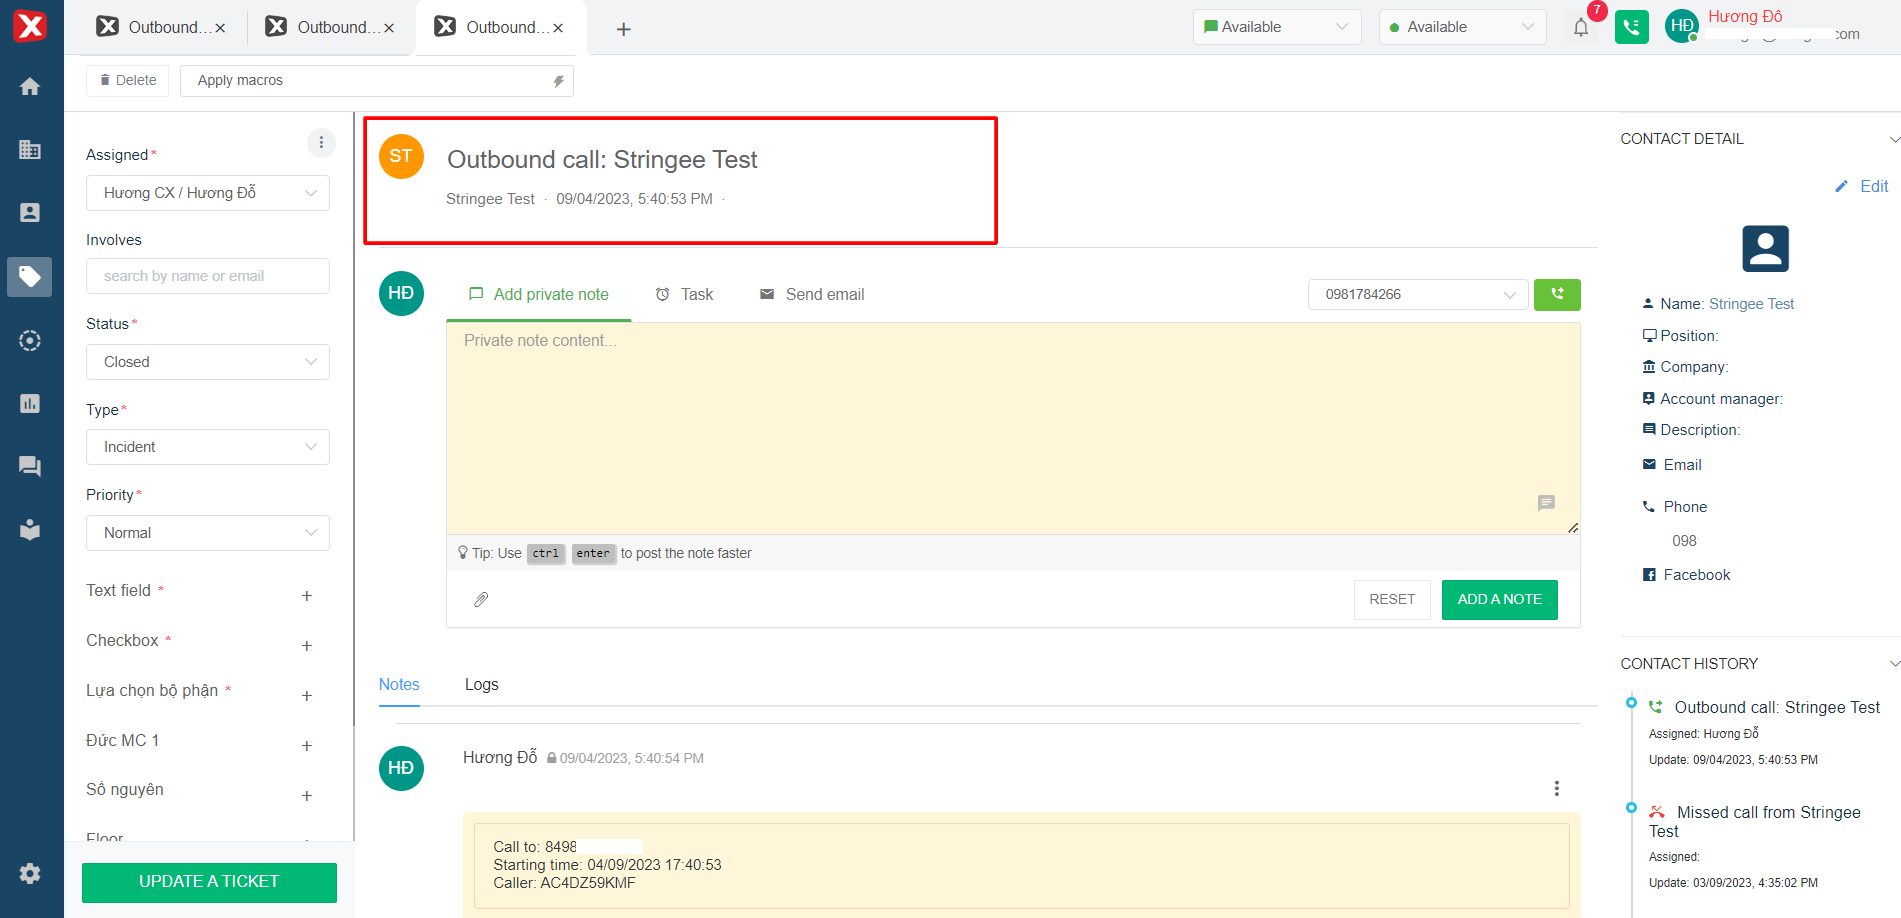
Ticket title
This is the ticket name that represents the main content details of the ticket. Here the user can enter a title for the ticket, view the Customer's contact name and when the ticket details were created.
This is the ticket name that represents the main content detailed inside the ticket. Here the user can enter a title for the ticket, view the Customer's contact name and when the ticket details were created.
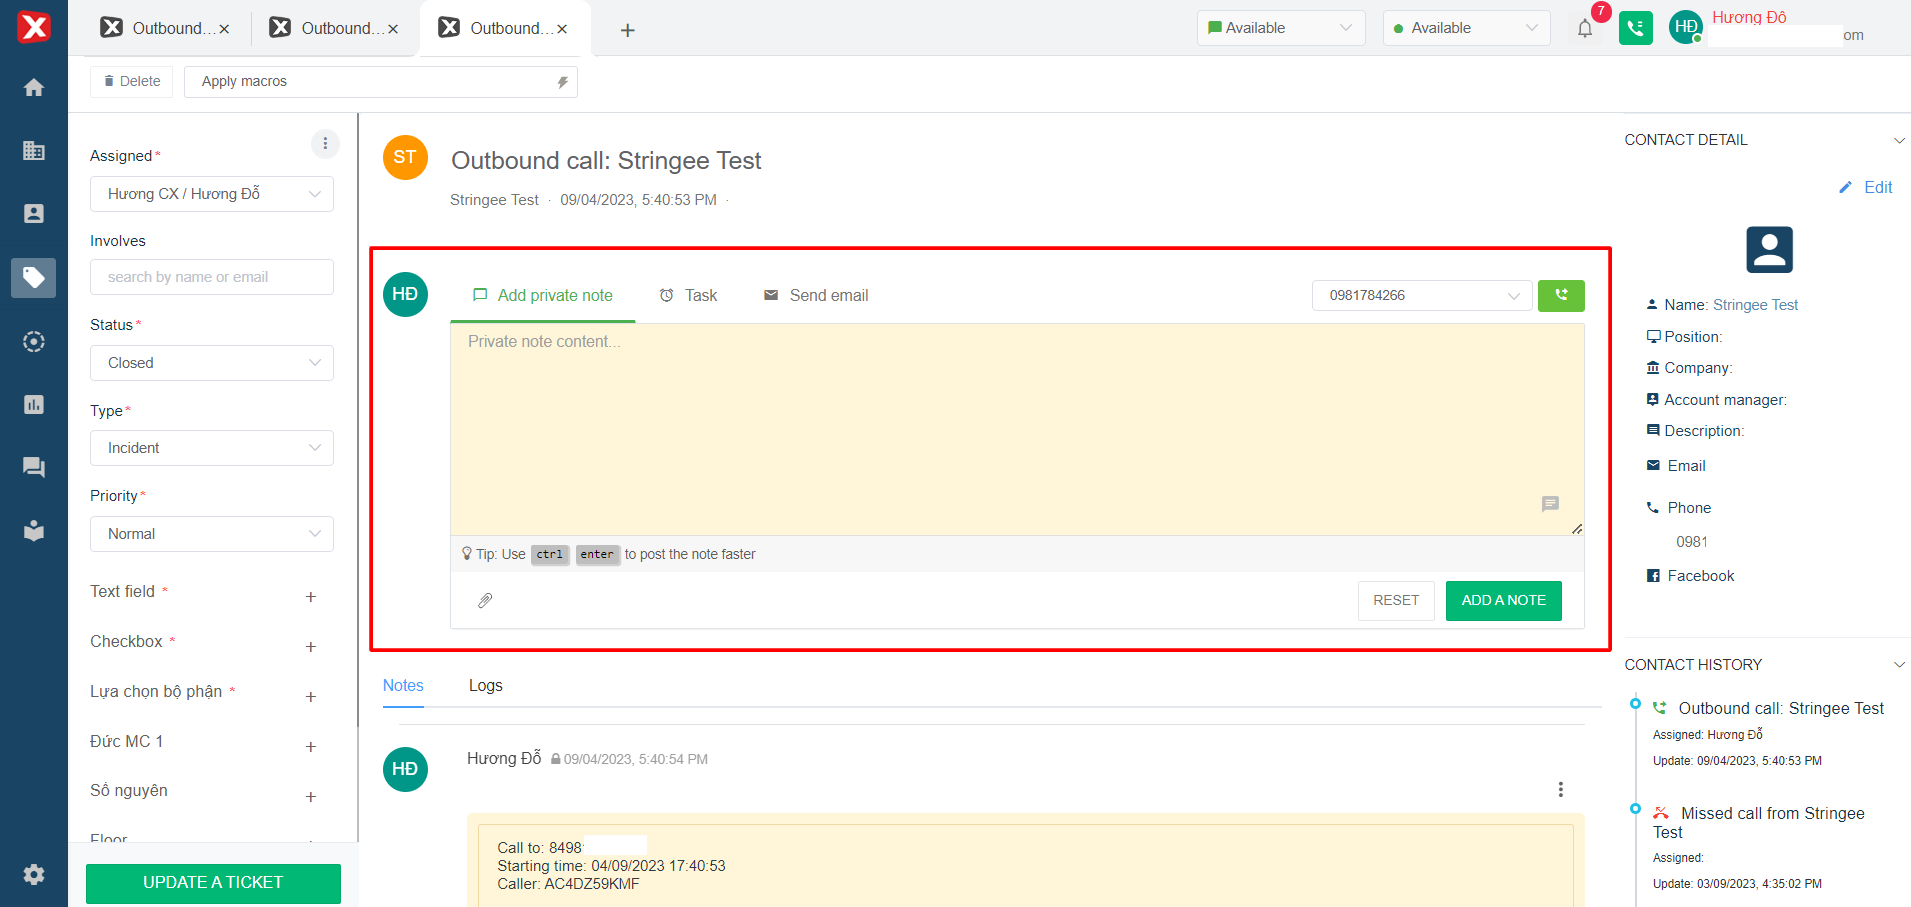
Ticket note
This section will cover many operations related to updating as well as processing tickets.
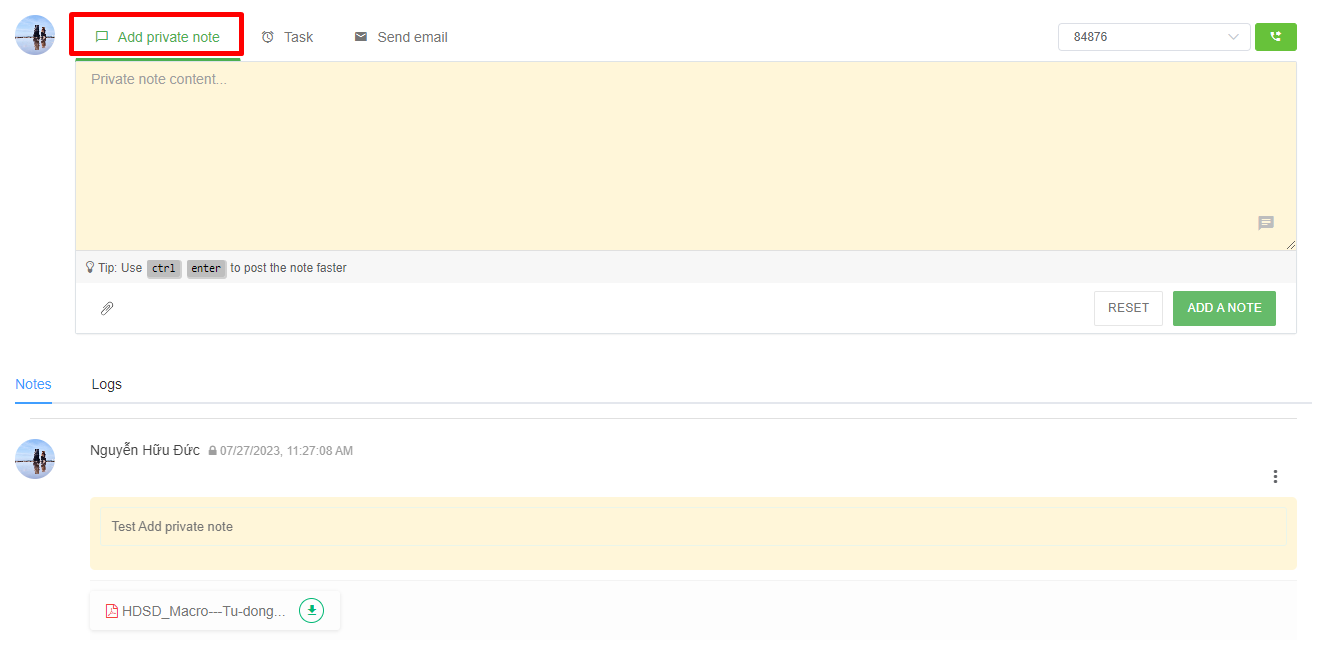
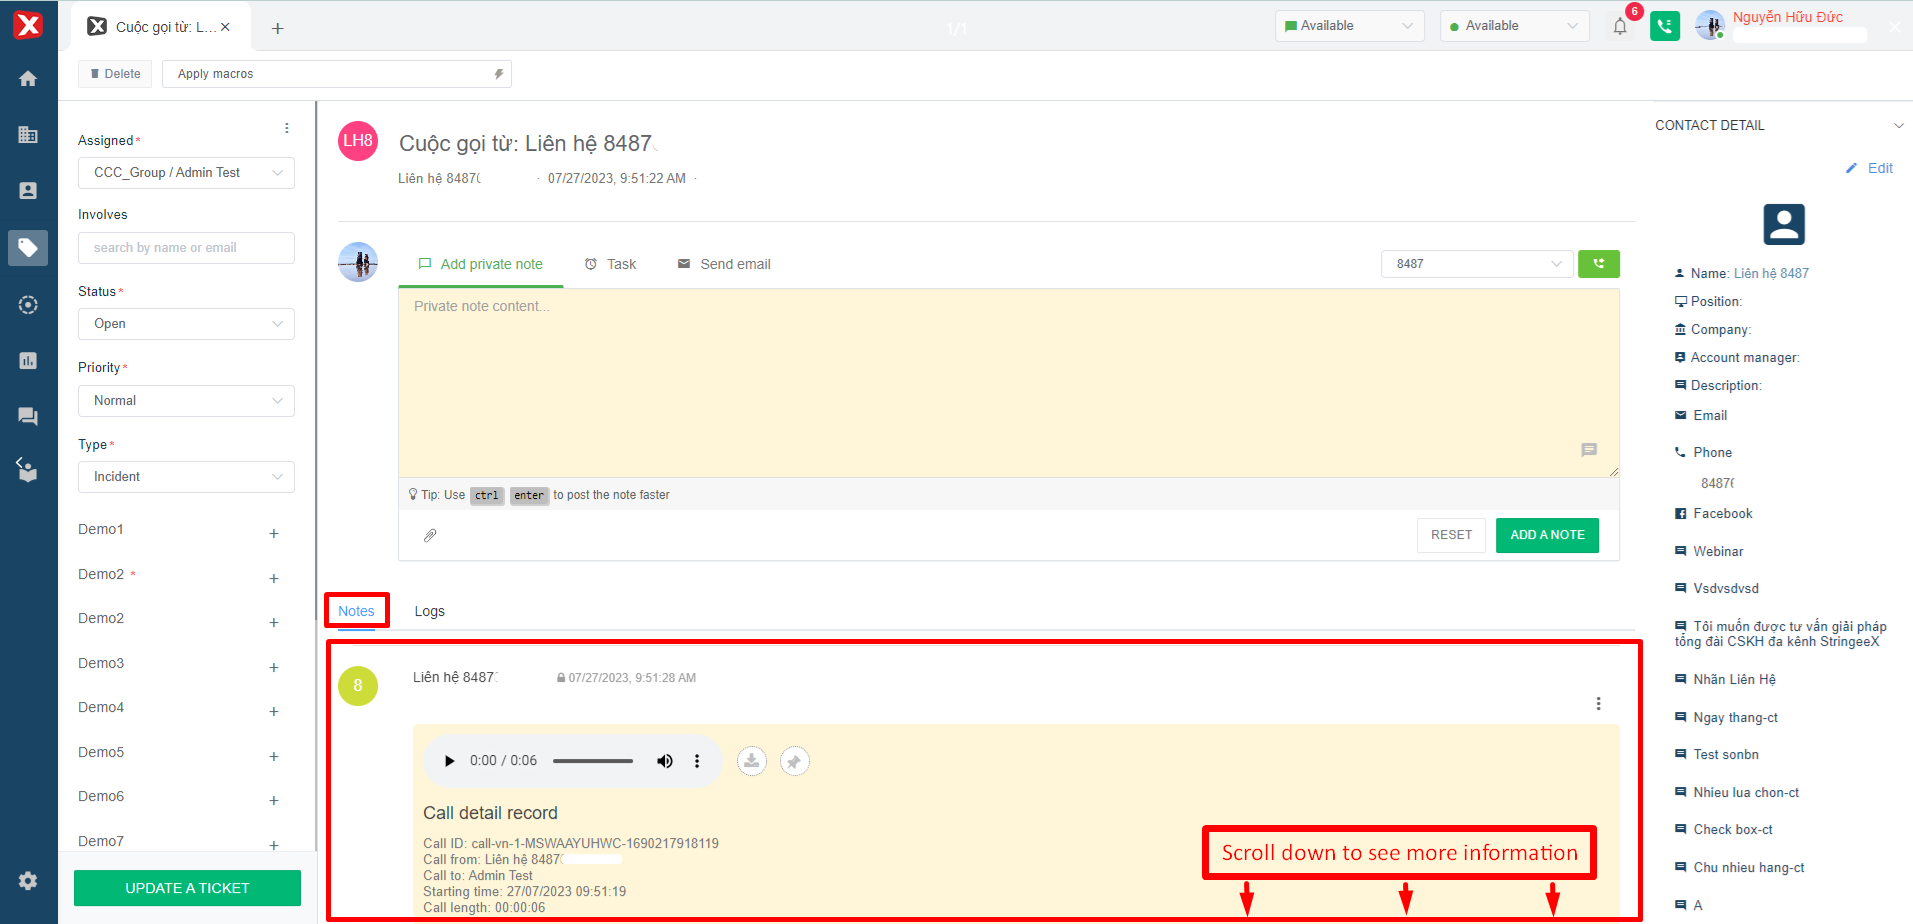
Internal note: here the user will enter the content in the internal note box and then click "Add a note" then the system will record the content in the "Notes" section as shown in Image 7.
Task: the system will notify about the email of the user who created the task in the log with the email content being the task content in the ticket.
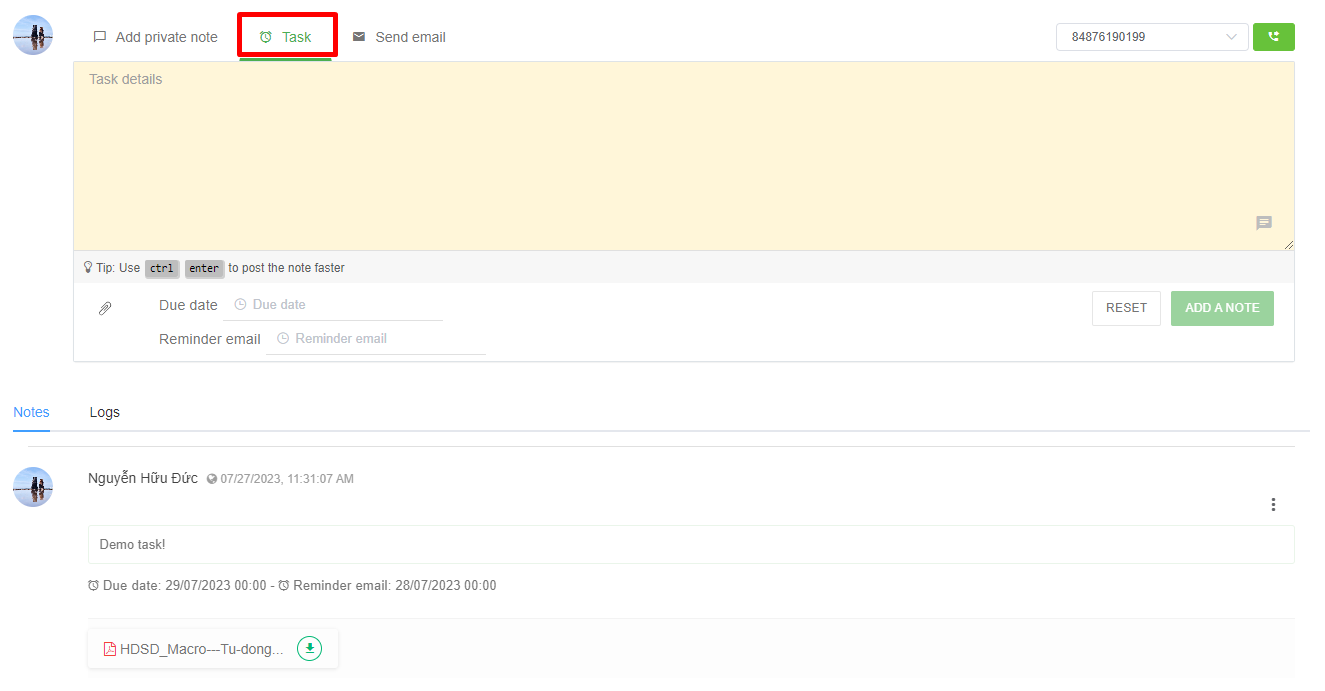
- Due date: the time limit for the user to complete the work.
- Remind email: The system will automatically send a reminder email to the email of the user who created the task in the ticket at the set time => After pressing the "Add a note" button, the task content will be saved in the Notes section as shown in image 8.
Send email: This feature helps users to send emails directly to customers, partners, internal, management, ... in the current ticket.
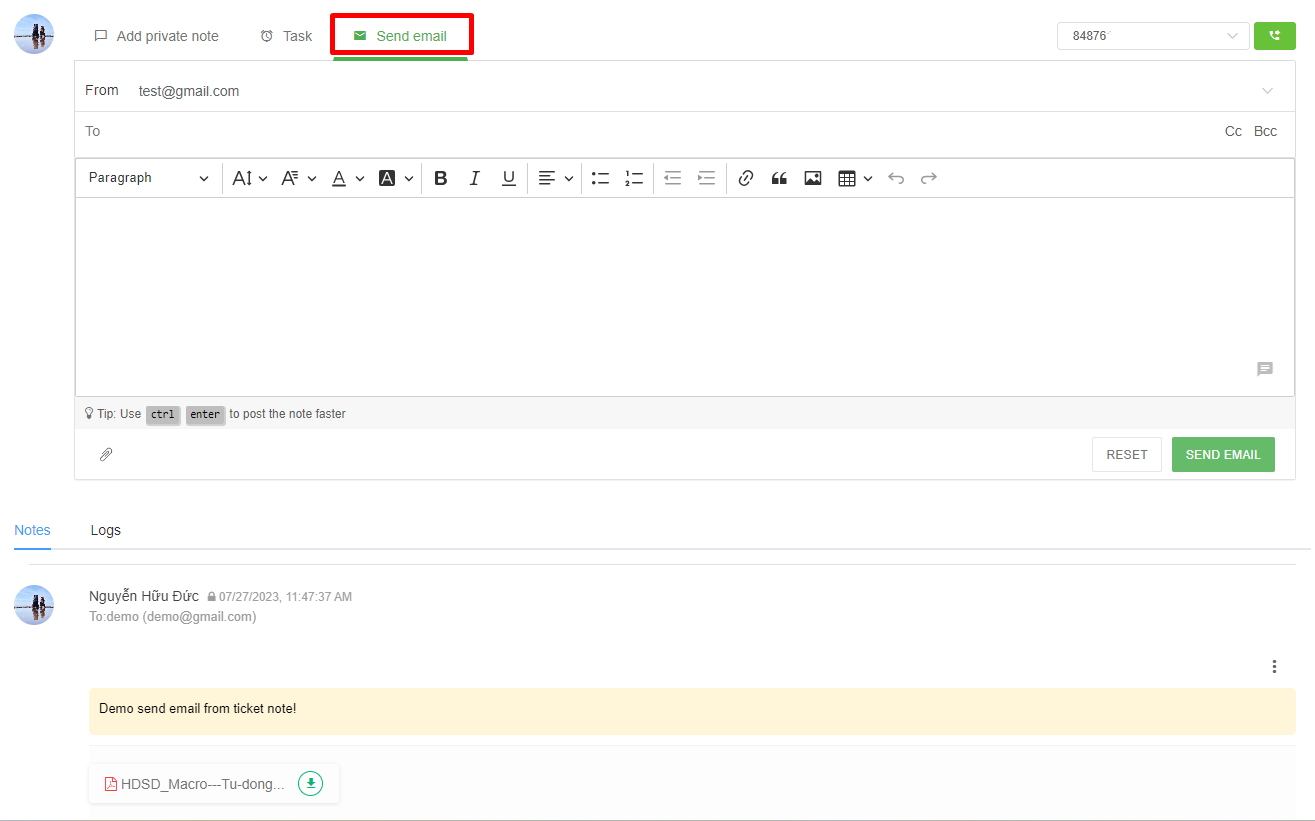
- From: Users are required to choose to send out from an email that has been integrated into the system.
- To: The user enters the email he wants to send the email to. In addition, users can also use CC, BCC email features.
- Email content: In the email content section, the user can customize the content as well as edit it according to the available toolbar as shown in Image 9 => After pressing the "Send email" button, the task content will be saved in the Notes section like image 9.
Feedback: This feature is only available for tickets created for chats (Facebook, Zalo, Livechat).
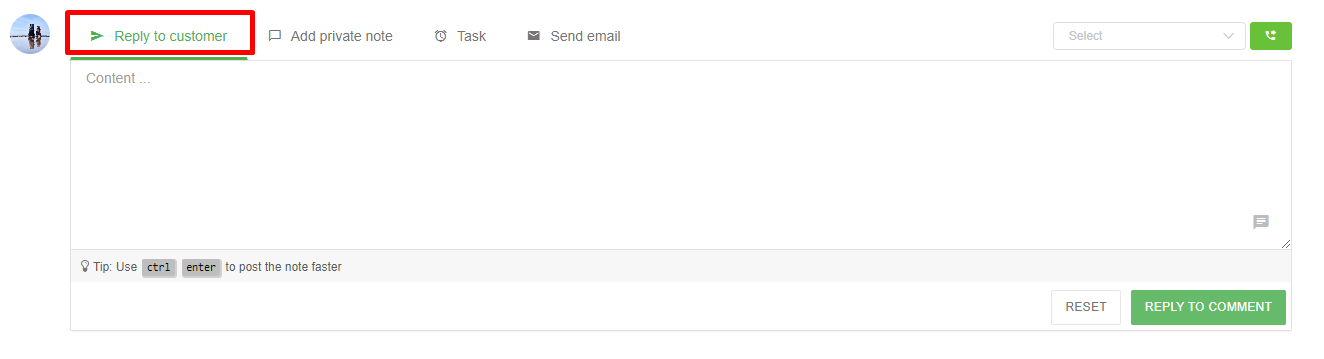
When the user enters the content to respond to the Customer and presses the reply button, the message will be sent to the customer's chat channel (Facebook, Zalo, Livechat) according to the entered content and will be saved in Notes as shown in Image 10.
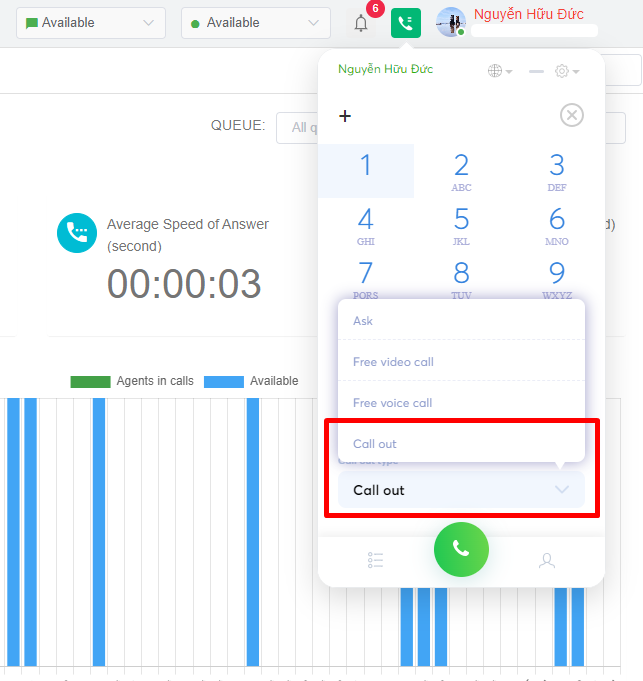
Calling out to Customer from the ticket: For the tickets including Customer's phone number in Contact Details section, the user can make a call to the Customer right from the ticket. Note: When the customer is the customer's phone number, to make a call to the agent, you need to choose the type of call out at the web phone (just choose not to dial the number manually) named "Call out".
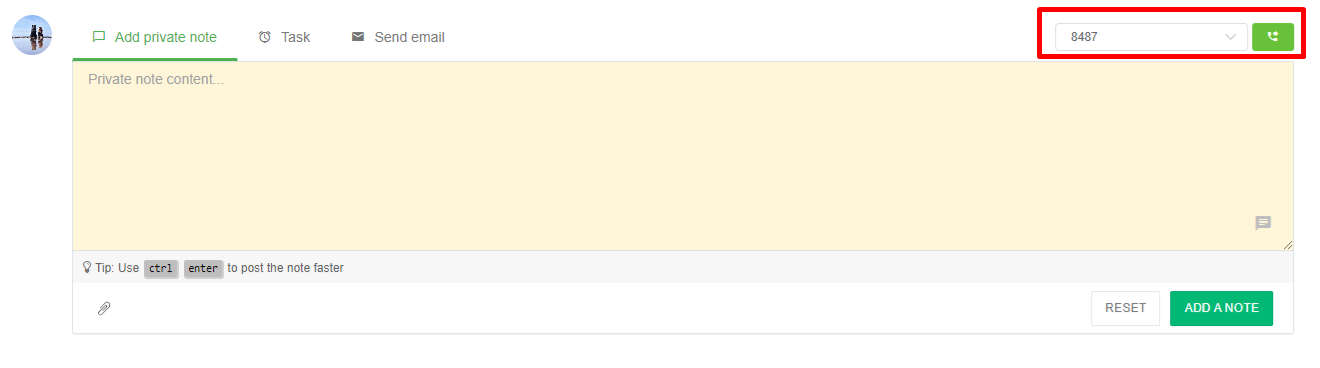
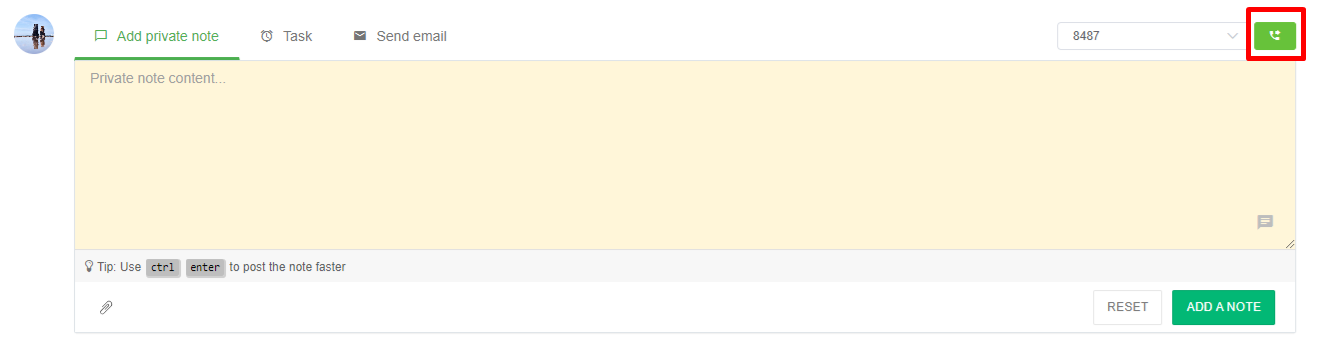
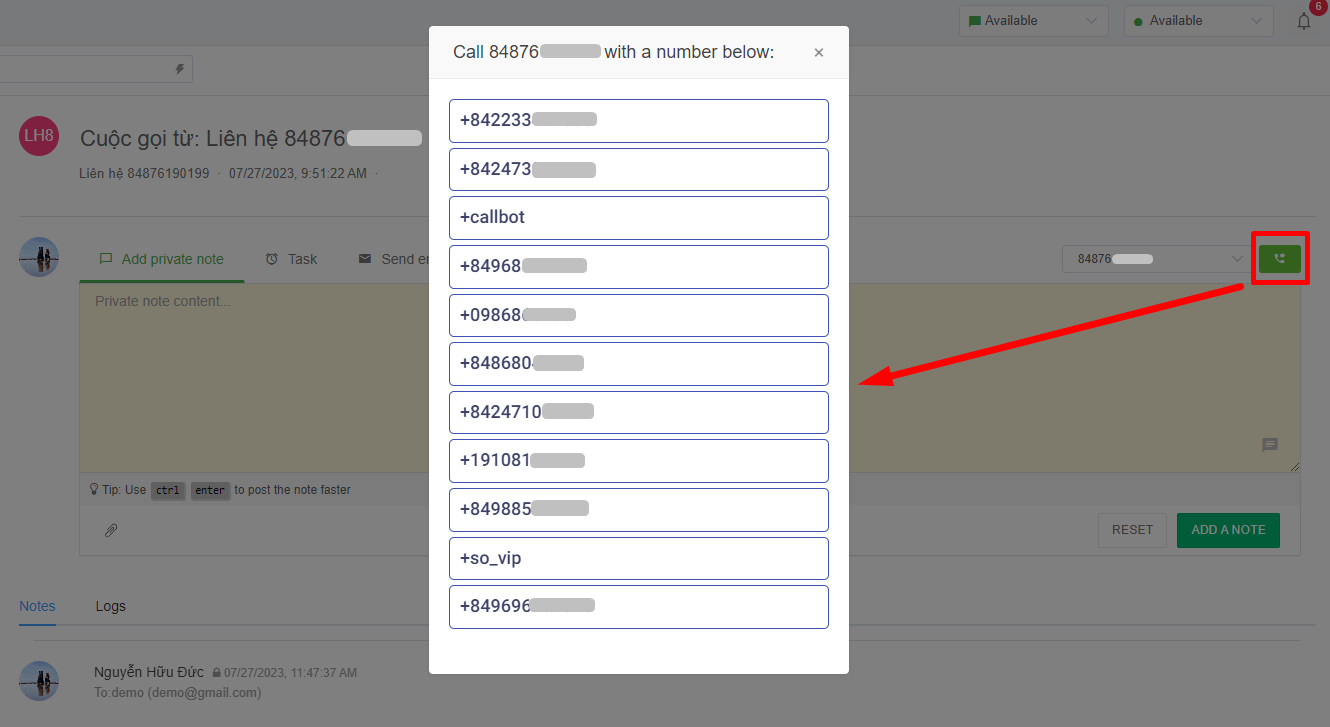
To make an outbound call to a customer, the user presses the call icon as shown in Figure 12. When making an outbound call, if there are multiple hotline numbers on the system, the system will ask the user to select the number as shown in the image 13.
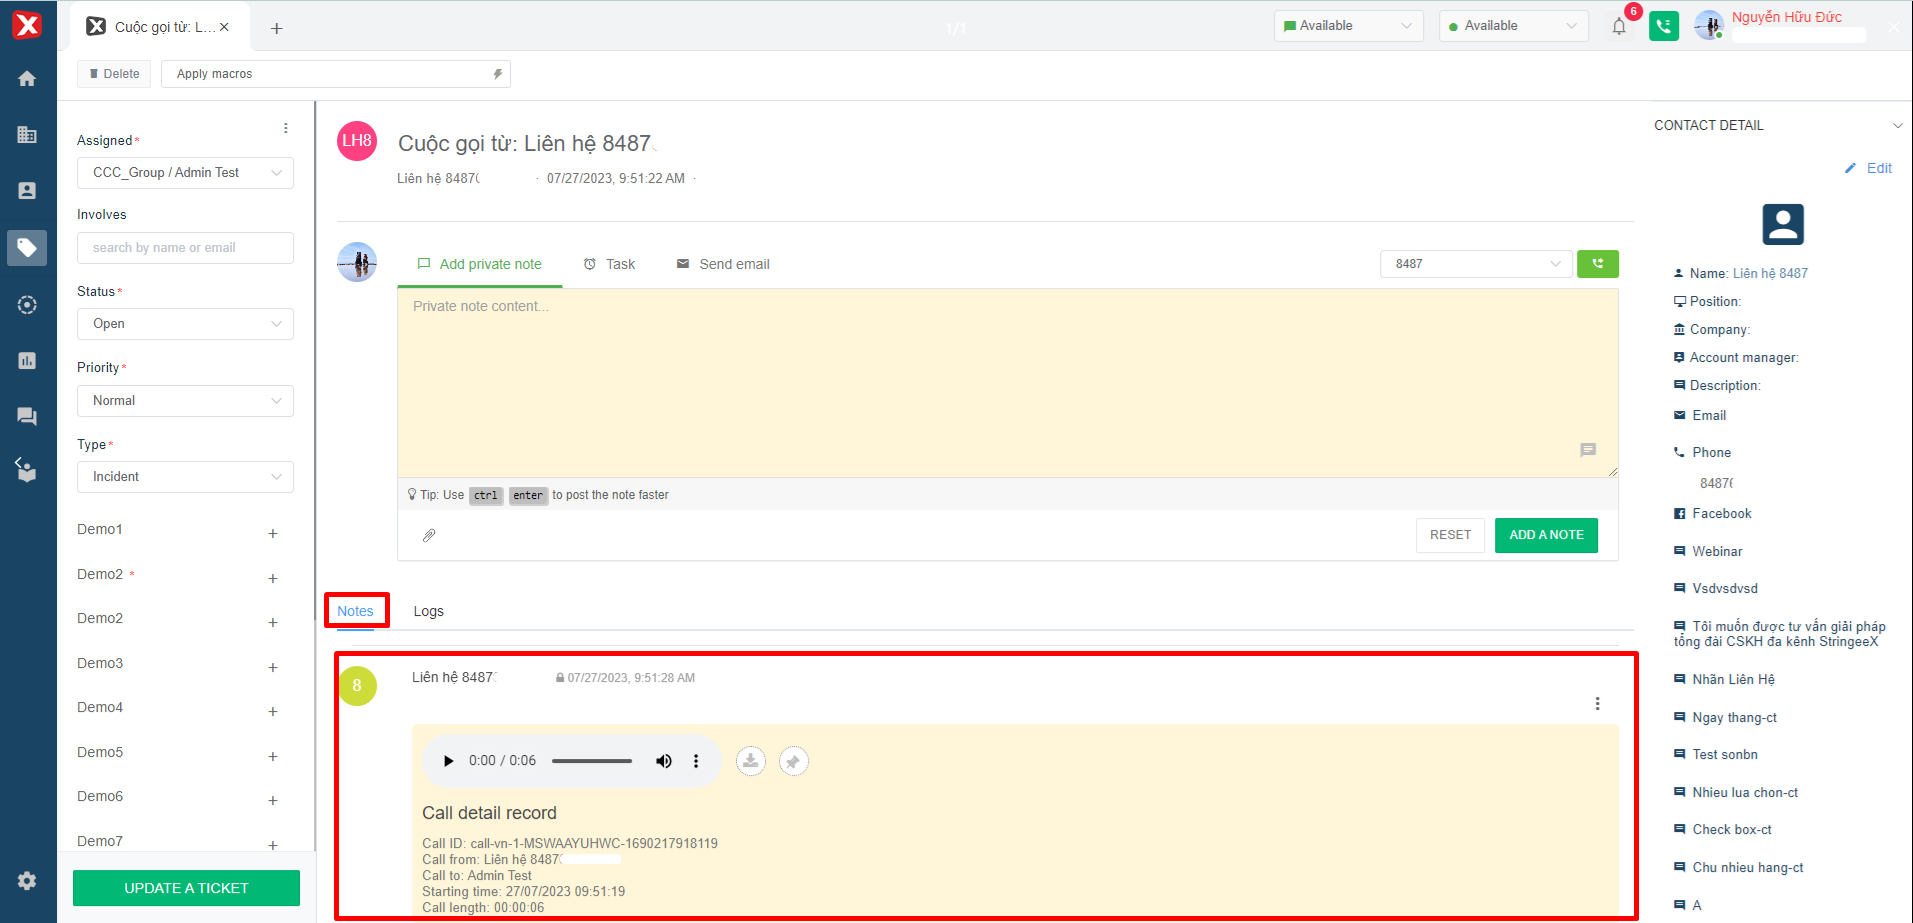
After making a call, the system will not create a new ticket. The call details will be saved in the Notes section of the ticket.
Attached file: Users can attach document files (Word, Excel, photos, videos, ...) with a maximum size of 25MB.
- For "Internal note": The file will be saved in Notes (Image 7).
- For "Task": file will be saved in Notes (Image 8).
- For "Send email": The file will be saved in the Notes (Image 9) and at the same time will be sent as an attachment in the mail to the recipient.
Sample notes: are pre-made templates. Users can select those samples to insert directly into the content of internal notes, tasks, and email.
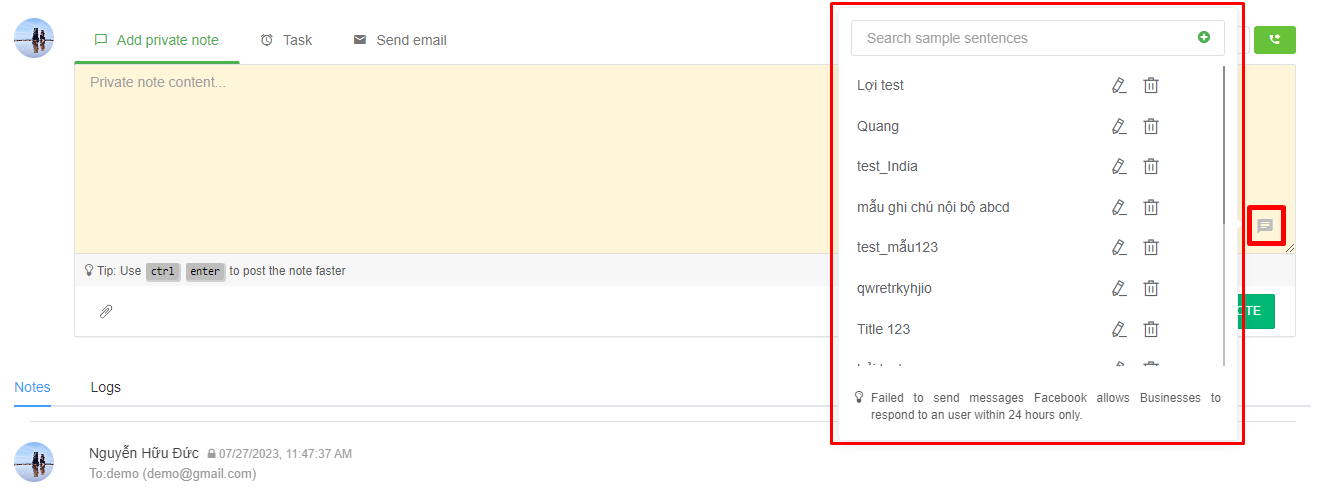
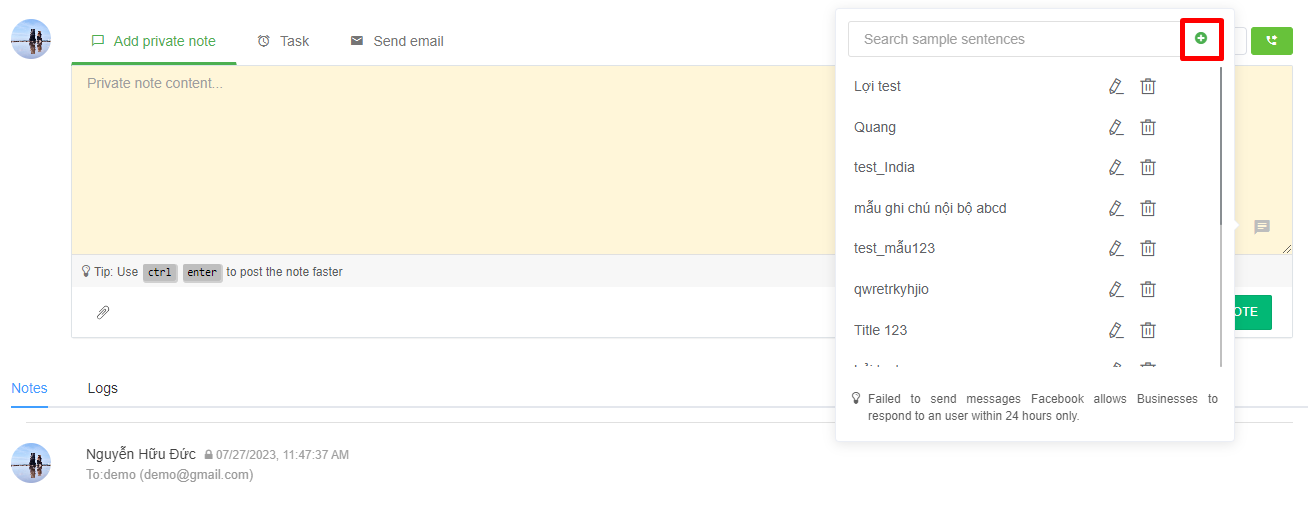
Here, users can check sample notes through the search box in Image 15 and add new sample notes by selecting the icon as shown in Image 16.
To complete adding a new sample note, the user enters all the information in the corresponding fields and then clicks add a sample.
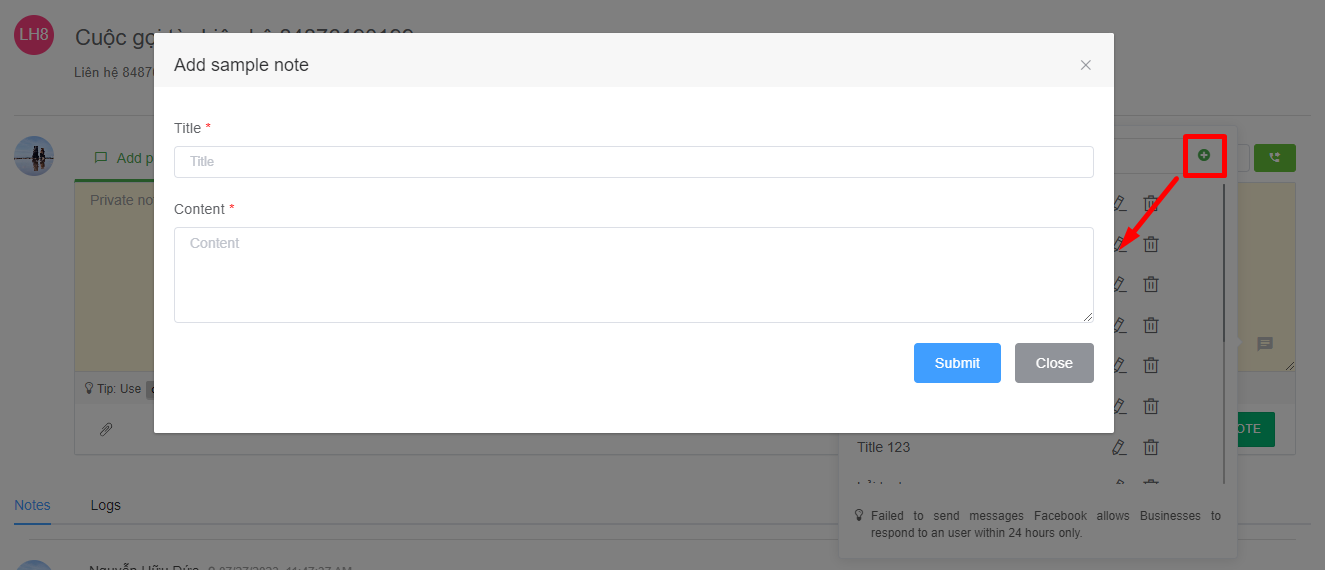
- Title: A name of a note sample.
- Content: The content of the sample note will be inserted when the user selects the template note name.
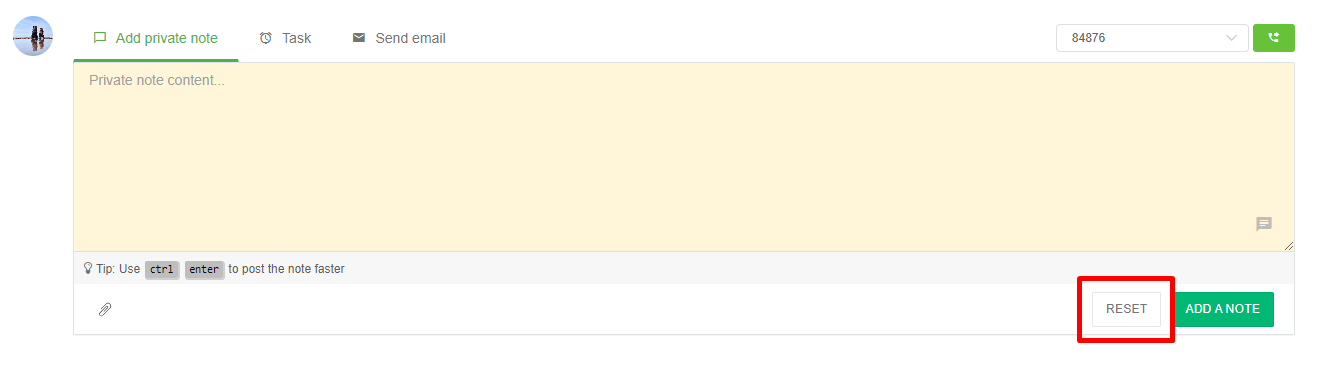
Reset notes: In each entry of internal notes, tasks, and emailing, there will be an option to reset. When the user chooses to reset, all current content and actions will be deleted.
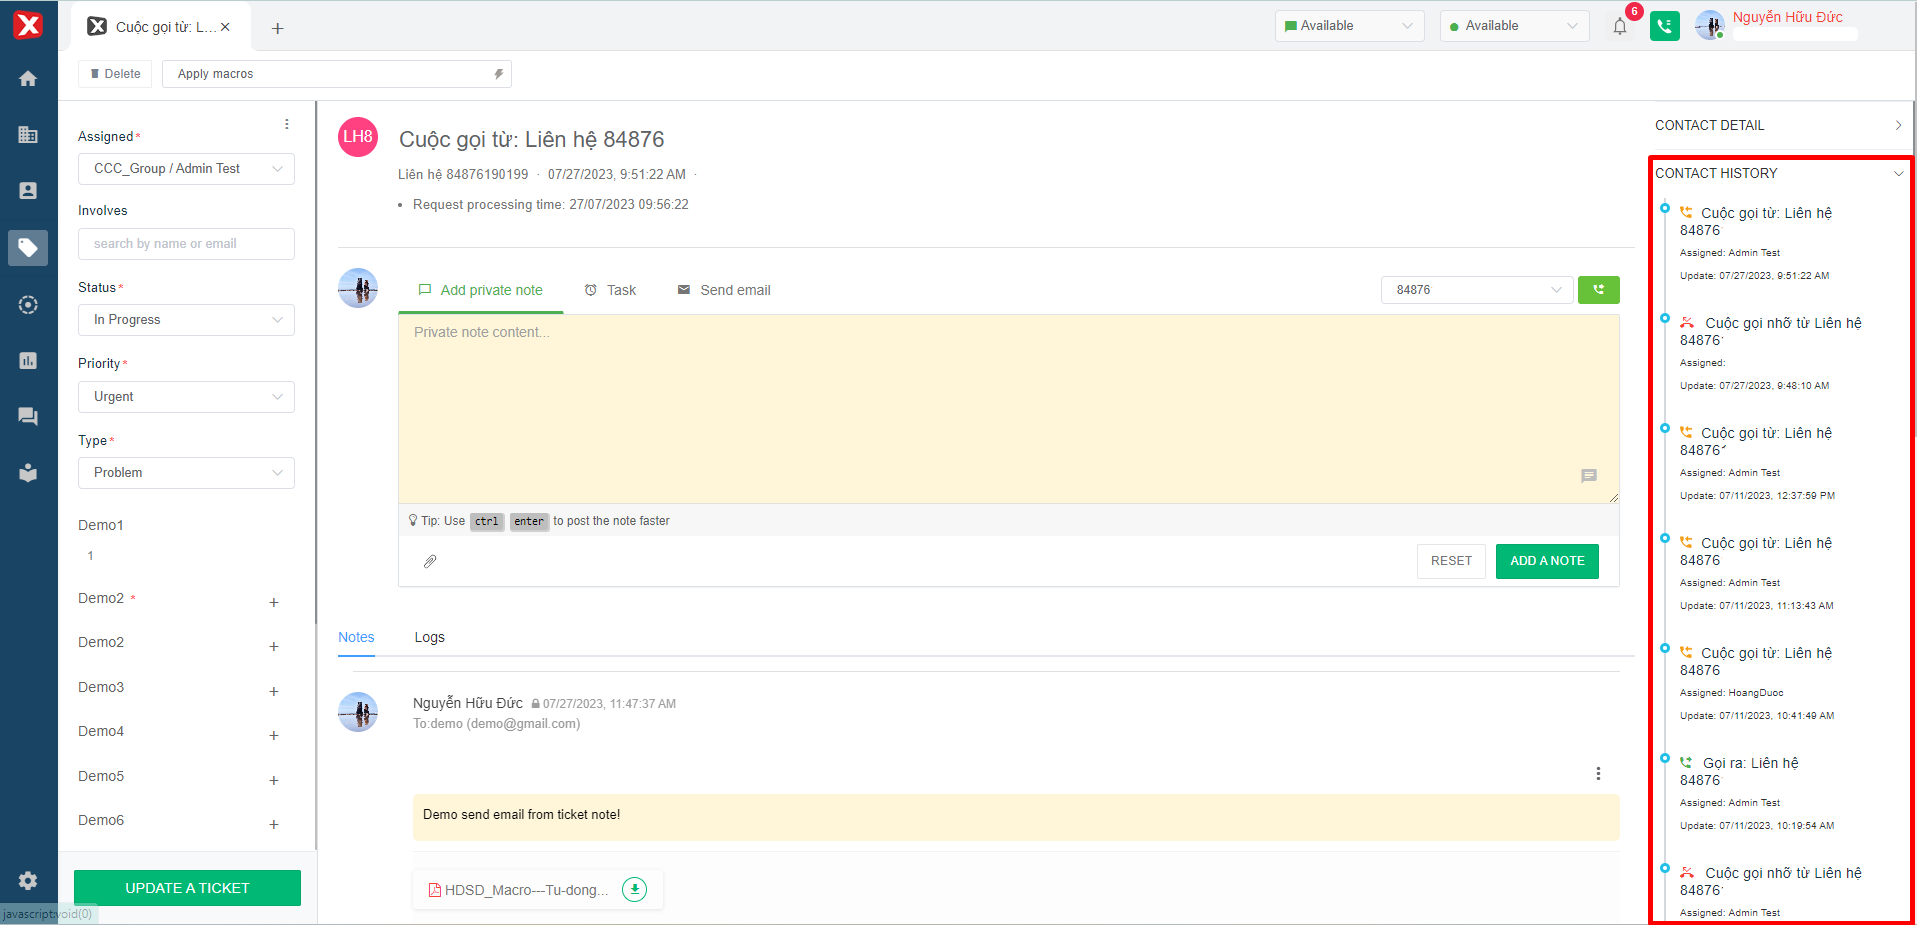
Ticket history
Notes: The system will save all information related to the ticket including calls, chats, emails, internal notes, tasks, emails, etc.
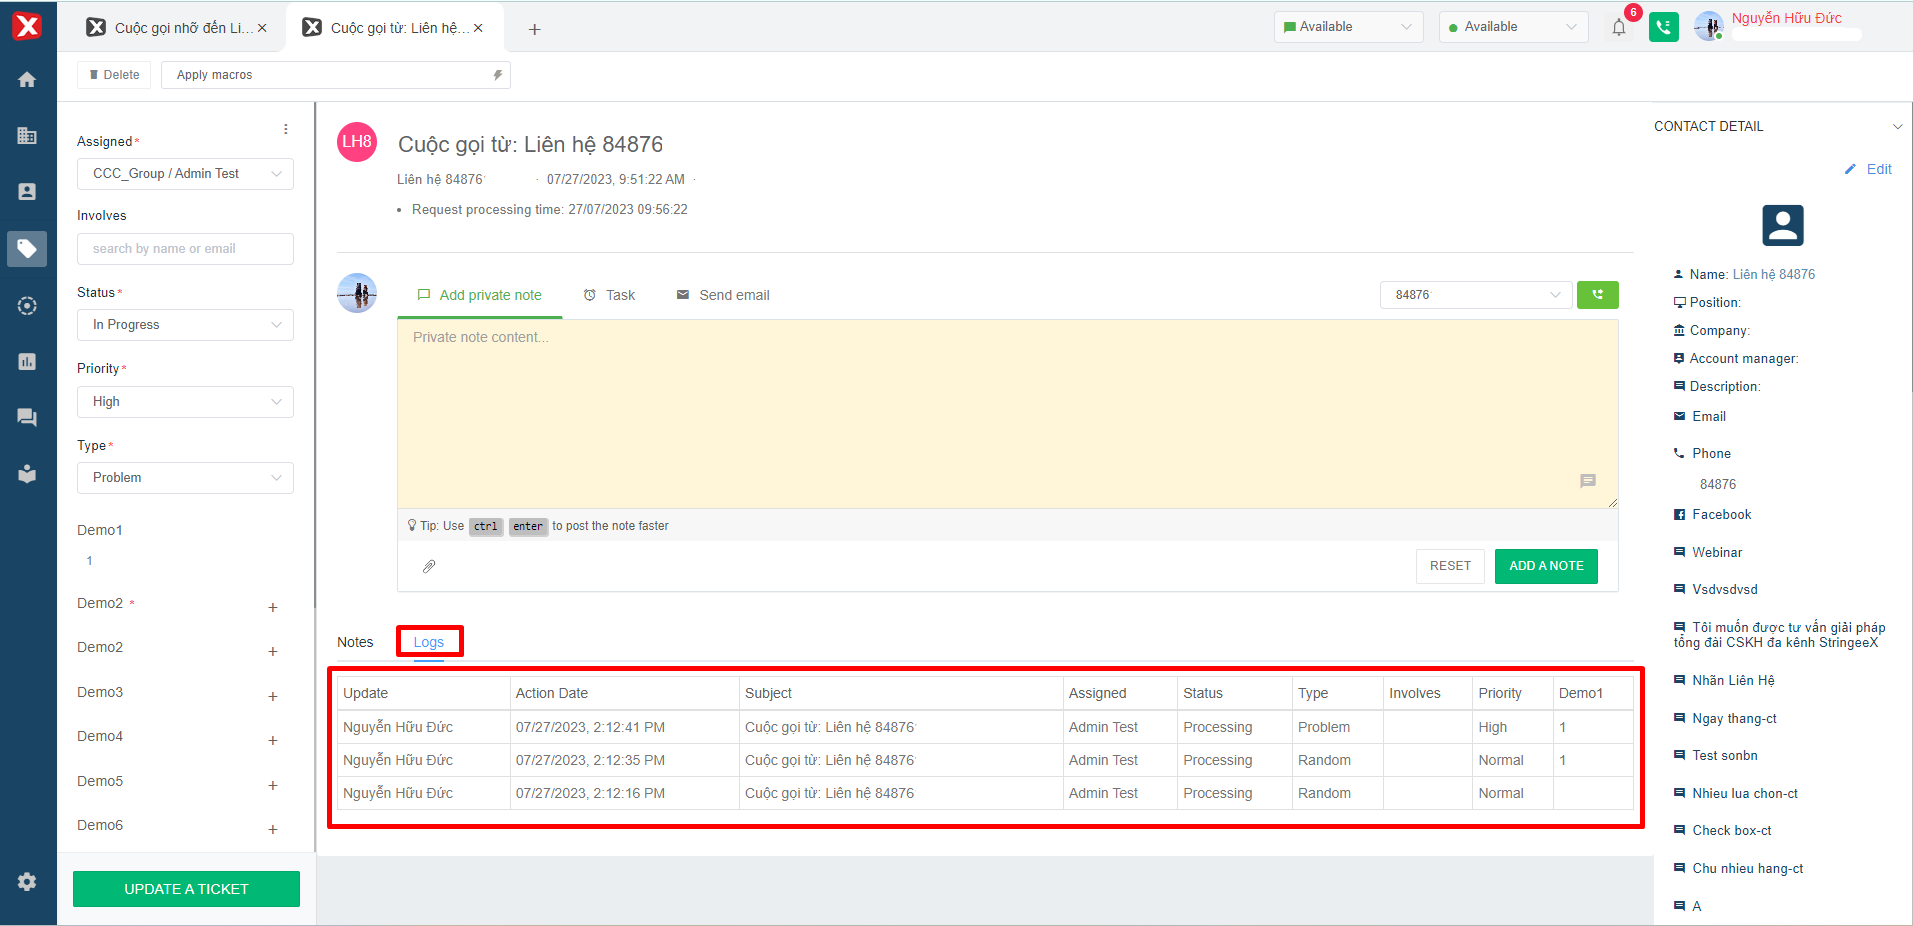
Logs: the system will record all changes of the ticket fields.
- For system default ticket fields: After changing the information, the user needs to press the "Update a ticket" button to save the changes.
- For custom ticket fields: After changing, enter the information the user needs to operate and press the "Save" button at that information field to save the changes.
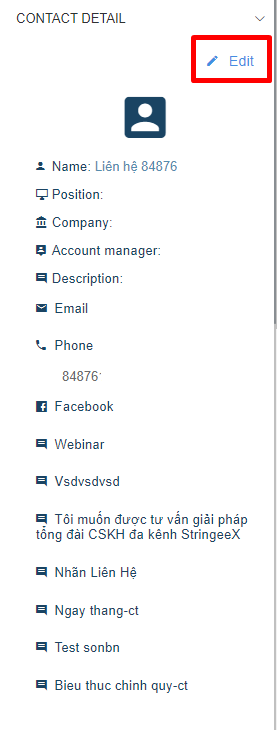
Contact details
Here users can view all fields of Customer's contact details in the ticket.
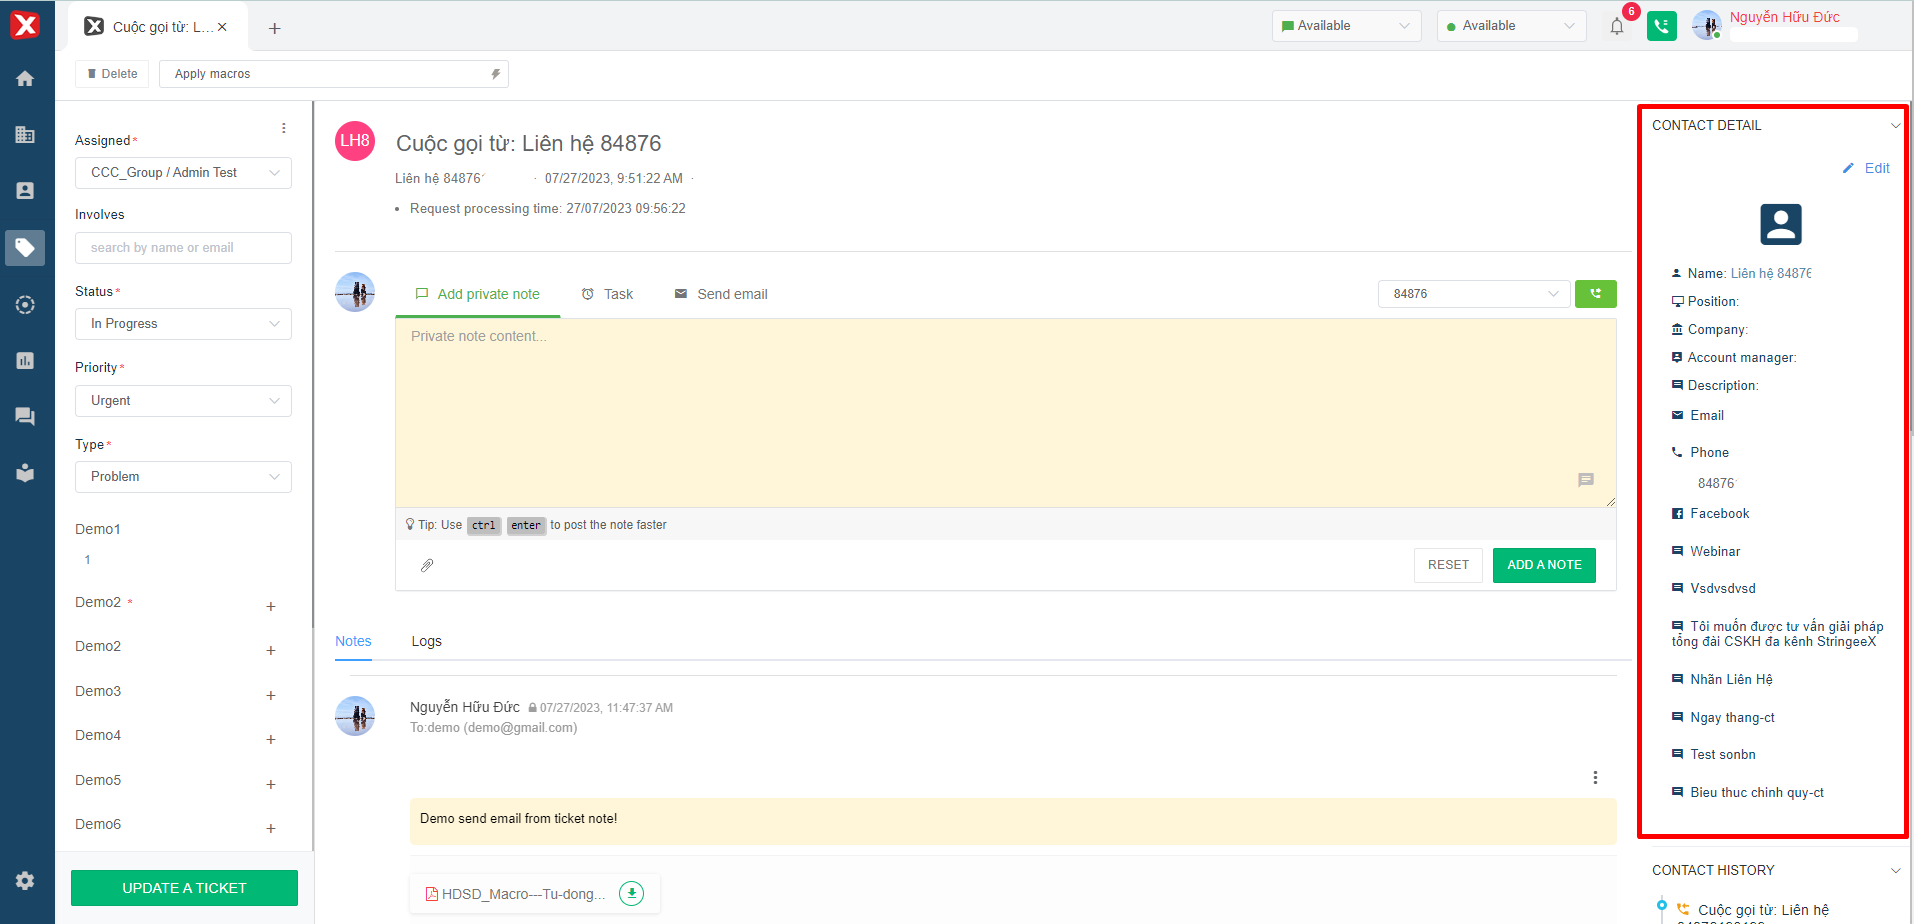
At the same time, users can directly edit contact information in the ticket.
Notes
This is the ticket list belonging to the previously Customer contact. Users can review previous tickets by clicking directly on the ticket to view.