# Marco

## Definition

Macro is an object managed on StringeeX, allowing admin users to pre-set the values ​​to fill in the ticket such as email content, note content, value of ticket fields,... Based on set values, agents can quickly fill in the ticket content to be processed with just a few mouse clicks.

<figure><img src="https://content.gitbook.com/content/W1nWhVvoi55dxT8euy3M/blobs/hLYlizs1kX6YiW8vHXcw/image.png" alt=""><figcaption><p>
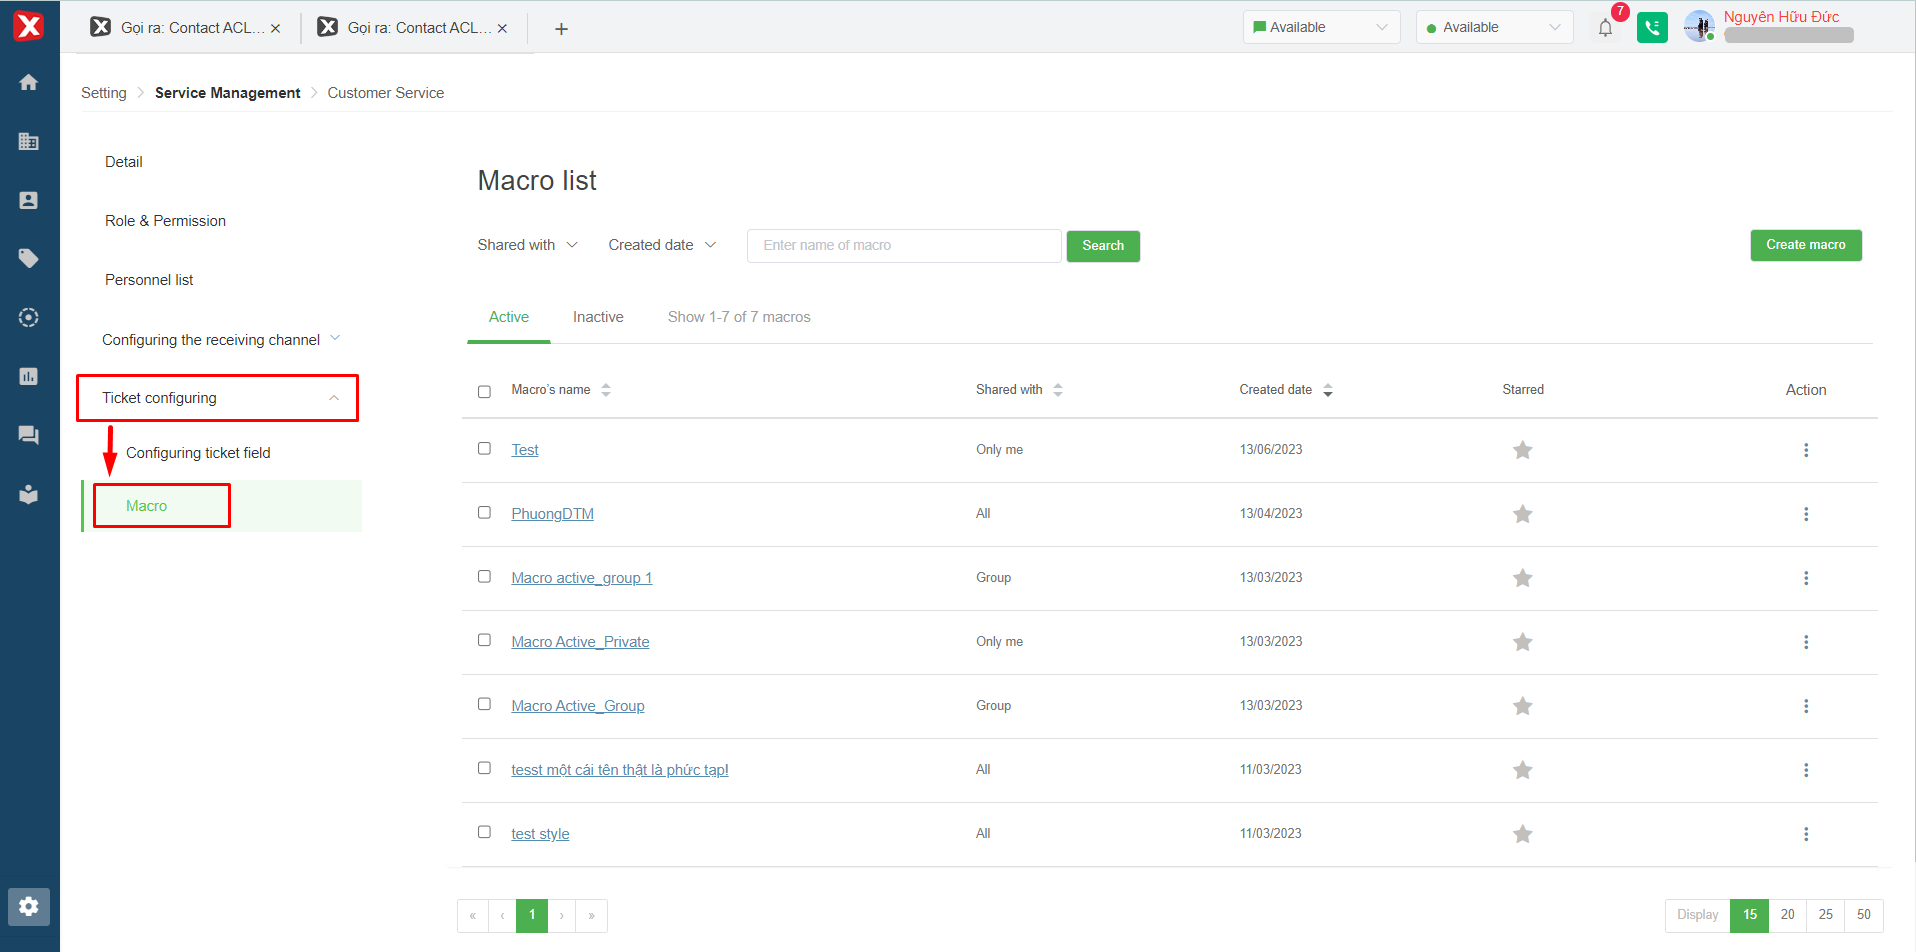
Image 1: Macro feature</p></figcaption></figure>

Trong danh sách Macro người dùng sẽ có 2 mục là bộ lọc Macro và bảng thống kê Macro.

## Macro filter

<figure><img src="https://content.gitbook.com/content/W1nWhVvoi55dxT8euy3M/blobs/TkNCEb0OQYmcUrc5pXqT/image.png" alt=""><figcaption><p>
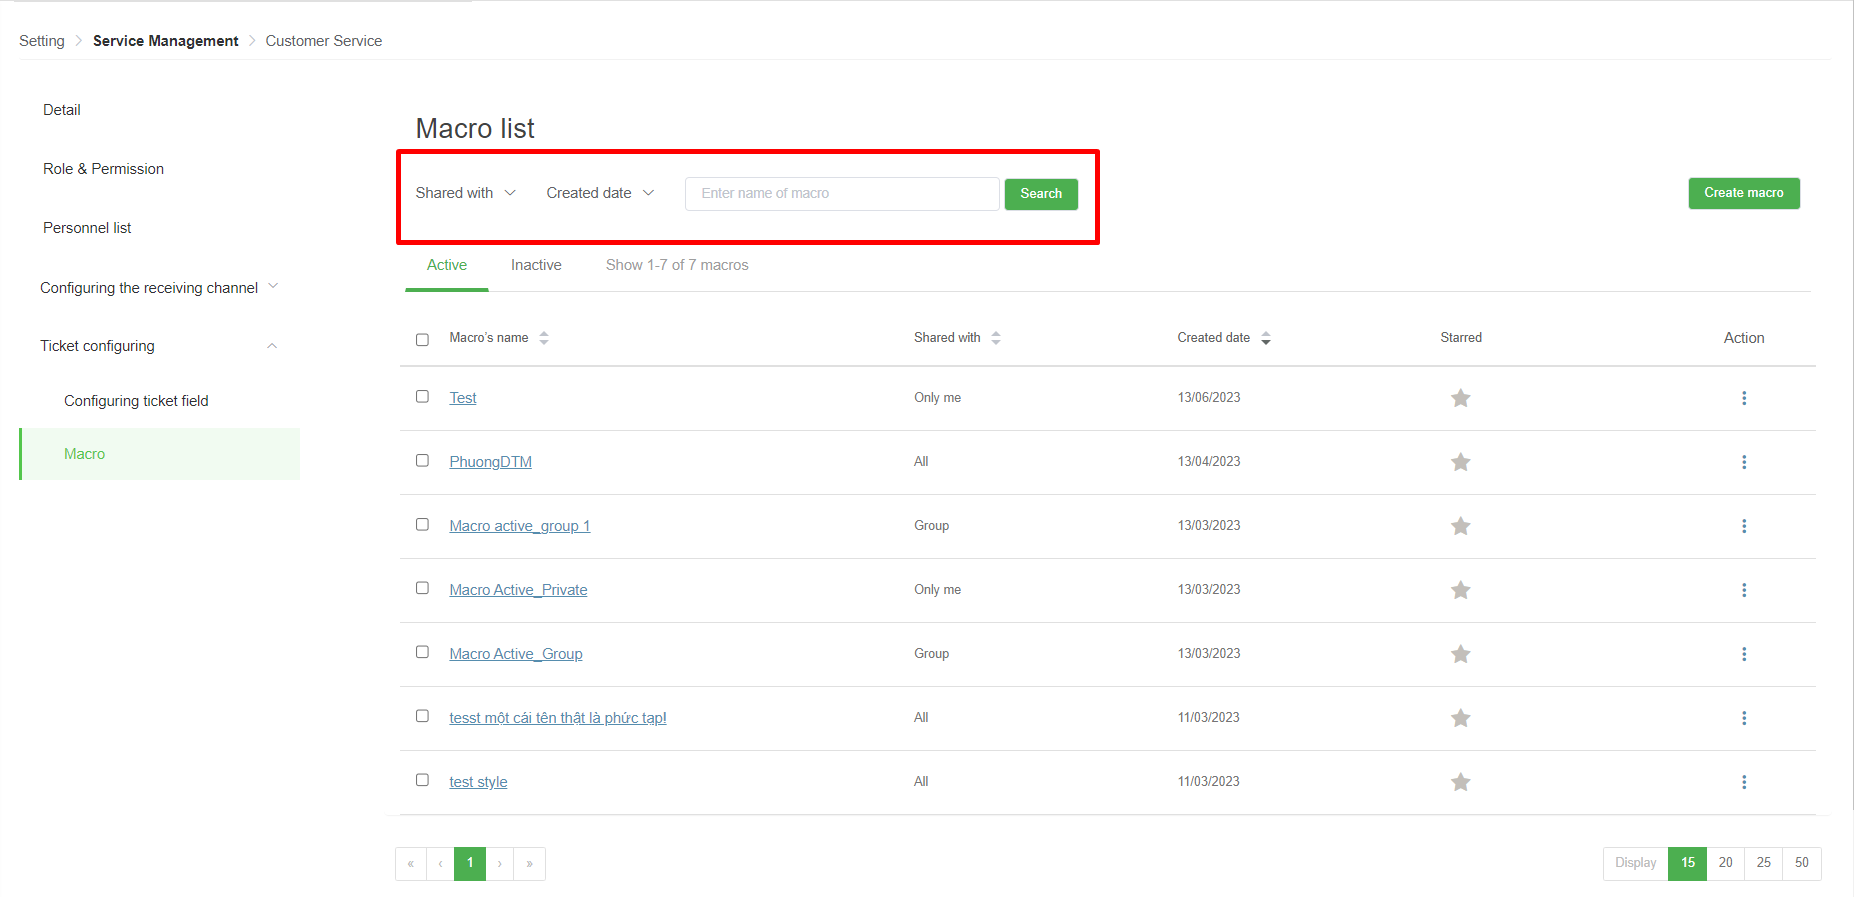
Image 2: Macro filter</p></figcaption></figure>

* **Share with:** users can filter out shared Macros by permissions All, Only Me (Macro creator), Group (Agent groups on the system).&#x20;
* **Created date:** the date the Macro was created on the system.&#x20;
* **Search box:** search by name of Macro.

## Statistical table of Macro

<figure><img src="https://content.gitbook.com/content/W1nWhVvoi55dxT8euy3M/blobs/ojUGhpZir8Ixw7vin1F2/image.png" alt=""><figcaption><p>
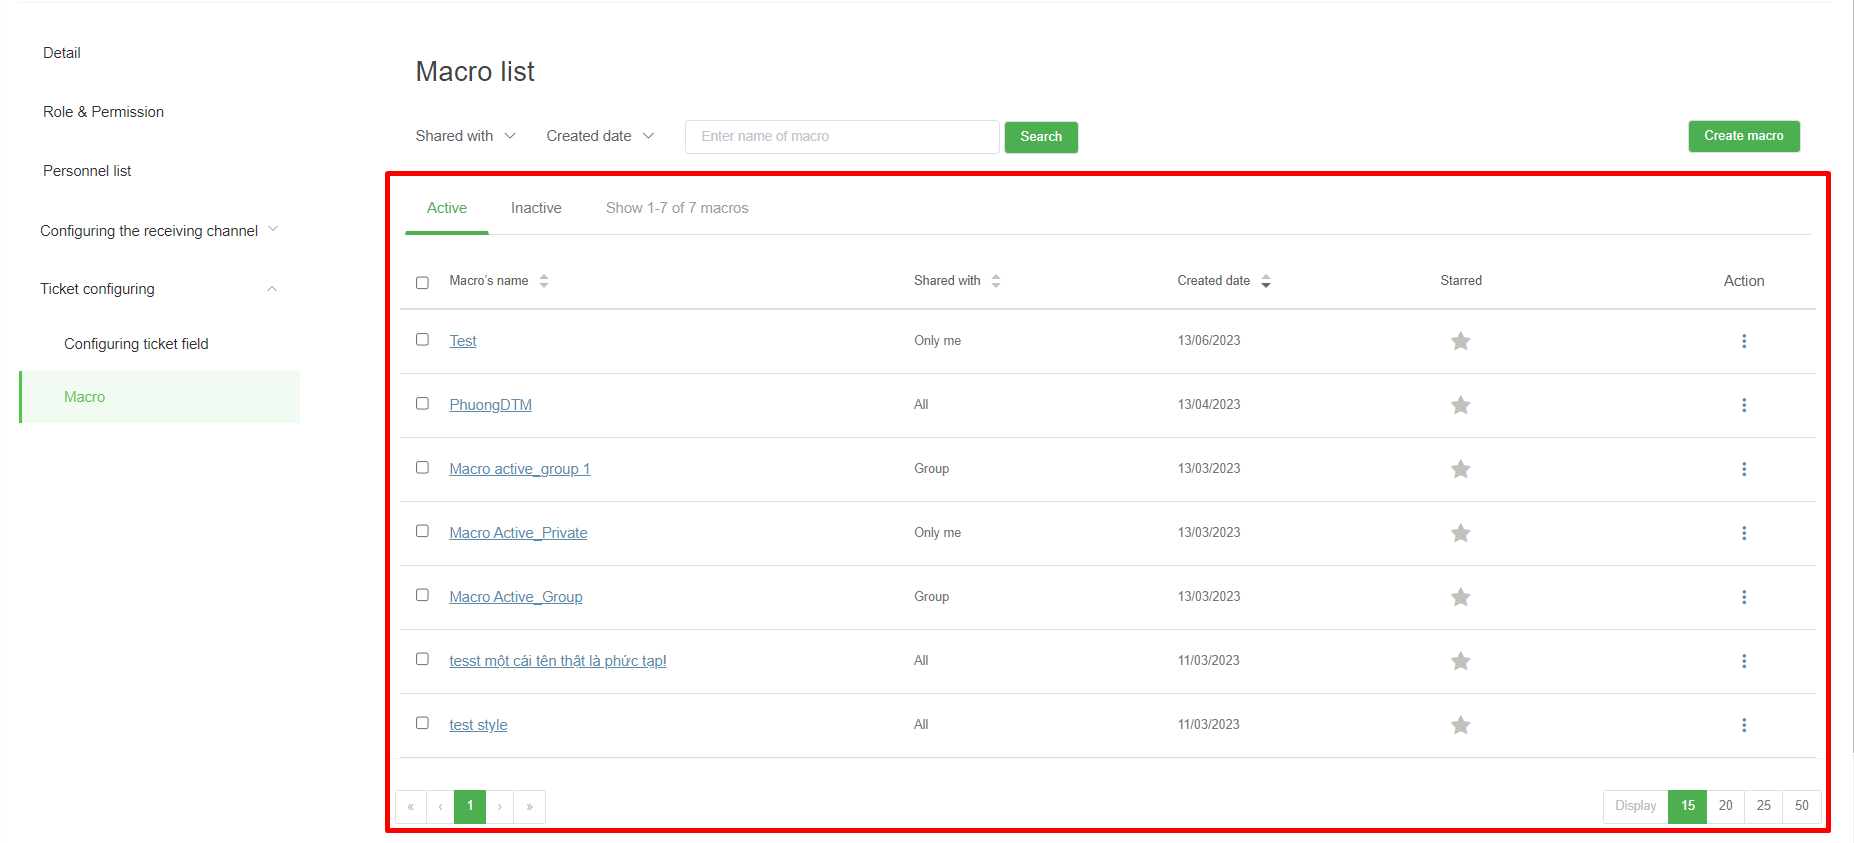
Image 3: Statistical table of Macro</p></figcaption></figure>

* **Active/Inactive:** Active is the user who can apply the Macro in the ticket. Inactive user is the opposite.&#x20;
* **Macro name:** the name given when initializing the Macro.&#x20;
* **Share with:** permission to view and use Macros.&#x20;
* **Created date:** Macro initialization time.&#x20;
* **Favorite:** yes or no. If marked as favorite Macro will be prioritized to display at the top of the list.&#x20;
* **Action:**

<figure><img src="https://content.gitbook.com/content/W1nWhVvoi55dxT8euy3M/blobs/JfVvaSkD0aWrqD6Pcu1w/image.png" alt=""><figcaption><p>
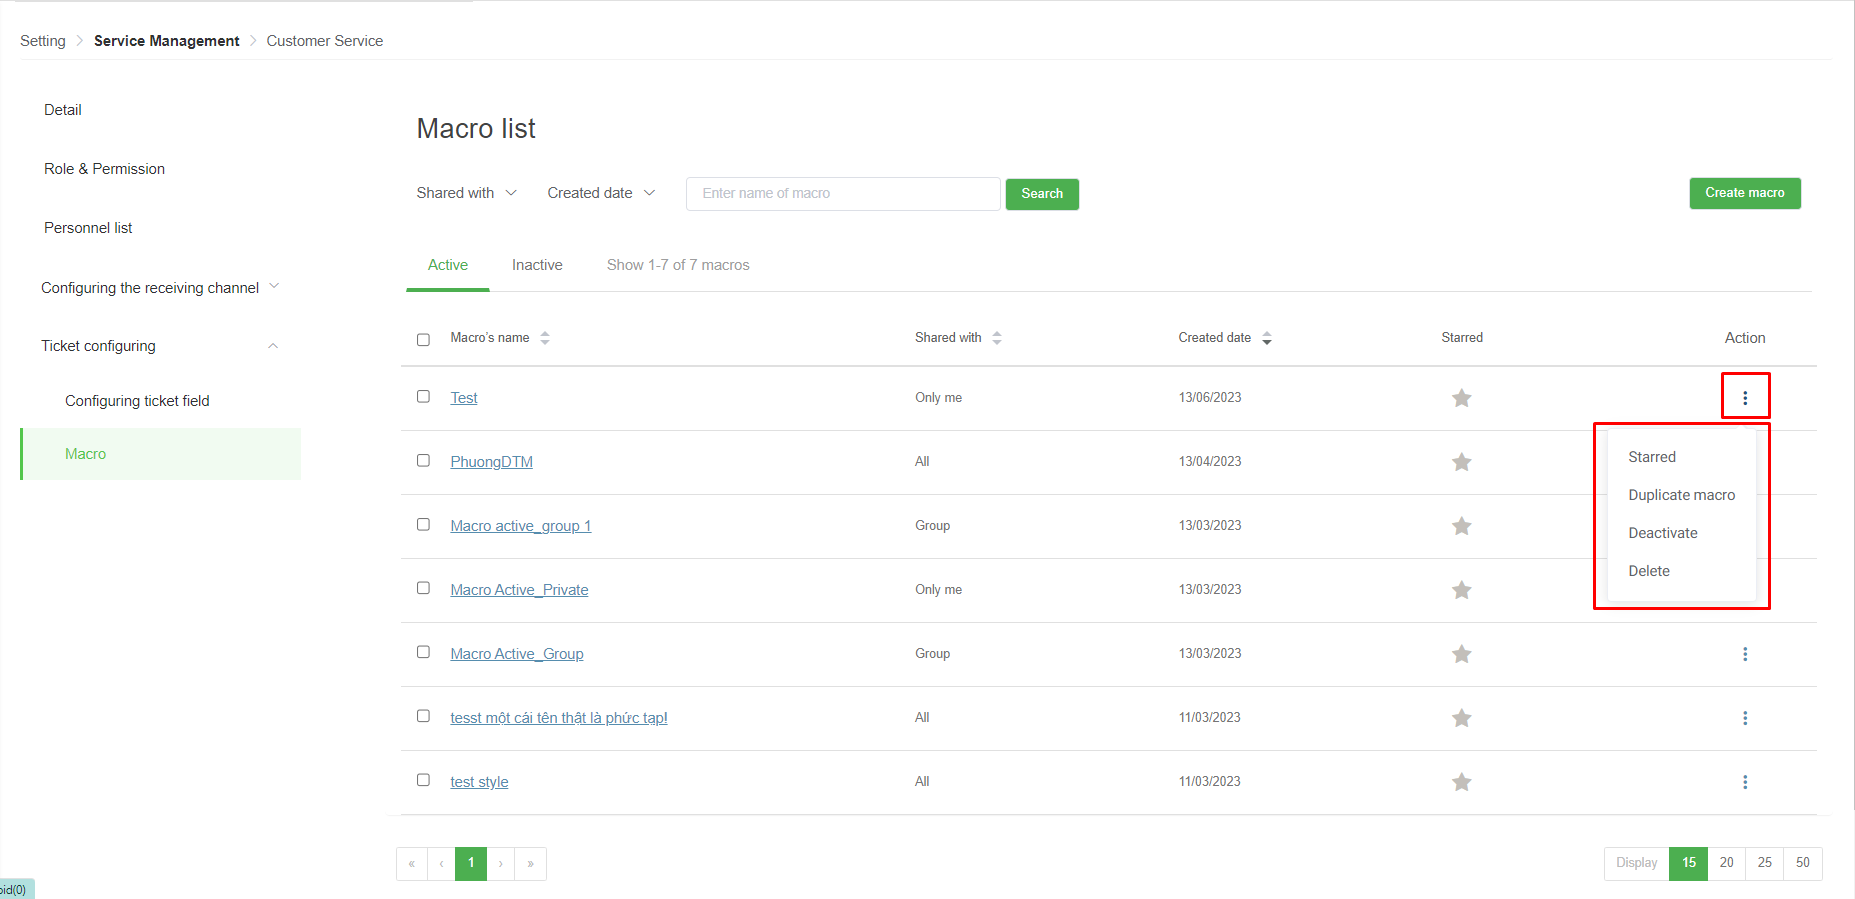
Image 4: Actions for Macro</p></figcaption></figure>

&#x20;     **- Favorite:** mark Macro as favorite or unfavorite.

&#x20;     **- Duplicate Macro:** the system will go to the ticket creation interface with the same settings as the cloned Macro.

&#x20;    **- Disable:** put the Macro into a state of inactivity and can be reopened for that Macro when needed. If you use this action in the Macro section to stop working, it will be “Activate”.

* **Delete Macro:** To delete a Macro, the user ticks the Macro selection box and selects the delete button as shown in the image below.

<figure><img src="https://content.gitbook.com/content/W1nWhVvoi55dxT8euy3M/blobs/OGhgTbP8Drz1uHhairko/image.png" alt=""><figcaption><p>
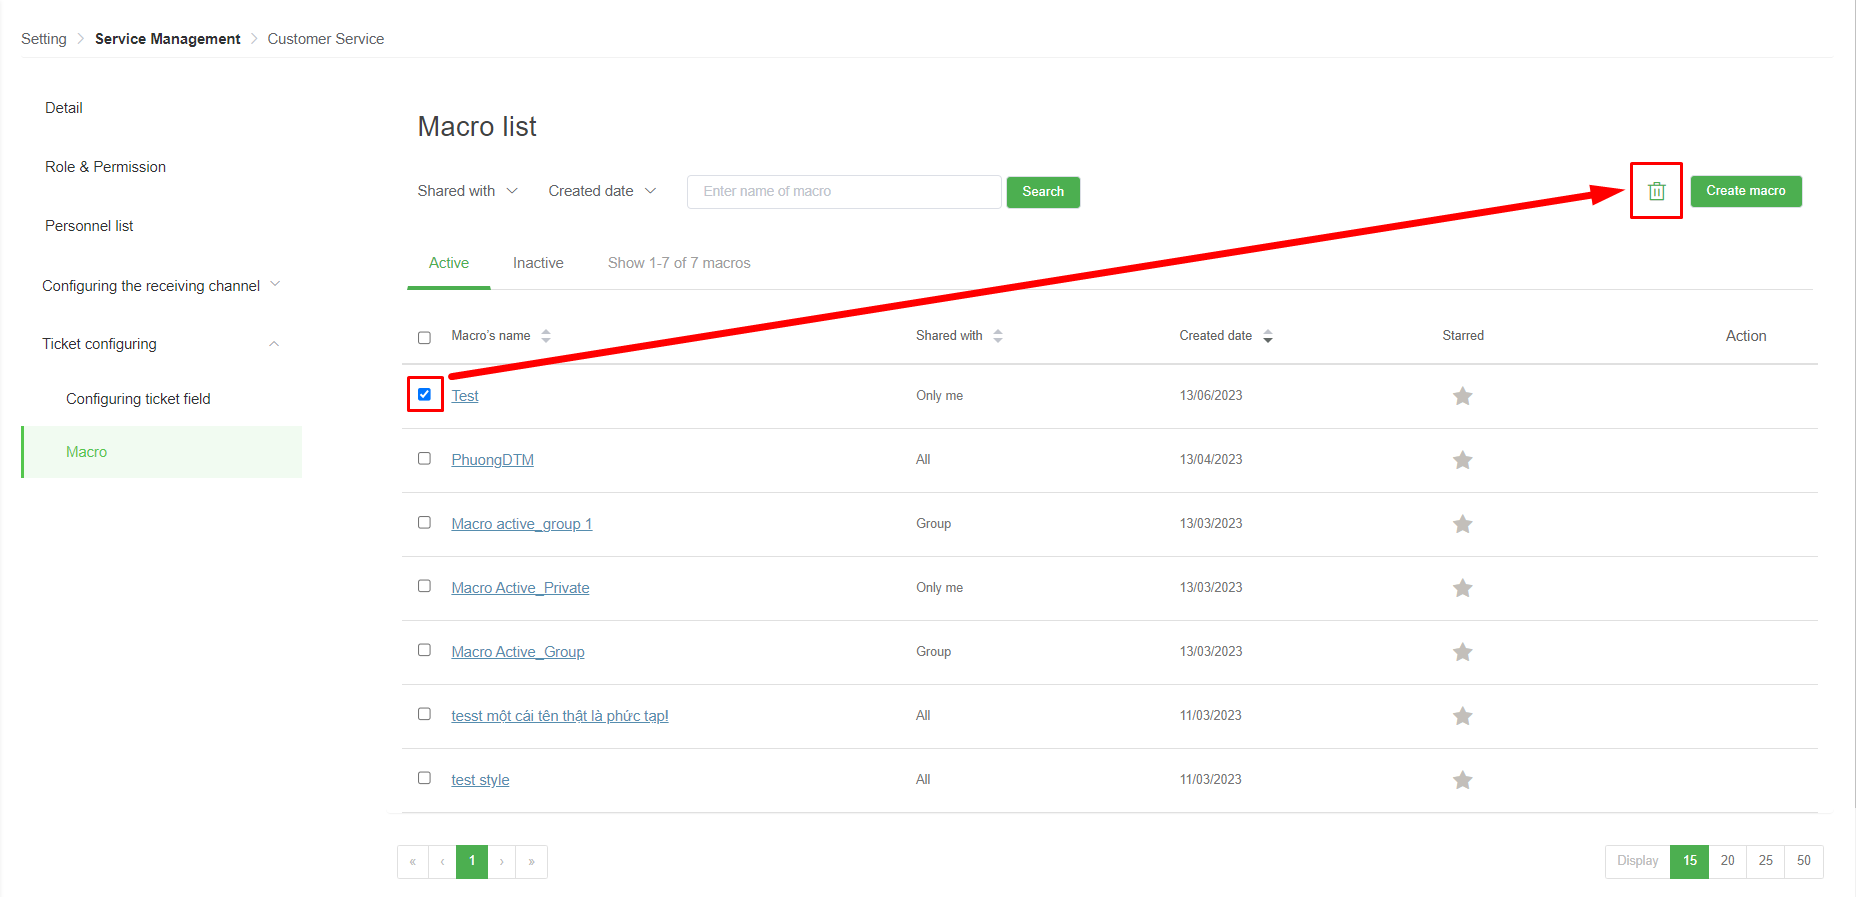
Image 5: Delete Macro</p></figcaption></figure>

## Create a Macro

To create a Macro, the user clicks the "Create a Macro" button on the interface.

<figure><img src="https://content.gitbook.com/content/W1nWhVvoi55dxT8euy3M/blobs/IkRyX8DofjpoSFKhpdyv/image.png" alt=""><figcaption><p>
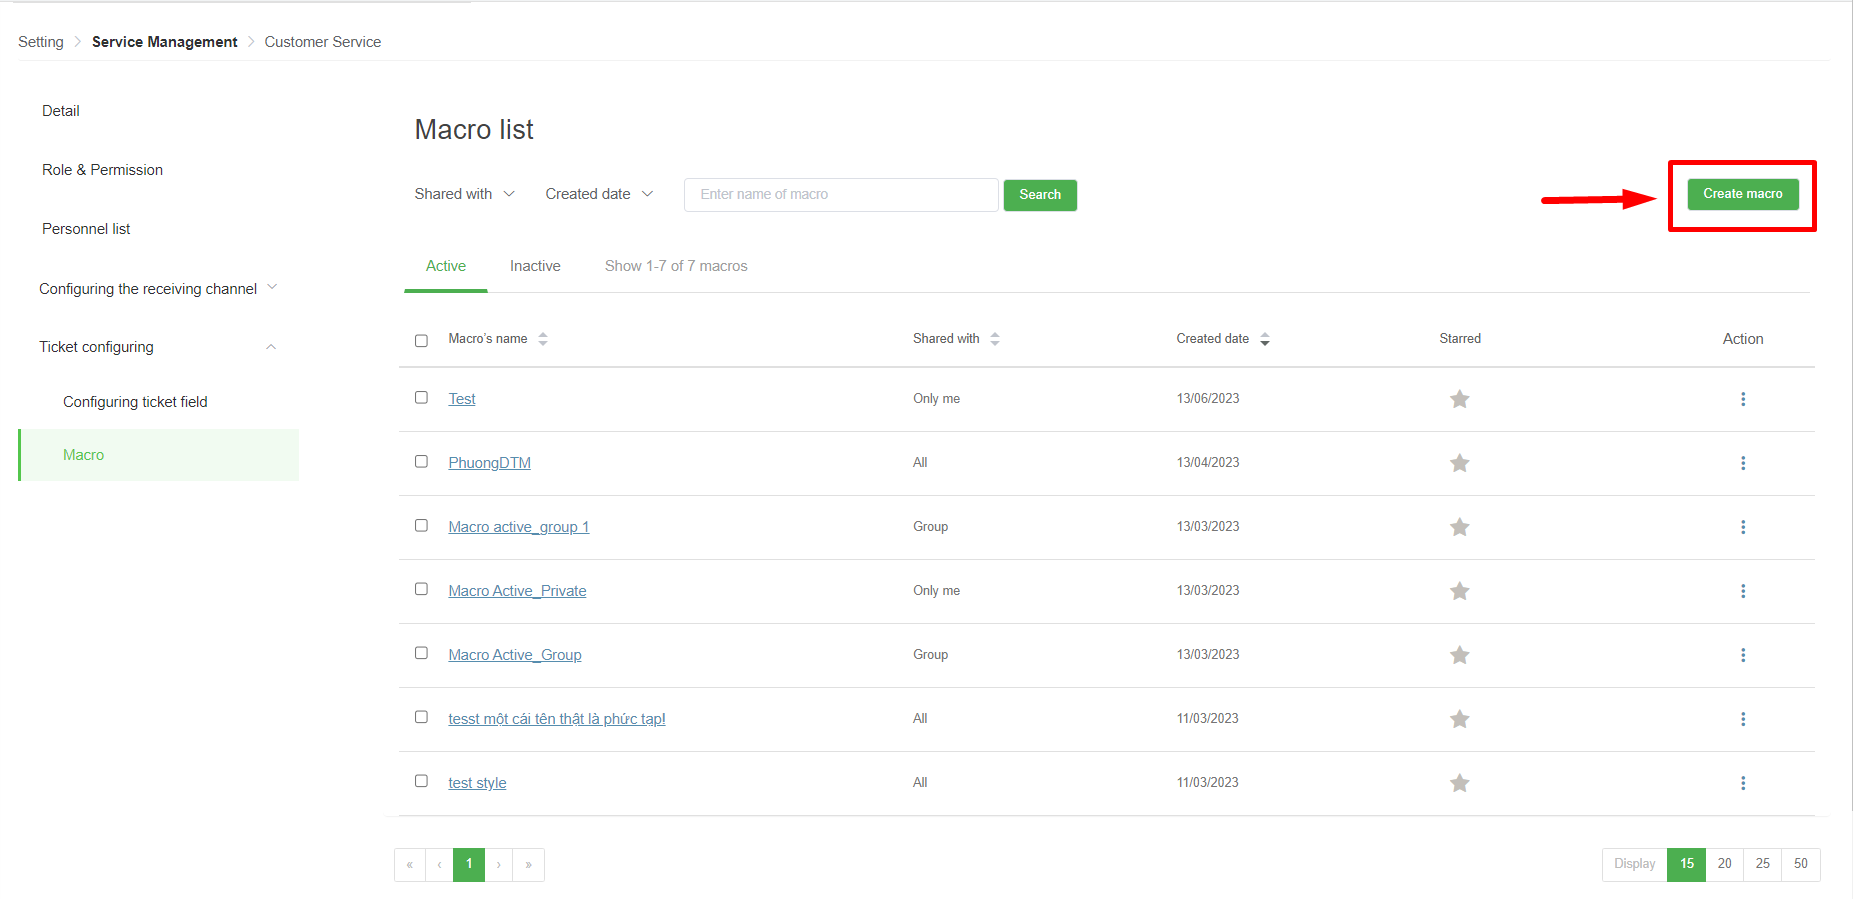
Image 5: Create a Macro</p></figcaption></figure>

### Macro configuration

<figure><img src="https://content.gitbook.com/content/W1nWhVvoi55dxT8euy3M/blobs/ItMuNdJjJUC71Vnzd4bh/image.png" alt=""><figcaption><p>
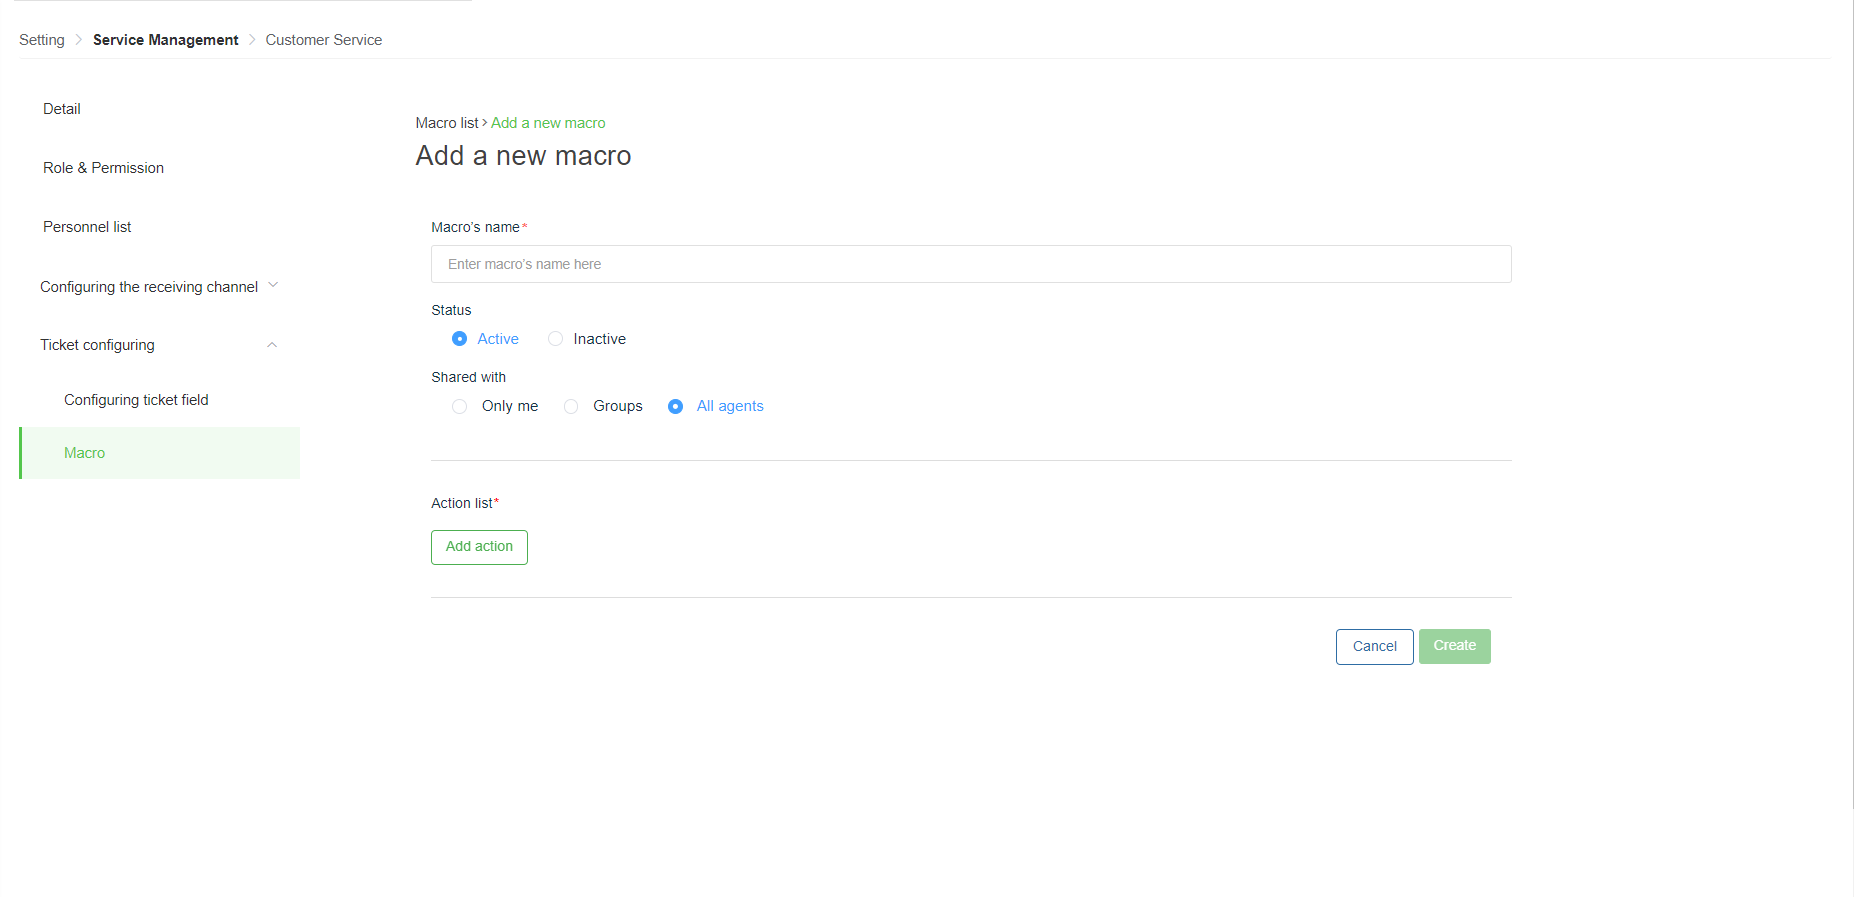
Image 6: Configure macro</p></figcaption></figure>

* **Macro name:** The name of the Macro will be displayed in the Macro statistics list.&#x20;
* **Status:** active or inactive.&#x20;
* **Share with:** the user will choose the most suitable option. If you choose to select the user group, you will select the groups that are allowed to use the created Macro.

<figure><img src="https://content.gitbook.com/content/W1nWhVvoi55dxT8euy3M/blobs/BseBOtm1kVbKsSJJUkIS/image.png" alt=""><figcaption><p>
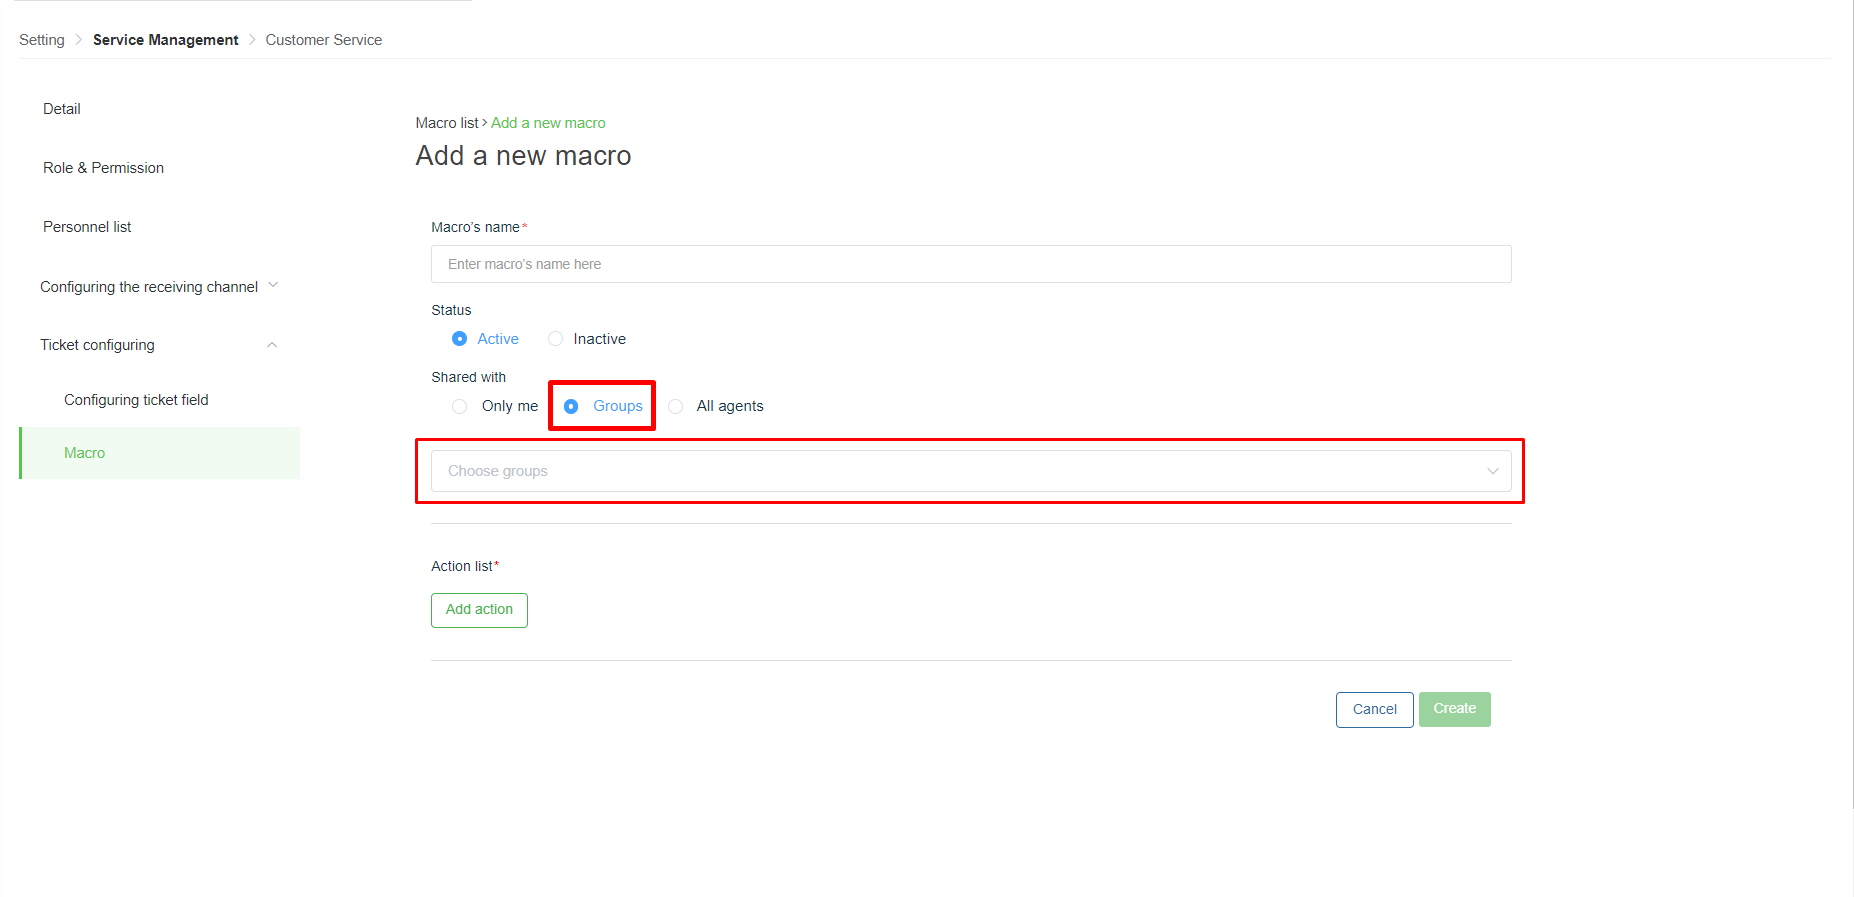
Image 7: Select the group used Macro</p></figcaption></figure>

* **List of operations**: in a Macro, each operation can only be selected once.

<figure><img src="https://content.gitbook.com/content/W1nWhVvoi55dxT8euy3M/blobs/QFl2J65V4d6chyfV0z3L/image.png" alt=""><figcaption><p>
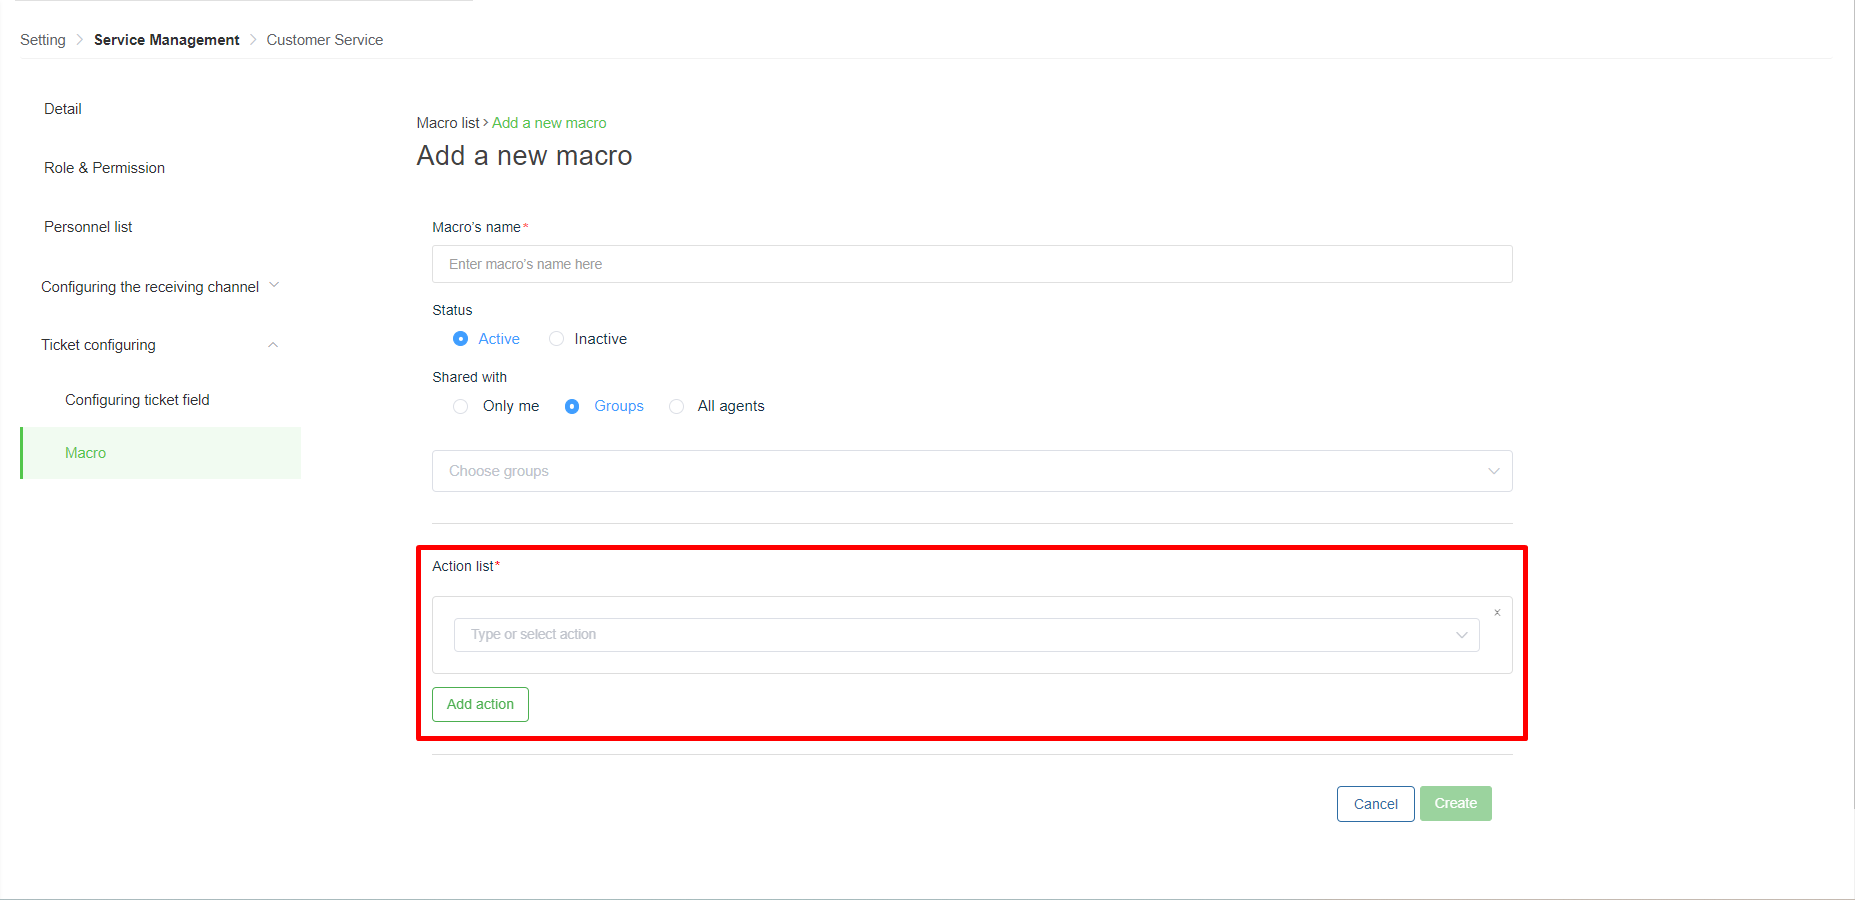
Image 8: Macro operation</p></figcaption></figure>

&#x20;     **- Send Email:** users add content to the template available on the system or can use the existing Placeholder on the system to create a complete Macro.

<figure><img src="https://content.gitbook.com/content/W1nWhVvoi55dxT8euy3M/blobs/POhoENZhB5A7SYcvAmK8/image.png" alt=""><figcaption><p>
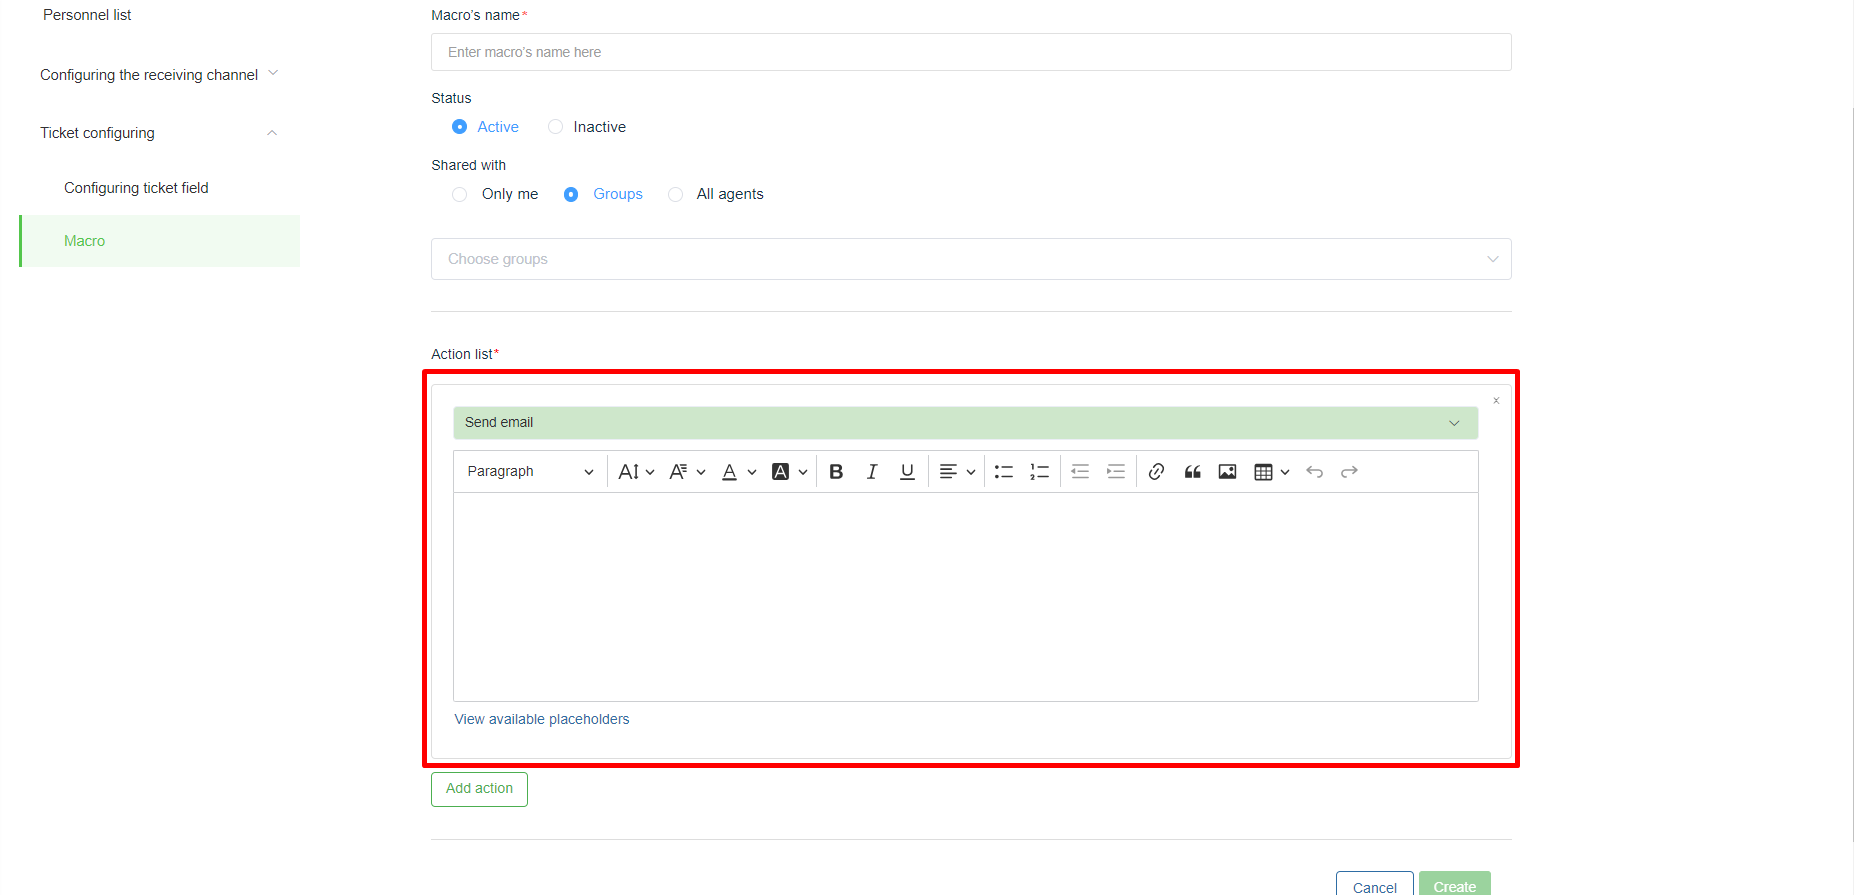
Image 9: Configure the operation of the Macro to send Email</p></figcaption></figure>

## Create a Macro in a ticket

To use the Macro feature, users need to open the details of a ticket and select the Macro feature to apply.

<figure><img src="https://content.gitbook.com/content/W1nWhVvoi55dxT8euy3M/blobs/OFHc5ub6TjQYD8EbBMH4/image.png" alt=""><figcaption><p>
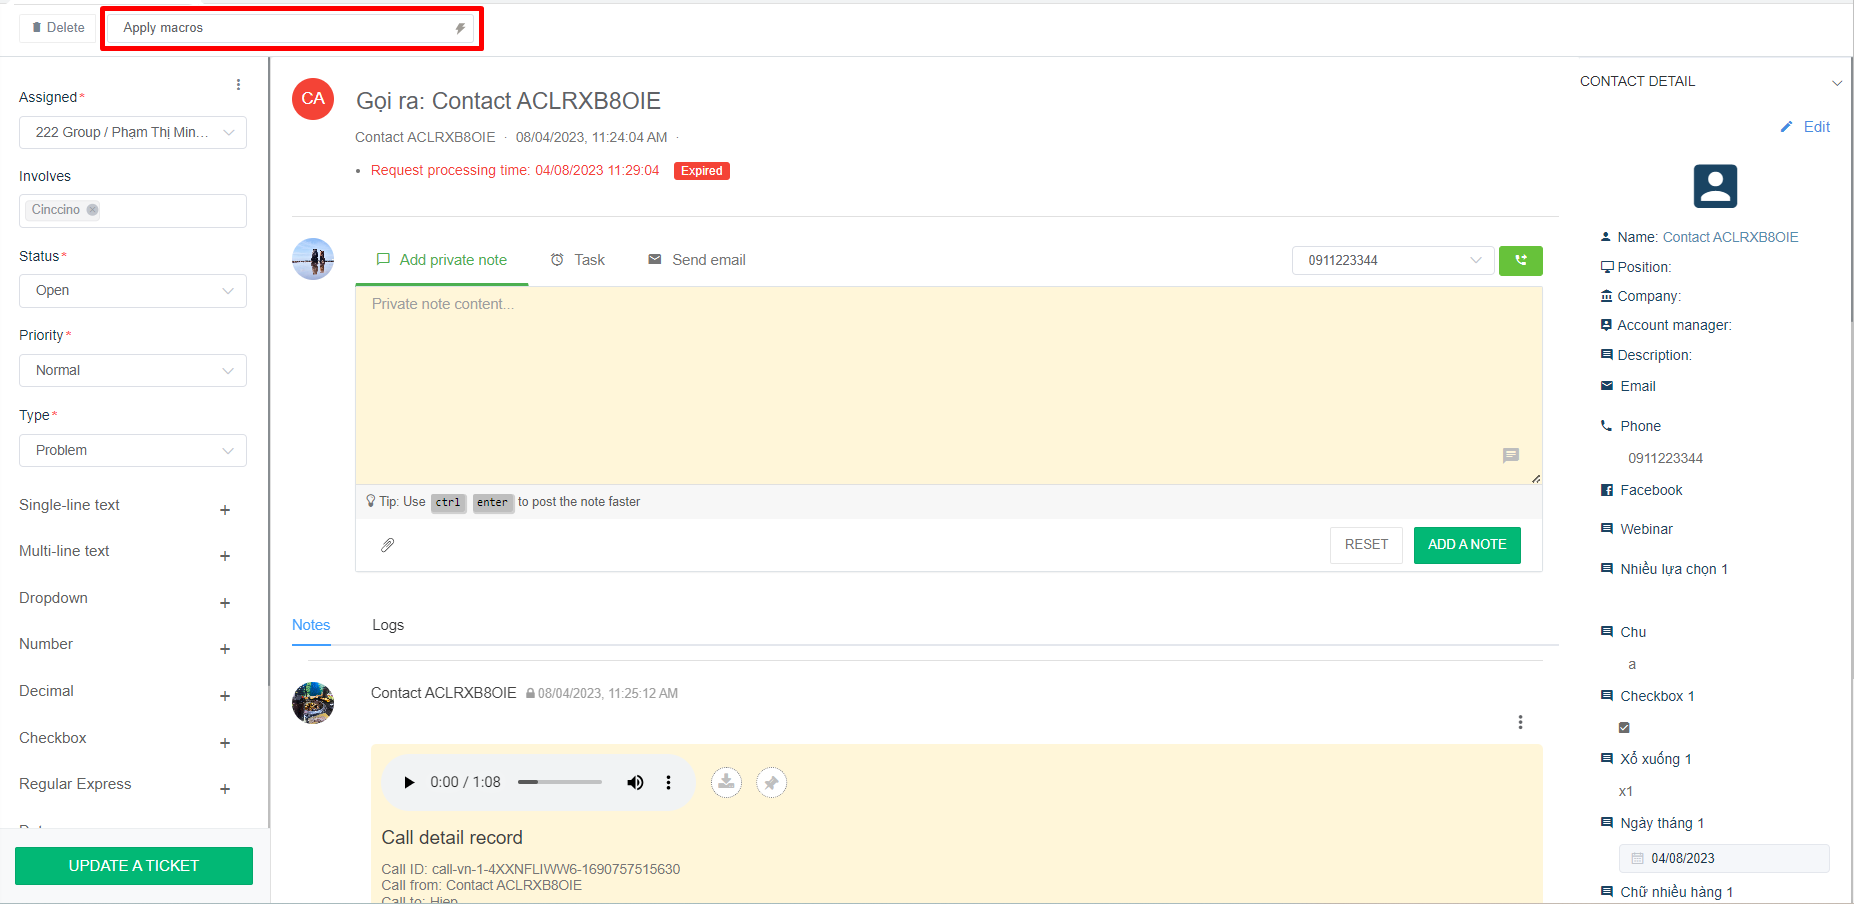
Image 10: Select Macro in ticket details</p></figcaption></figure>

### Macro to send Email

After selecting the "Send Email" Macro, the system will automatically switch to the interface to send mail to the Customer and apply the content of the Macro to the ticket.

<figure><img src="https://content.gitbook.com/content/W1nWhVvoi55dxT8euy3M/blobs/7blvSsGWAXWNdHZf8gb8/image.png" alt=""><figcaption><p>
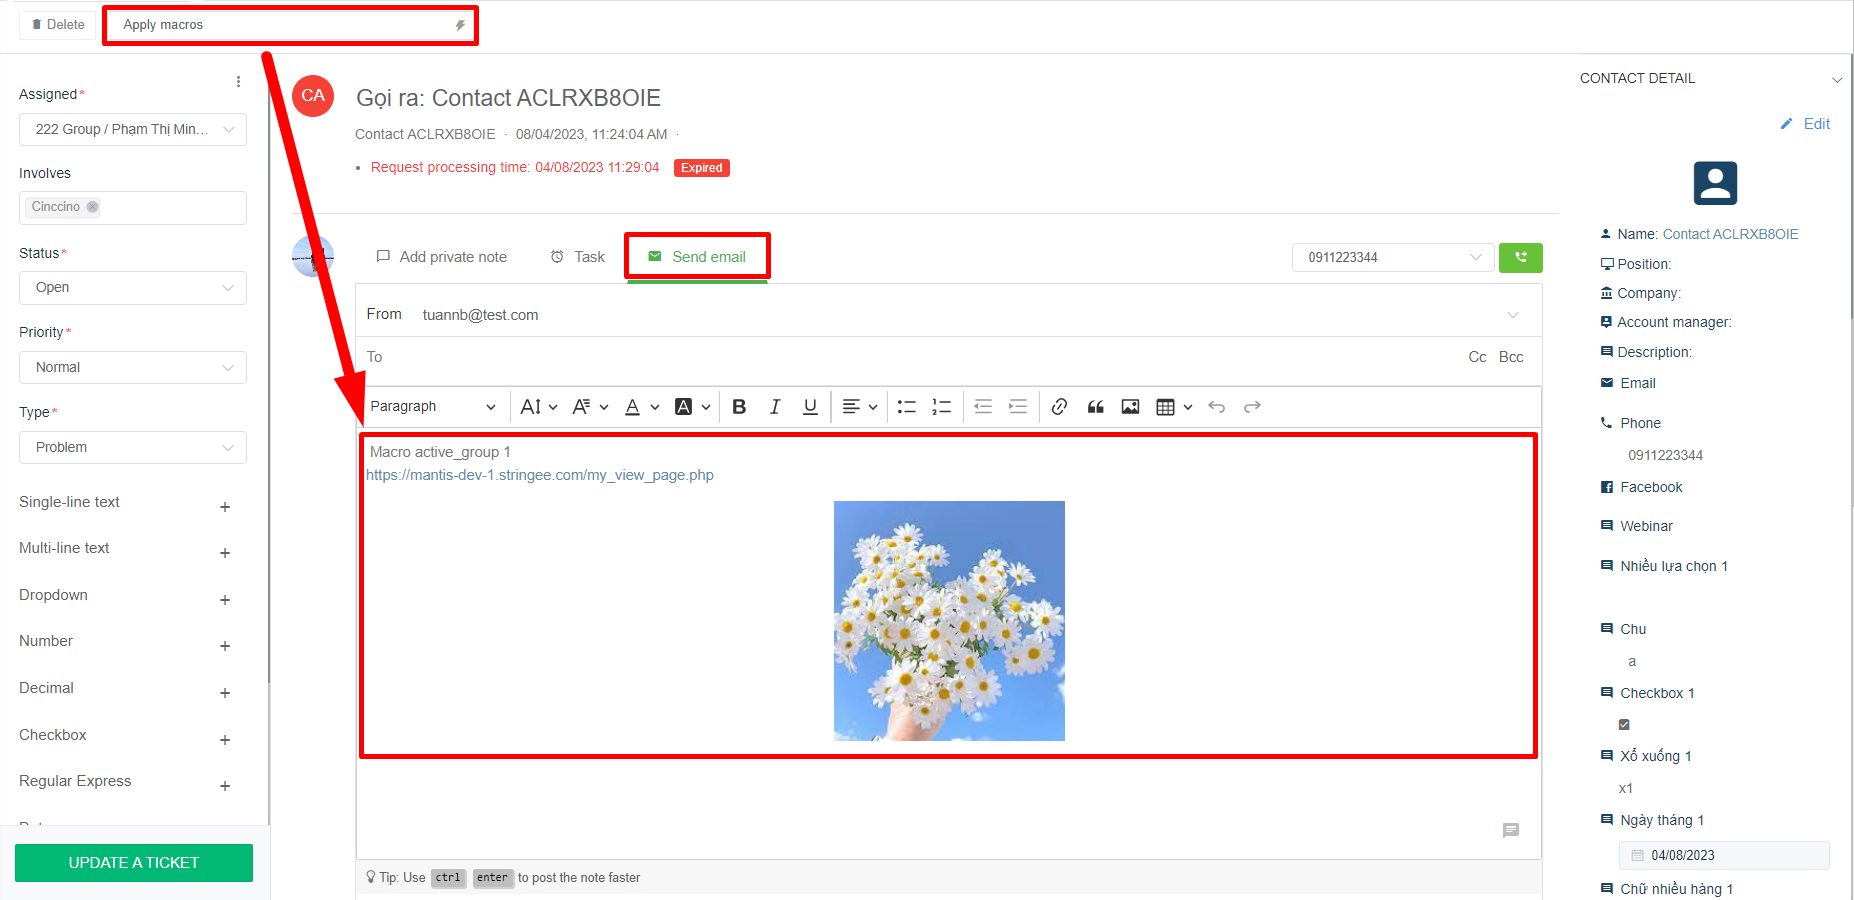
Image 11: Apply Macro to send emails</p></figcaption></figure>

<figure><img src="https://content.gitbook.com/content/W1nWhVvoi55dxT8euy3M/blobs/fDZdB0jUCpKTumkoZrn0/image.png" alt=""><figcaption><p>
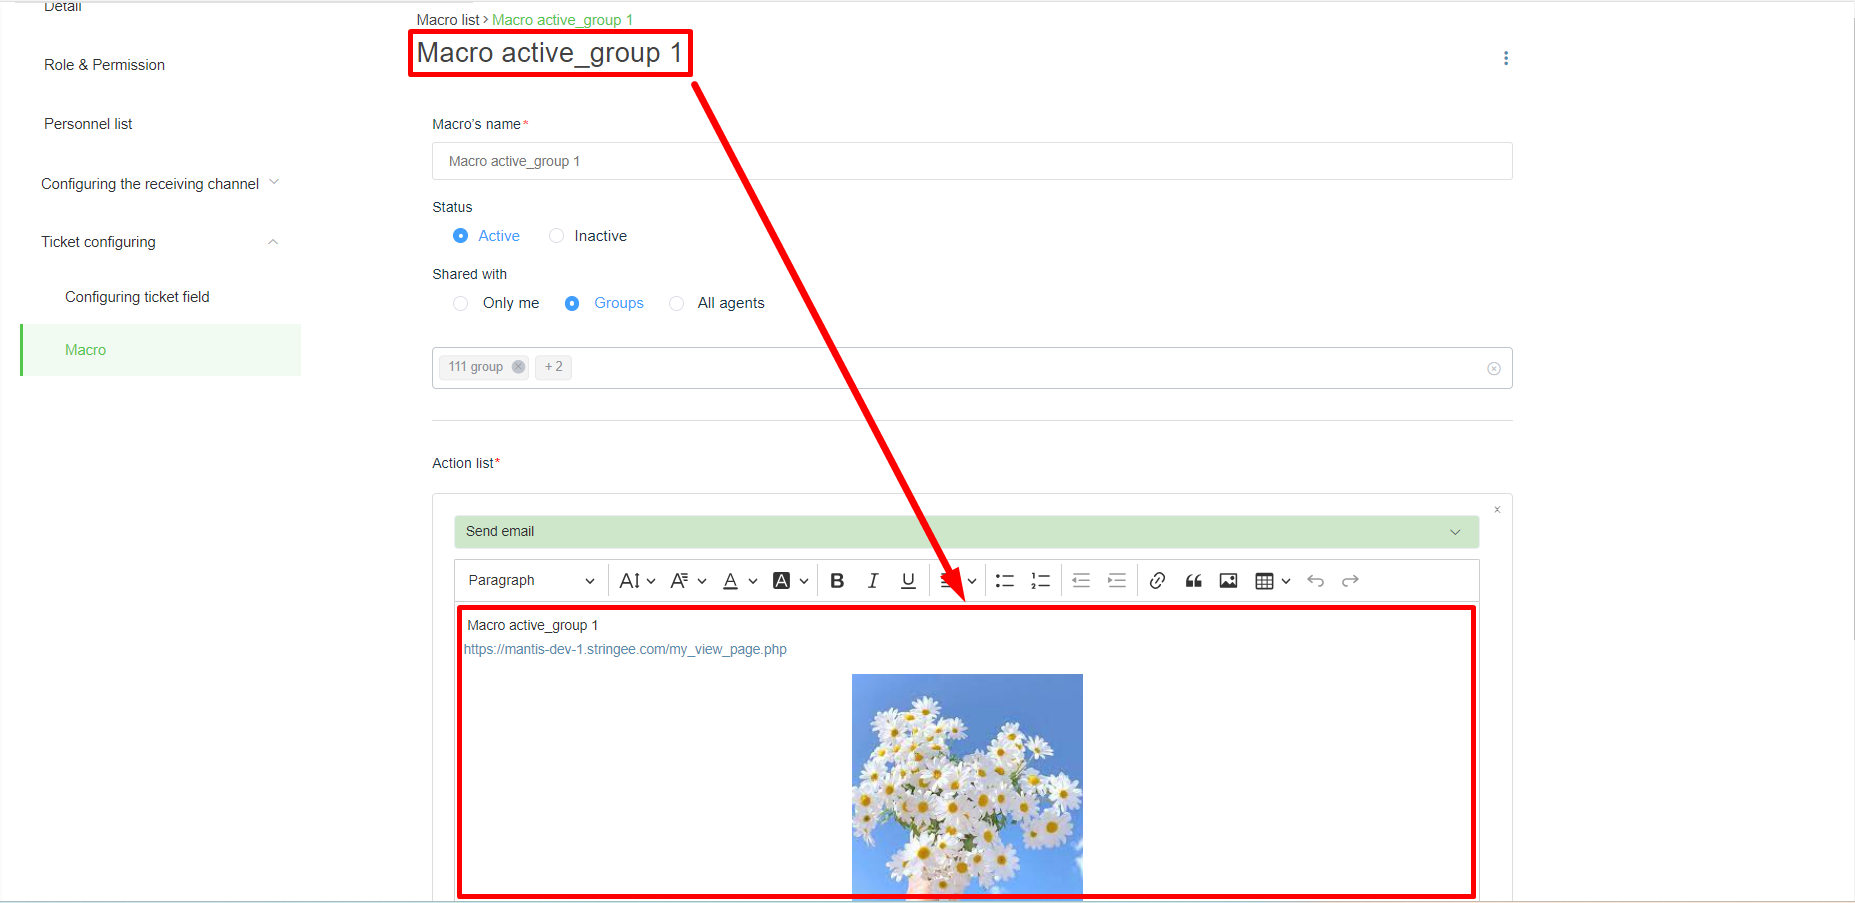
Image 12: Macro active_group 1</p></figcaption></figure>
